Cisco VG224 Hardware Installation Guide - Page 59
Getting Your Network Information, Setting the Fast Ethernet Port IP Address, Command, Purpose - config
 |
UPC - 746320575360
View all Cisco VG224 manuals
Add to My Manuals
Save this manual to your list of manuals |
Page 59 highlights
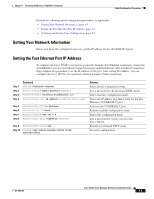
Chapter 4 Powering On the Cisco VG224 Voice Gateway Initial Configuration Procedures Perform the following initial configuration procedures, as applicable: • Getting Your Network Information, page 4-3 • Setting the Fast Ethernet Port IP Address, page 4-3 • Verifying and Saving Your Configuration, page 4-4 Getting Your Network Information Before you begin the configuration process, get the IP address for the 10/100BASE-T ports. Setting the Fast Ethernet Port IP Address To configure the Cisco VG224 voice gateway remotely through a Fast Ethernet connection, connect the 10/100BASE-T port to a live Ethernet connection using a standard Ethernet cable with RJ-45 connectors; then complete this procedure to set the IP address for the port. After setting this address, you can configure the Cisco VG224 voice gateway remotely through a Telnet connection. Step 1 Step 2 Step 3 Step 4 Command Router# configure terminal Router(config)# enable password password Router(config)# interface FastEthernet 0/0 Router(config-if)# ip address IP-address subnet-mask Step 5 Step 6 Step 7 Step 8 Router(config-if)# no shutdown Router(config-if)# exit Router(config)# line vty 0 4 Router(config-line)# password password Step 9 Step 10 Router(config-line)# end Router# copy system:running-config nvram: startup-config Purpose Enters global configuration mode. Sets a password for the privileged EXEC mode. Enters interface configuration mode. Enters the IP address and subnet mask for the Fast Ethernet (10/100BASE-T) port. Activates the 10/100BASE-T port. Returns to global configuration mode. Enters line configuration mode. Sets a password for remote access to the Cisco VG224. Returns to privileged EXEC mode. Saves the configuration. OL-5006-04 Cisco VG224 Voice Gateway Hardware Installation Guide 4-3
-
 1
1 -
2
-
3
-
4
-
5
-
6
-
7
-
8
-
9
-
10
-
11
-
12
-
13
-
14
-
15
-
16
-
17
-
18
-
19
-
20
-
21
-
22
-
23
-
24
-
25
-
26
-
27
-
28
-
29
-
30
-
31
-
32
-
33
-
34
-
35
-
36
-
37
-
38
-
39
-
40
-
41
-
42
-
43
-
44
-
45
-
46
-
47
-
48
-
49
-
50
-
51
-
52
-
53
-
 54
54 -
 55
55 -
 56
56 -
 57
57 -
 58
58 -
 59
59 -
 60
60 -
 61
61 -
 62
62 -
 63
63 -
 64
64 -
65
-
66
-
67
-
68
-
69
-
70
-
71
-
72
-
73
-
74
-
75
 |
 |