Dell Dimension 2200 Dell Dimension 2200 Owner's Manual - Page 69
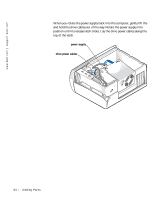
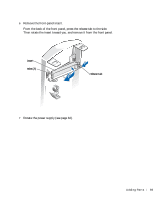
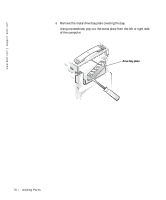
Rotate the power supply see Then rotate the insert toward
 |
View all Dell Dimension 2200 manuals
Add to My Manuals
Save this manual to your list of manuals |
Page 69 highlights
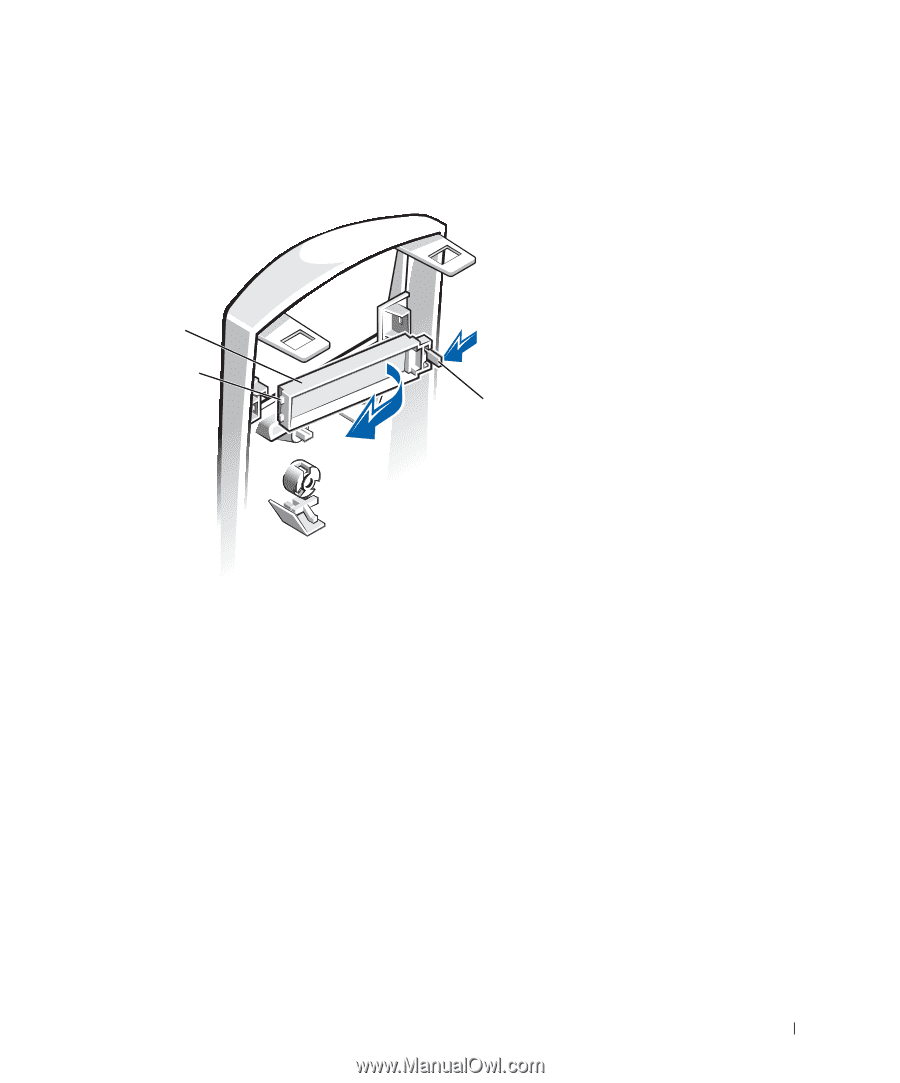
6 Remove the front-panel insert. From the back of the front panel, press the release tab to the side. Then rotate the insert toward you, and remove it from the front panel. insert tabs (2) release tab 7 Rotate the power supply (see page 62). Adding Pa rts 69
-
 1
1 -
2
-
3
-
4
-
5
-
6
-
7
-
8
-
9
-
10
-
11
-
12
-
13
-
14
-
15
-
16
-
17
-
18
-
19
-
20
-
21
-
22
-
23
-
24
-
25
-
26
-
27
-
28
-
29
-
30
-
31
-
32
-
33
-
34
-
35
-
36
-
37
-
38
-
39
-
40
-
41
-
42
-
43
-
44
-
45
-
46
-
47
-
48
-
49
-
50
-
51
-
52
-
53
-
54
-
55
-
56
-
57
-
58
-
59
-
60
-
61
-
62
-
63
-
 64
64 -
 65
65 -
 66
66 -
 67
67 -
 68
68 -
 69
69 -
 70
70 -
 71
71 -
 72
72 -
 73
73 -
 74
74 -
75
-
76
-
77
-
78
-
79
-
80
-
81
-
82
-
83
-
84
-
85
-
86
-
87
-
88
-
89
-
90
-
91
-
92
-
93
-
94
-
95
-
96
-
97
-
98
-
99
-
100
-
101
-
102
-
103
-
104
-
105
-
106
-
107
-
108
-
109
-
110
-
111
-
112
-
113
-
114
-
115
-
116
-
117
-
118
-
119
-
120
-
121
-
122
-
123
-
124
-
125
-
126
-
127
-
128
-
129
-
130
-
131
-
132
-
133
-
134
-
135
-
136
-
137
-
138
-
139
-
140
 |
 |
Adding Parts
69
6
Remove the front-panel insert.
From the back of the front panel, press the release tab to the side.
Then rotate the insert toward you, and remove it from the front panel.
7
Rotate the power supply (see page 62).
insert
release tab
tabs (2)