Dell Dimension 2200 Dell Dimension 2200 Owner's Manual - Page 71
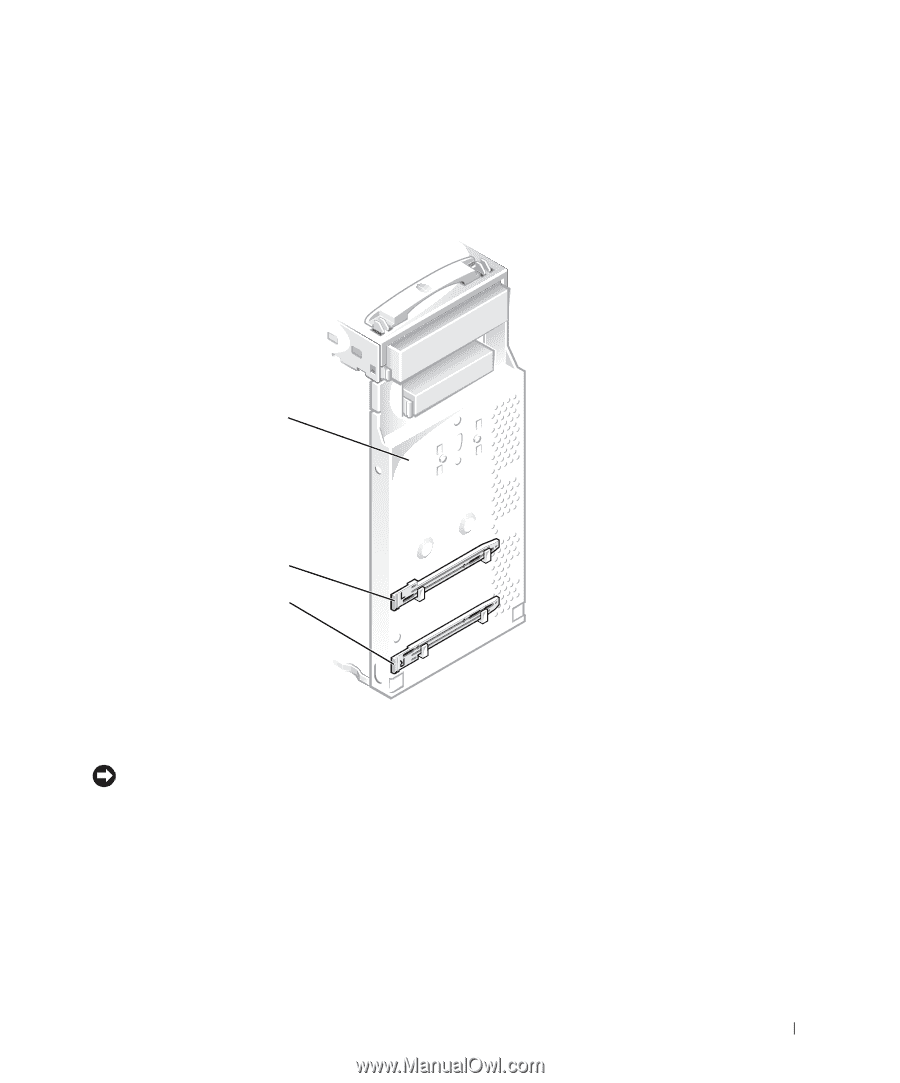
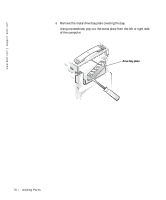
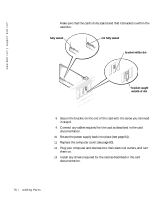
Slide the drive assembly into the drive bay., marked R on the right side of the drive.
 |
View all Dell Dimension 2200 manuals
Add to My Manuals
Save this manual to your list of manuals |
Page 71 highlights
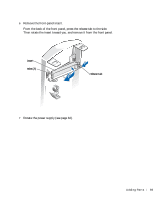
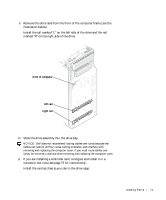
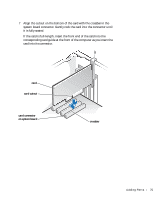
9 Remove the extra rails from the front of the computer frame (see the illustration below). Install the rail marked "L" on the left side of the drive and the rail marked "R" on the right side of the drive. front of computer left rail right rail 10 Slide the drive assembly into the drive bay. NOTICE: Dell does not recommend routing cables over cards because the cables can restrict airflow, cause cooling problems, and interfere with removing and replacing the computer cover. If you must route cables over cards, be extremely cautious when removing and replacing the computer cover. 11 If you are installing a controller card, configure and install it in a connector slot now (see page 73 for instructions). Install the card as close as you can to the drive cage. Adding Pa rts 71
-
 1
1 -
2
-
3
-
4
-
5
-
6
-
7
-
8
-
9
-
10
-
11
-
12
-
13
-
14
-
15
-
16
-
17
-
18
-
19
-
20
-
21
-
22
-
23
-
24
-
25
-
26
-
27
-
28
-
29
-
30
-
31
-
32
-
33
-
34
-
35
-
36
-
37
-
38
-
39
-
40
-
41
-
42
-
43
-
44
-
45
-
46
-
47
-
48
-
49
-
50
-
51
-
52
-
53
-
54
-
55
-
56
-
57
-
58
-
59
-
60
-
61
-
62
-
63
-
64
-
65
-
 66
66 -
 67
67 -
 68
68 -
 69
69 -
 70
70 -
 71
71 -
 72
72 -
 73
73 -
 74
74 -
 75
75 -
 76
76 -
77
-
78
-
79
-
80
-
81
-
82
-
83
-
84
-
85
-
86
-
87
-
88
-
89
-
90
-
91
-
92
-
93
-
94
-
95
-
96
-
97
-
98
-
99
-
100
-
101
-
102
-
103
-
104
-
105
-
106
-
107
-
108
-
109
-
110
-
111
-
112
-
113
-
114
-
115
-
116
-
117
-
118
-
119
-
120
-
121
-
122
-
123
-
124
-
125
-
126
-
127
-
128
-
129
-
130
-
131
-
132
-
133
-
134
-
135
-
136
-
137
-
138
-
139
-
140
 |
 |