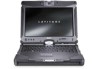
Dell Latitude XT2 XFR Service Manual - Page 51
Speaker
 |
View all Dell Latitude XT2 XFR manuals
Add to My Manuals
Save this manual to your list of manuals |
Page 51 highlights
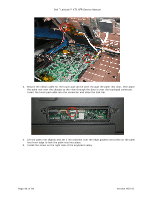
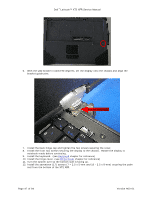
Dell™ Latitude™ XT2 XFR Service Manual 4. Loosen and remove the screw holding the stylus bay housing to the chassis. 5. Unthread the cable and connector for the stylus bay. 6. Remove the Stylus Bay from the bottom chassis by lifting up. Being careful not to damage the grommet that seals to the base. 4.12.2 Installing the Stylus Bay 1. Start by threading the cable and connector through the opening in the chassis. 2. Set the grommet surrounding the cable in the opening to produce a seal. 3. Insert the stylus bay into the chassis being careful with the gaskets around the bay. 4. Insert and tighten the self tapping screw. 4.13 Speaker WARNING: Before working inside your XT2 XFR, read the safety information that shipped with your XT2 XFR. For additional safety best practices information, see the Regulatory Compliance Homepage at www.dell.com/regulatory_compliance. Page 51 of 94 Version A00-01
-
 1
1 -
2
-
3
-
4
-
5
-
6
-
7
-
8
-
9
-
10
-
11
-
12
-
13
-
14
-
15
-
16
-
17
-
18
-
19
-
20
-
21
-
22
-
23
-
24
-
25
-
26
-
27
-
28
-
29
-
30
-
31
-
32
-
33
-
34
-
35
-
36
-
37
-
38
-
39
-
40
-
41
-
42
-
43
-
44
-
45
-
 46
46 -
 47
47 -
 48
48 -
 49
49 -
 50
50 -
 51
51 -
 52
52 -
 53
53 -
 54
54 -
 55
55 -
 56
56 -
57
-
58
-
59
-
60
-
61
-
62
-
63
-
64
-
65
-
66
-
67
-
68
-
69
-
70
-
71
-
72
-
73
-
74
-
75
-
76
-
77
-
78
-
79
-
80
-
81
-
82
-
83
-
84
-
85
-
86
-
87
-
88
-
89
-
90
-
91
-
92
-
93
-
94
 |
 |
