Dell PowerEdge R440 EMC Installation and Service Manual 1 - Page 130
Installing the system board
 |
View all Dell PowerEdge R440 manuals
Add to My Manuals
Save this manual to your list of manuals |
Page 130 highlights
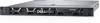
d. IDSDM/vFlash module card e. Internal USB key (if installed) f. Processors and heat sink modules g. Memory modules h. LOM riser card Steps 1. Disconnect all cables from the system board. NOTE: Ensure that you note the routing of the cables as you remove them from the system board. CAUTION: Take care not to damage the system identification button while removing the system board from the chassis. CAUTION: Do not lift the system board by holding a memory module, processor, or other components. 2. Using a Phillips #2 screwdriver, remove the screws that secure the system board to the chassis. 3. Hold the system board holder, slightly lift the system board, and then slide it toward the front of the chassis. 4. Using the system board holder, lift the system board out of the chassis. Figure 111. Removing the system board Next steps Install the system board. Installing the system board Prerequisites Follow the safety guidelines listed in Safety instructions. Steps 1. Unpack the new system board assembly. CAUTION: Do not lift the system board by holding a memory module, processor, or other components. CAUTION: Take care not to damage the system identification button while placing the system board into the chassis. 2. Holding the system board holder, align the connector on the system board with the slots on the back of the chassis and place the system board in place. 3. Using a Phillips #2 screwdriver, replace the screws that secure the system board to the chassis. 130 Installing and removing system components
-
 1
1 -
2
-
3
-
4
-
5
-
6
-
7
-
8
-
9
-
10
-
11
-
12
-
13
-
14
-
15
-
16
-
17
-
18
-
19
-
20
-
21
-
22
-
23
-
24
-
25
-
26
-
27
-
28
-
29
-
30
-
31
-
32
-
33
-
34
-
35
-
36
-
37
-
38
-
39
-
40
-
41
-
42
-
43
-
44
-
45
-
46
-
47
-
48
-
49
-
50
-
51
-
52
-
53
-
54
-
55
-
56
-
57
-
58
-
59
-
60
-
61
-
62
-
63
-
64
-
65
-
66
-
67
-
68
-
69
-
70
-
71
-
72
-
73
-
74
-
75
-
76
-
77
-
78
-
79
-
80
-
81
-
82
-
83
-
84
-
85
-
86
-
87
-
88
-
89
-
90
-
91
-
92
-
93
-
94
-
95
-
96
-
97
-
98
-
99
-
100
-
101
-
102
-
103
-
104
-
105
-
106
-
107
-
108
-
109
-
110
-
111
-
112
-
113
-
114
-
115
-
116
-
117
-
118
-
119
-
120
-
121
-
122
-
123
-
124
-
 125
125 -
 126
126 -
 127
127 -
 128
128 -
 129
129 -
 130
130 -
 131
131 -
 132
132 -
 133
133 -
 134
134 -
 135
135 -
136
-
137
-
138
-
139
-
140
-
141
 |
 |
