Dell PowerEdge R440 EMC Installation and Service Manual 1 - Page 133
Removing the TPM, Installing the TPM, Initializing TPM for BitLocker users
 |
View all Dell PowerEdge R440 manuals
Add to My Manuals
Save this manual to your list of manuals |
Page 133 highlights
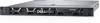
About this task CAUTION: If you are using the Trusted Platform Module (TPM) with an encryption key, you may be prompted to create a recovery key during program or System Setup. Work with the customer to create and safely store this recovery key. When replacing this system board, you must supply the recovery key when you restart your system or program before you can access the encrypted data on your hard drives. CAUTION: Once the TPM plug-in module is installed, it is cryptographically bound to that specific system board. Any attempt to remove an installed TPM plug-in module breaks the cryptographic binding, the removed TPM cannot be reinstalled or installed on another system board. Removing the TPM Steps 1. Locate the TPM connector on the system board. 2. Press to hold the module down and remove the screw using the security Torx 8-bit shipped with the TPM module. 3. Slide the TPM module out from its connector. 4. Push the plastic rivet away from the TPM connector and rotate it 90° counterclockwise to release it from the system board. 5. Pull the plastic rivet out of its slot on the system board. Installing the TPM Steps 1. To install the TPM, align the edge connectors on the TPM with the slot on the TPM connector. 2. Insert the TPM into the TPM connector such that the plastic rivet aligns with the slot on the system board. 3. Press the plastic rivet until the rivet snaps into place. Figure 113. Installing the TPM Next steps 1. Install the system board. 2. Follow the procedure listed in After working inside your system. Initializing TPM for BitLocker users Steps Initialize the TPM. For more information, see . The TPM Status changes to Enabled, Activated. Installing and removing system components 133
-
 1
1 -
2
-
3
-
4
-
5
-
6
-
7
-
8
-
9
-
10
-
11
-
12
-
13
-
14
-
15
-
16
-
17
-
18
-
19
-
20
-
21
-
22
-
23
-
24
-
25
-
26
-
27
-
28
-
29
-
30
-
31
-
32
-
33
-
34
-
35
-
36
-
37
-
38
-
39
-
40
-
41
-
42
-
43
-
44
-
45
-
46
-
47
-
48
-
49
-
50
-
51
-
52
-
53
-
54
-
55
-
56
-
57
-
58
-
59
-
60
-
61
-
62
-
63
-
64
-
65
-
66
-
67
-
68
-
69
-
70
-
71
-
72
-
73
-
74
-
75
-
76
-
77
-
78
-
79
-
80
-
81
-
82
-
83
-
84
-
85
-
86
-
87
-
88
-
89
-
90
-
91
-
92
-
93
-
94
-
95
-
96
-
97
-
98
-
99
-
100
-
101
-
102
-
103
-
104
-
105
-
106
-
107
-
108
-
109
-
110
-
111
-
112
-
113
-
114
-
115
-
116
-
117
-
118
-
119
-
120
-
121
-
122
-
123
-
124
-
125
-
126
-
127
-
 128
128 -
 129
129 -
 130
130 -
 131
131 -
 132
132 -
 133
133 -
 134
134 -
 135
135 -
 136
136 -
 137
137 -
 138
138 -
139
-
140
-
141
 |
 |
