Dell PowerEdge R440 EMC Installation and Service Manual 1 - Page 75
Removing the drive from the drive carrier
 |
View all Dell PowerEdge R440 manuals
Add to My Manuals
Save this manual to your list of manuals |
Page 75 highlights
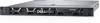
Figure 37. Installing a hard drive Next steps If applicable, install the front bezel. Removing the drive from the drive carrier Prerequisites CAUTION: Mixing drives from previous generations of PowerEdge servers is not supported. Steps 1. Using a Phillips #1 screwdriver, remove the screws from the slide rails on the drive carrier. 2. Lift the drive out of the drive carrier. Figure 38. Removing the drive from the drive carrier Next steps If applicable, install the drive into the drive carrier. Installing and removing system components 75
-
 1
1 -
2
-
3
-
4
-
5
-
6
-
7
-
8
-
9
-
10
-
11
-
12
-
13
-
14
-
15
-
16
-
17
-
18
-
19
-
20
-
21
-
22
-
23
-
24
-
25
-
26
-
27
-
28
-
29
-
30
-
31
-
32
-
33
-
34
-
35
-
36
-
37
-
38
-
39
-
40
-
41
-
42
-
43
-
44
-
45
-
46
-
47
-
48
-
49
-
50
-
51
-
52
-
53
-
54
-
55
-
56
-
57
-
58
-
59
-
60
-
61
-
62
-
63
-
64
-
65
-
66
-
67
-
68
-
69
-
 70
70 -
 71
71 -
 72
72 -
 73
73 -
 74
74 -
 75
75 -
 76
76 -
 77
77 -
 78
78 -
 79
79 -
 80
80 -
81
-
82
-
83
-
84
-
85
-
86
-
87
-
88
-
89
-
90
-
91
-
92
-
93
-
94
-
95
-
96
-
97
-
98
-
99
-
100
-
101
-
102
-
103
-
104
-
105
-
106
-
107
-
108
-
109
-
110
-
111
-
112
-
113
-
114
-
115
-
116
-
117
-
118
-
119
-
120
-
121
-
122
-
123
-
124
-
125
-
126
-
127
-
128
-
129
-
130
-
131
-
132
-
133
-
134
-
135
-
136
-
137
-
138
-
139
-
140
-
141
 |
 |

Figure 37. Installing a hard drive
Next steps
If applicable,
install the front bezel
.
Removing the drive from the drive carrier
Prerequisites
CAUTION:
Mixing drives from previous generations of PowerEdge servers is not supported.
Steps
1.
Using a Phillips #1 screwdriver, remove the screws from the slide rails on the drive carrier.
2.
Lift the drive out of the drive carrier.
Figure 38. Removing the drive from the drive carrier
Next steps
If applicable,
install the drive into the drive carrier.
Installing and removing system components
75