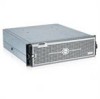
Dell PowerVault MD1000 Hardware Owners Manual - Page 27
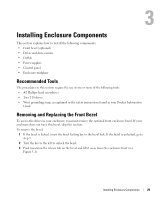
Installing Enclosure Components, Recommended Tools, Removing and Replacing the Front Bezel
 |
View all Dell PowerVault MD1000 manuals
Add to My Manuals
Save this manual to your list of manuals |
Page 27 highlights
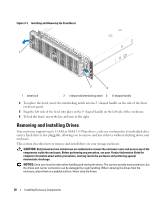
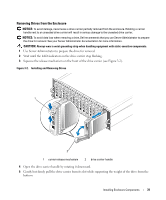
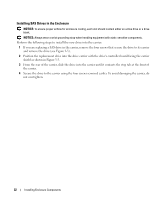
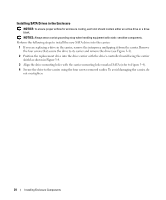
3 Installing Enclosure Components This section explains how to install the following components: • Front bezel (optional) • Drives and drive carriers • EMMs • Power supplies • Control panel • Enclosure midplane Recommended Tools The procedures in this section require the use of one or more of the following tools: • #2 Phillips-head screwdriver • Torx T10 driver • Wrist grounding strap, as explained in the safety instructions found in your Product Information Guide Removing and Replacing the Front Bezel To access the drives in your enclosure, you must remove the optional front enclosure bezel. If your enclosure does not have this bezel, skip this section. To remove the bezel: 1 If the bezel is locked, insert the bezel locking key in the bezel lock. If the bezel is unlocked, go to step 3. 2 Turn the key to the left to unlock the bezel. 3 Push inward on the release tab on the bezel and lift it away from the enclosure front (see Figure 3-1). Installing Enclosure Components 29
-
 1
1 -
2
-
3
-
4
-
5
-
6
-
7
-
8
-
9
-
10
-
11
-
12
-
13
-
14
-
15
-
16
-
17
-
18
-
19
-
20
-
21
-
 22
22 -
 23
23 -
 24
24 -
 25
25 -
 26
26 -
 27
27 -
 28
28 -
 29
29 -
 30
30 -
 31
31 -
 32
32 -
33
-
34
-
35
-
36
-
37
-
38
-
39
-
40
-
41
-
42
-
43
-
44
-
45
-
46
-
47
-
48
-
49
-
50
-
51
-
52
-
53
-
54
-
55
-
56
-
57
-
58
-
59
-
60
-
61
-
62
-
63
-
64
 |
 |