Dell PowerVault MD1000 Hardware Owners Manual - Page 30
Installing SAS Drives in the Enclosure
 |
View all Dell PowerVault MD1000 manuals
Add to My Manuals
Save this manual to your list of manuals |
Page 30 highlights
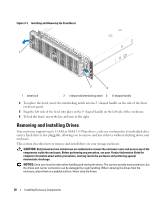
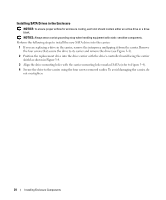
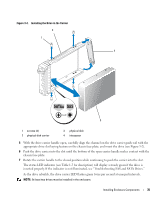
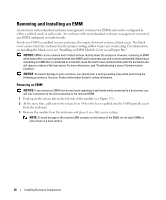
Installing SAS Drives in the Enclosure NOTICE: To ensure proper airflow for enclosure cooling, each slot should contain either an active drive or a drive blank. NOTICE: Always wear a wrist grounding strap when handling equipment with static-sensitive components. Perform the following steps to install the new drive into the carrier: 1 If you are replacing a SAS drive in the carrier, remove the four screws that secure the drive to its carrier and remove the drive (see Figure 3-3). 2 Position the replacement drive into the drive carrier with the drive's controller board facing the carrier shield as shown in Figure 3-3. 3 From the rear of the carrier, slide the drive into the carrier until it contacts the stop tab at the front of the carrier. 4 Secure the drive to the carrier using the four screws removed earlier. To avoid damaging the carrier, do not overtighten. 32 Installing Enclosure Components
-
 1
1 -
2
-
3
-
4
-
5
-
6
-
7
-
8
-
9
-
10
-
11
-
12
-
13
-
14
-
15
-
16
-
17
-
18
-
19
-
20
-
21
-
22
-
23
-
24
-
 25
25 -
 26
26 -
 27
27 -
 28
28 -
 29
29 -
 30
30 -
 31
31 -
 32
32 -
 33
33 -
 34
34 -
 35
35 -
36
-
37
-
38
-
39
-
40
-
41
-
42
-
43
-
44
-
45
-
46
-
47
-
48
-
49
-
50
-
51
-
52
-
53
-
54
-
55
-
56
-
57
-
58
-
59
-
60
-
61
-
62
-
63
-
64
 |
 |