Dell PowerVault MD1000 Hardware Owners Manual - Page 29
Removing Drives from the Enclosure - weight
 |
View all Dell PowerVault MD1000 manuals
Add to My Manuals
Save this manual to your list of manuals |
Page 29 highlights
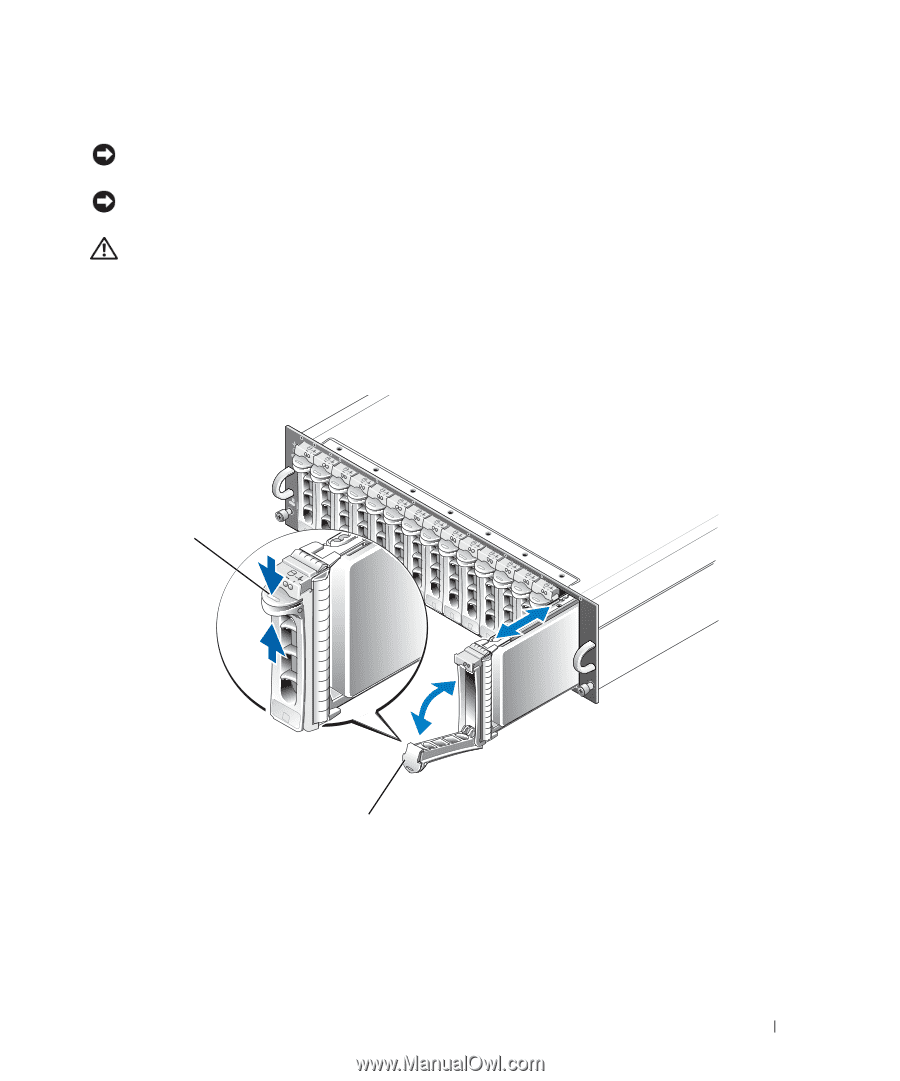
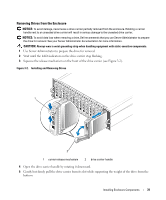
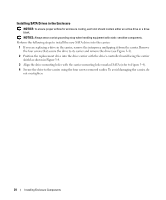
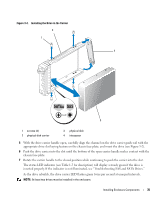
Removing Drives from the Enclosure NOTICE: To avoid damage, never leave a drive carrier partially removed from the enclosure. Rotating a carrier handle next to an unseated drive carrier will result in serious damage to the unseated drive carrier. NOTICE: To avoid data loss when removing a drive, Dell recommends that you use Server Administrator to prepare the drive for removal. See your Server Administrator documentation for more information. CAUTION: Always wear a wrist grounding strap when handling equipment with static-sensitive components. 1 Use Server Administrator to prepare the drive for removal. 2 Wait until the LED indicators on the drive carrier stop flashing. 3 Squeeze the release mechanism on the front of the drive carrier (see Figure 3-2). Figure 3-2. Installing and Removing Drives 1 2 1 carrier release mechanism 2 drive carrier handle 4 Open the drive carrier handle by rotating it downward. 5 Gently but firmly pull the drive carrier from its slot while supporting the weight of the drive from the bottom. Installing Enclosure Components 31
-
 1
1 -
2
-
3
-
4
-
5
-
6
-
7
-
8
-
9
-
10
-
11
-
12
-
13
-
14
-
15
-
16
-
17
-
18
-
19
-
20
-
21
-
22
-
23
-
 24
24 -
 25
25 -
 26
26 -
 27
27 -
 28
28 -
 29
29 -
 30
30 -
 31
31 -
 32
32 -
 33
33 -
 34
34 -
35
-
36
-
37
-
38
-
39
-
40
-
41
-
42
-
43
-
44
-
45
-
46
-
47
-
48
-
49
-
50
-
51
-
52
-
53
-
54
-
55
-
56
-
57
-
58
-
59
-
60
-
61
-
62
-
63
-
64
 |
 |