Electrolux CEI30EF5GS Service Manual - Page 25
LUXURY™ Lighting
 |
View all Electrolux CEI30EF5GS manuals
Add to My Manuals
Save this manual to your list of manuals |
Page 25 highlights
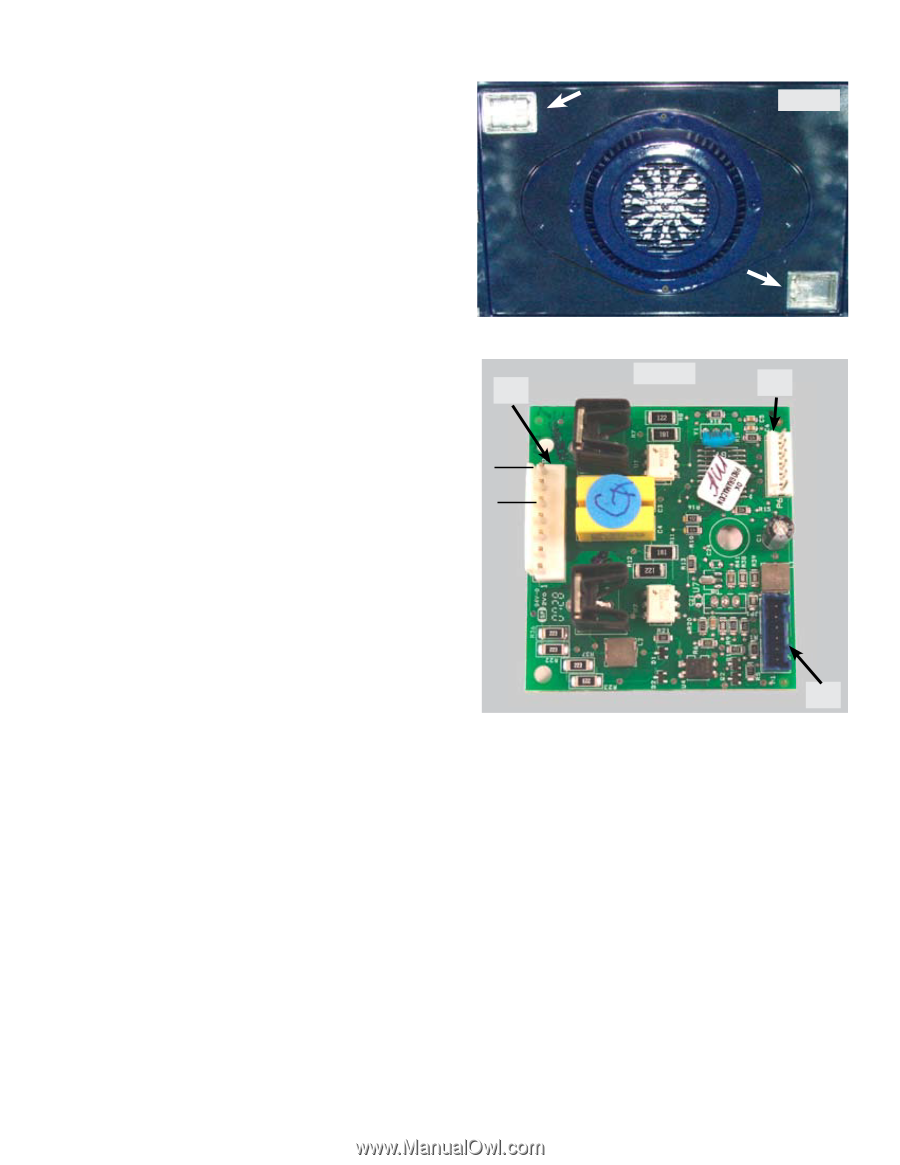
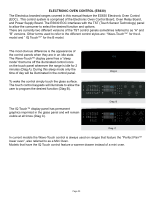
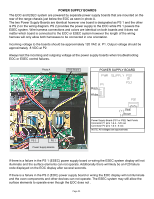
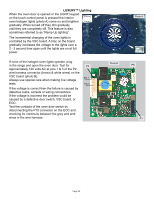
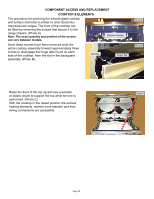
LUXURY™ Lighting When the oven door is opened or the LIGHT keypad on the touch control panel is pressed the interior oven halogen lights (photo A) come on and brighten gradually. When turned off they dim gradually until they are completely off. This feature is also sometimes referred to as "Ramp Up lighting". The incremental changing of the oven lights is controlled by the VSC board. A triac on the board gradually increases the voltage to the lights over a 2 - 3 second time span until the lights are on at full power. If none of the halogen oven lights operate, plug in the range and open the oven door. Test for P2 approximately 120 volts AC at pins 1 & 3 of the P2 wire harness connector (brown & white wires) on the VSC board (photo B). Always use special care when making live voltage Pin 1 tests. Pin 3 If the voltage is correct then the failure is caused by defective bulbs, sockets or wiring connections. If the voltage is incorrect the problem could be caused by a defective door switch, VSC board, or EOC. Test the contacts of the oven door switch by disconnecting the P10 connector on the EOC and checking for continuity between the grey and pink wires in the wire harness. Photo A Photo B P6 P1 Page 25
-
 1
1 -
2
-
3
-
4
-
5
-
6
-
7
-
8
-
9
-
10
-
11
-
12
-
13
-
14
-
15
-
16
-
17
-
18
-
19
-
 20
20 -
 21
21 -
 22
22 -
 23
23 -
 24
24 -
 25
25 -
 26
26 -
 27
27 -
 28
28 -
 29
29 -
 30
30 -
31
-
32
-
33
-
34
-
35
-
36
-
37
-
38
-
39
-
40
-
41
-
42
-
43
-
44
-
45
-
46
-
47
 |
 |