Electrolux CEI30EF5GS Service Manual - Page 42
Replacing Drawer Glide Rails, Replacing Drawer Seal
 |
View all Electrolux CEI30EF5GS manuals
Add to My Manuals
Save this manual to your list of manuals |
Page 42 highlights
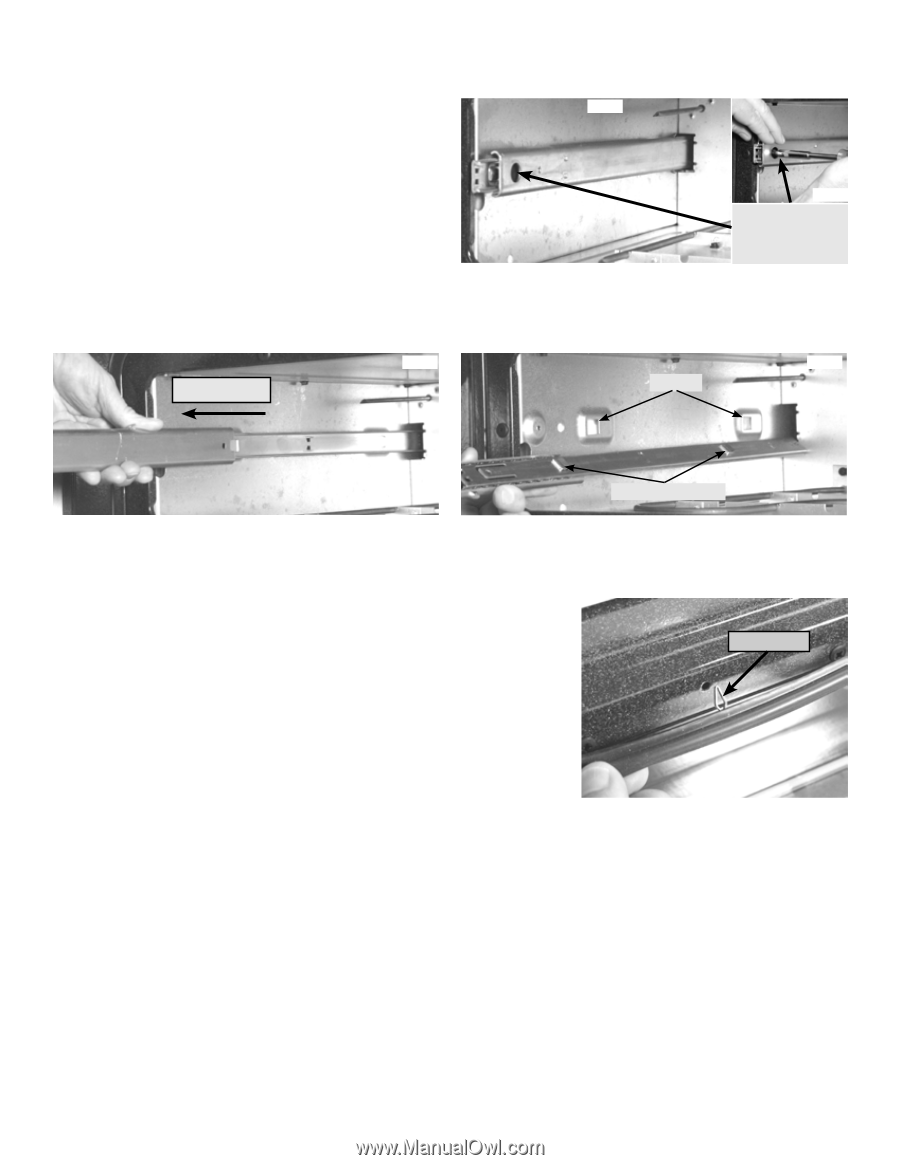
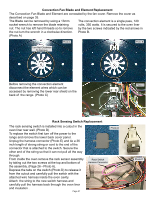
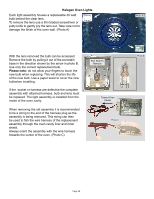
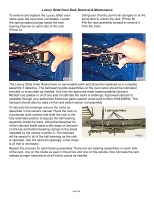
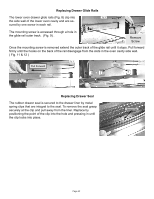
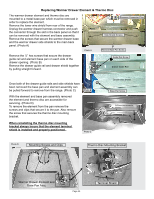
Replacing Drawer Glide Rails The lower oven drawer glide rails (Fig. 8) clip into Fig. 8 the side wall of the lower oven cavity and are se- cured by one screw in each rail. The mounting screw is accessed through a hole in the glide rail outer track. (Fig. 9) . Fig. 9 Remove Screw Once the mounting screw is removed extend the outer track of the glide rail until it stops. Pull forward firmly until the hooks on the back of the rail disengage from the slots in the oven cavity side wall. ( Fig. 11 & 12 ) Pull Forward Fig. 11 Slots Fig. 12 Glide Rail Hooks Replacing Drawer Seal The rubber drawer seal is secured to the drawer liner by metal spring clips that are integral to the seal. To remove the seal grasp securely at the clip and pull away from the liner. Replace by positioning the point of the clip into the hole and pressing in until the clip locks into place. Spring Clip Page 42
-
 1
1 -
2
-
3
-
4
-
5
-
6
-
7
-
8
-
9
-
10
-
11
-
12
-
13
-
14
-
15
-
16
-
17
-
18
-
19
-
20
-
21
-
22
-
23
-
24
-
25
-
26
-
27
-
28
-
29
-
30
-
31
-
32
-
33
-
34
-
35
-
36
-
 37
37 -
 38
38 -
 39
39 -
 40
40 -
 41
41 -
 42
42 -
 43
43 -
 44
44 -
 45
45 -
 46
46 -
 47
47
 |
 |