Electrolux CEI30EF5GS Service Manual - Page 39
Luxury Glide Oven Rack Removal & Maintenance, Lubricate Here
 |
View all Electrolux CEI30EF5GS manuals
Add to My Manuals
Save this manual to your list of manuals |
Page 39 highlights
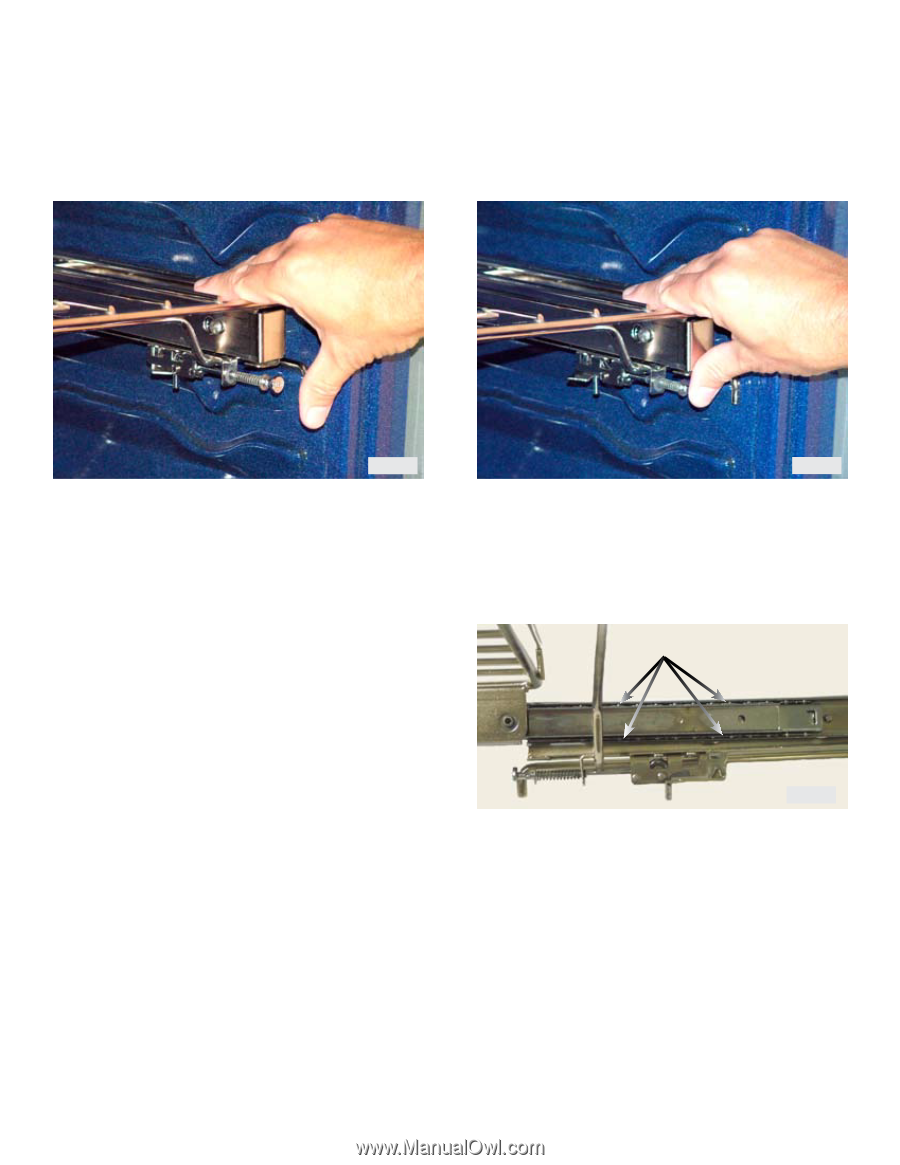
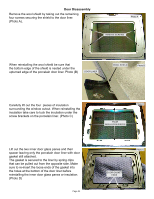
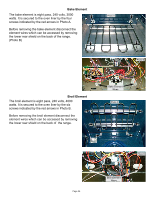
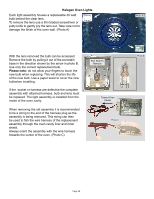
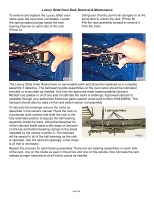
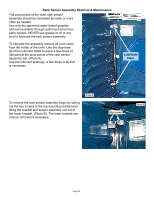
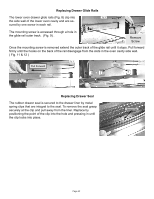
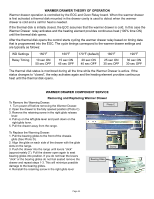
Luxury Glide Oven Rack Removal & Maintenance To remove and replace the Luxury Glide oven racks open the oven door completely. Locate the spring loaded plunger below the rack bearing channel on each side of the rack. (Photo A). Using your thumbs push both plungers in at the same time to unlock the rack. (Photo B). Pull the rack assembly forward to remove it from the oven. Photo A Photo B The Luxury Glide Oven Racks have no serviceable parts and should be replaced as a complete assembly if defective. The ball bearing glide assemblies on the oven racks should be lubricated annually or more often as needed. Use only the approved water based graphite lubricant. NEVER use grease or oil of any kind to lubricate the racks or bearings. Approved lubricant is available through your authorized Electrolux parts supplier under part number 5304468694. This lubricant should also be used on the rack switch sensor rod assembly To lubricate the bearings remove the racks as described in the owners manual. Place the rack on a protected work surface and slide the rack to the fully extended position to expose the ball bearing assembly inside the track. Using the dispenser tip of the lubricant bottle place a few drops of lubricant on the top and bottom bearing carriers in the areas indicated by the arrows in photo C. The lubricant will be spread to all of the ball bearings as the rack is operated. Use the lubricant sparingly, a few drops is all that is necessary. Lubricate Here Photo C Repeat this process for each bearing assembly. There are two bearing assemblies on each side of the rack, one on the inside as seen in the photo and one on the outside. Also lubricate the rack release plunger mechanism at all friction points as needed. Page 39
-
 1
1 -
2
-
3
-
4
-
5
-
6
-
7
-
8
-
9
-
10
-
11
-
12
-
13
-
14
-
15
-
16
-
17
-
18
-
19
-
20
-
21
-
22
-
23
-
24
-
25
-
26
-
27
-
28
-
29
-
30
-
31
-
32
-
33
-
 34
34 -
 35
35 -
 36
36 -
 37
37 -
 38
38 -
 39
39 -
 40
40 -
 41
41 -
 42
42 -
 43
43 -
 44
44 -
45
-
46
-
47
 |
 |