Electrolux CEI30EF5GS Service Manual - Page 44
Warmer Drawer Component Service, Warmer Drawer Theory Of Operation
 |
View all Electrolux CEI30EF5GS manuals
Add to My Manuals
Save this manual to your list of manuals |
Page 44 highlights
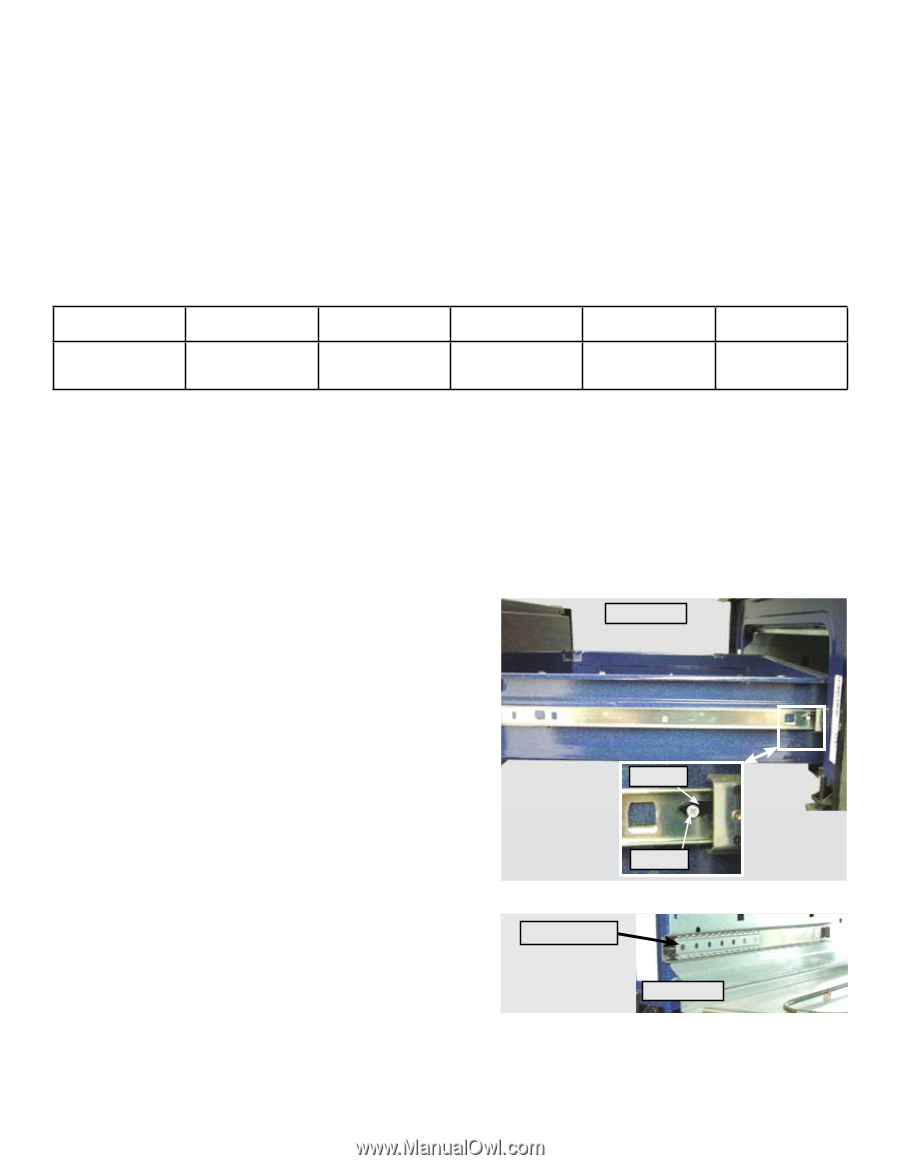
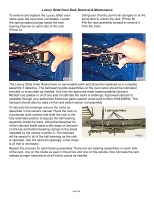
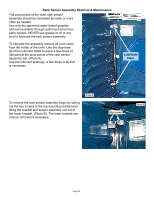
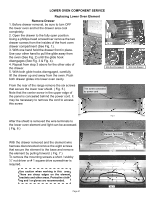
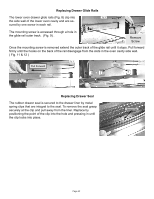
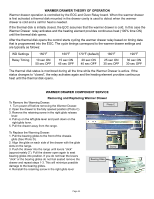
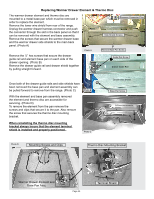
Warmer DRAWER Theory of Operation Warmer drawer operation is controlled by the EOC and Oven Relay board. When the warmer drawer is first activated a thermal disk mounted in the drawer cavity is used to detect when the warmer drawer is cold and a call for heat is needed. If the thermal disk is initially closed, the EOC assumes that the warmer drawer is cold. In this case the Warmer Drawer relay activates and the heating element provides continuous heat (100% time ON) until the thermal disk opens. After the thermal disk opens the control starts cycling the warmer drawer relay based on timing data that is programmed into the EOC. The cycle timings correspond to the warmer drawer settings and are typically as follows: WD Settings Relay Timing 150°F 10 sec ON 50 sec OFF 160°F 15 sec ON 45 sec OFF 170°F (default) 20 sec ON 40 sec OFF 180°F 25 sec ON 35 sec OFF 190°F 30 sec ON 30 sec OFF The thermal disk status is monitored during all the time while the Warmer Drawer is active. If the status changes to "closed", the relay activates again and the heating element provides continuous heat until the thermal disk opens. Warmer DRAWER Component Service Removing and Replacing Warmer Drawer To Remove the Warming Drawer: 1. Turn power off before removing the Warmer Drawer. 2. Open the drawer to the fully opened position (Photo C) 3. Remove the retaining screw in the right glide release lever. 4. Pull up on the left glide lever and push down on the right glide lever. 5. Pull the drawer away from the range. Photo C To Replace the Warming Drawer: 1. Pull the bearing glides to the front of the chassis glide (See Photo D). 2. Align the glide on each side of the drawer with the glide slots on the range. 3. Push the drawer into the range until levers "click" (approximately 2"). Pull the drawer open again to seat bearing glides into position. If you do not hear the levers "click" or the bearing glides do not feel seated remove the drawer and repeat steps 1-3. This will minimize possible damage to the bearing glides. 4. Reinstall the retaining screw in the right glide lever Lever Screw Bearing Glide Photo D Page 44
-
 1
1 -
2
-
3
-
4
-
5
-
6
-
7
-
8
-
9
-
10
-
11
-
12
-
13
-
14
-
15
-
16
-
17
-
18
-
19
-
20
-
21
-
22
-
23
-
24
-
25
-
26
-
27
-
28
-
29
-
30
-
31
-
32
-
33
-
34
-
35
-
36
-
37
-
38
-
 39
39 -
 40
40 -
 41
41 -
 42
42 -
 43
43 -
 44
44 -
 45
45 -
 46
46 -
 47
47
 |
 |