Electrolux CEI30EF5GS Service Manual - Page 40
Lubricate, Rack Sensor Assembly Removal & Maintenance
 |
View all Electrolux CEI30EF5GS manuals
Add to My Manuals
Save this manual to your list of manuals |
Page 40 highlights
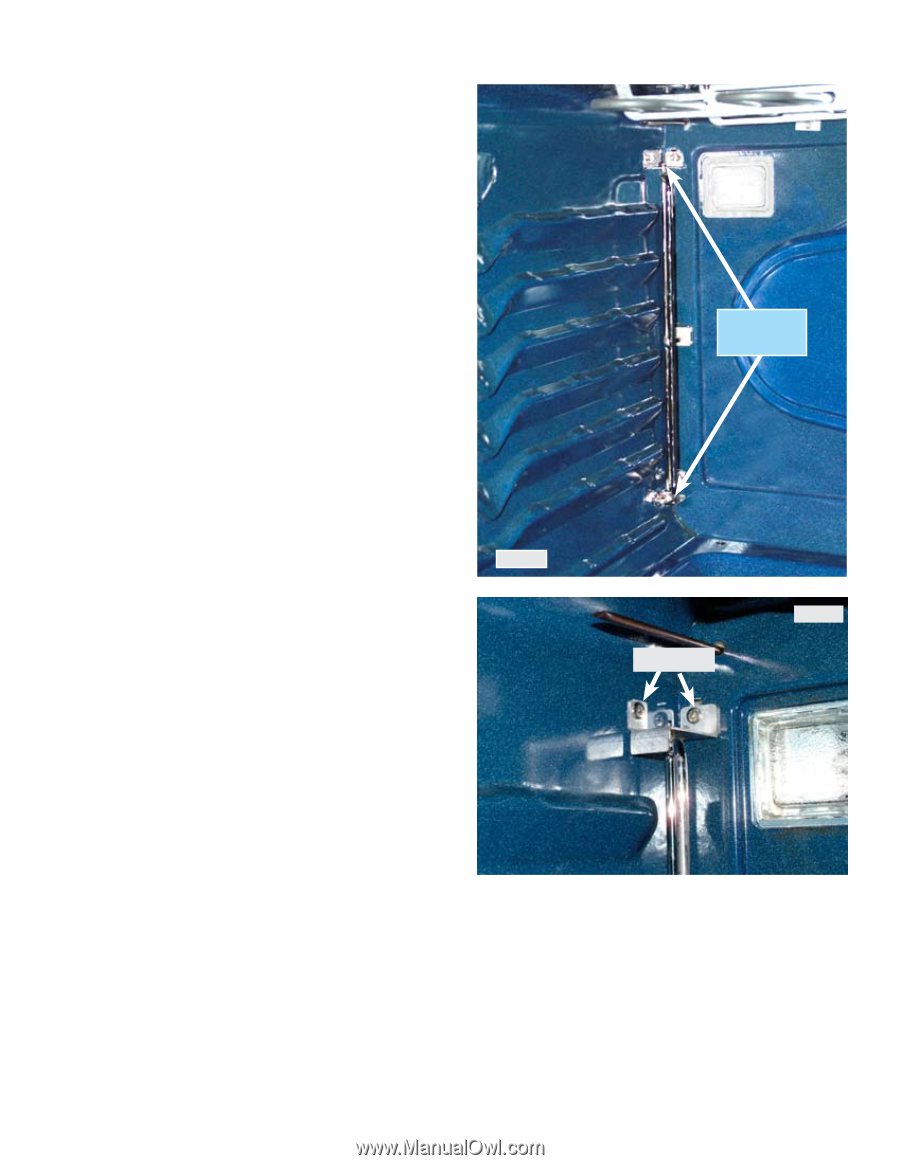
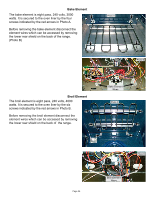
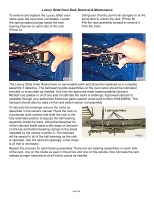
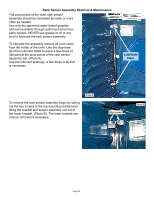
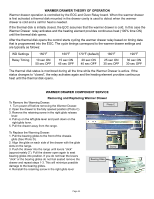
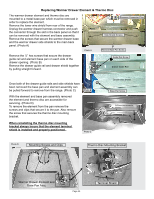
Rack Sensor Assembly Removal & Maintenance The pivot points of the oven rack sensor assembly should be lubricated annually or more often as needed. Use only the approved water based graphite lubricant available through authorized Electrolux parts dealers. NEVER use grease or oil of any kind to lubricate the rack sensor assembly. To lubricate the assembly remove all oven racks from the inside of the oven. Use the dispenser tip of the lubricant bottle to place a few drops of lubricant at the pivot points of the rack sensor assembly bar. (Photo A) Use the lubricant sparingly, a few drops is all that is necessary. Lubricate Here To remove the rack sensor assembly begin by taking out the two screws in the top mounting bracket and lifting the bracket and sensor assembly rod out of the lower bracket. (Photo B). The lower bracket can now be removed if necessary. Photo A Mtg. screws Photo B Page 40
-
 1
1 -
2
-
3
-
4
-
5
-
6
-
7
-
8
-
9
-
10
-
11
-
12
-
13
-
14
-
15
-
16
-
17
-
18
-
19
-
20
-
21
-
22
-
23
-
24
-
25
-
26
-
27
-
28
-
29
-
30
-
31
-
32
-
33
-
34
-
 35
35 -
 36
36 -
 37
37 -
 38
38 -
 39
39 -
 40
40 -
 41
41 -
 42
42 -
 43
43 -
 44
44 -
 45
45 -
46
-
47
 |
 |