Epson 1250 Scanner Basics - Page 16
and enter the same, e-mail address
 |
UPC - 010343836976
View all Epson 1250 manuals
Add to My Manuals
Save this manual to your list of manuals |
Page 16 highlights
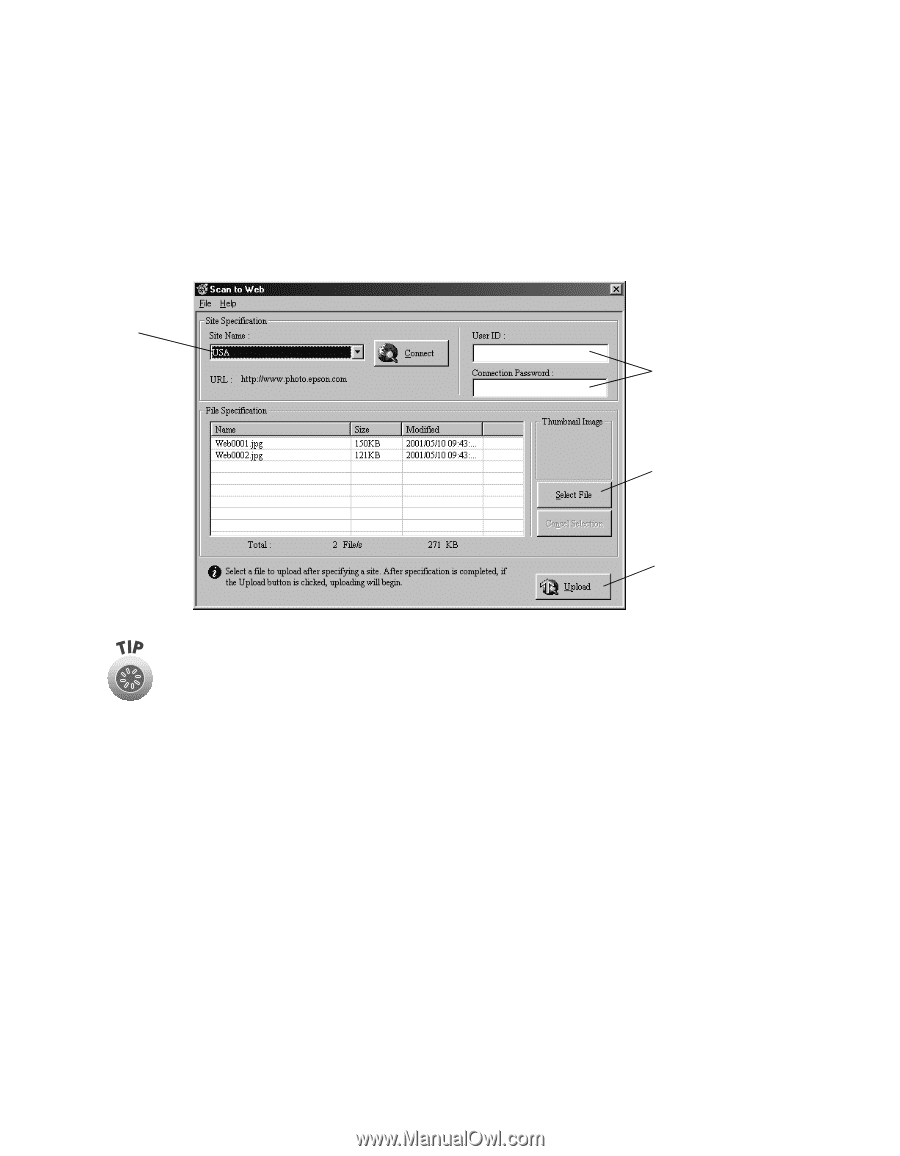
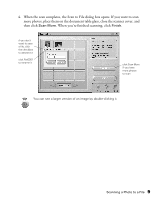
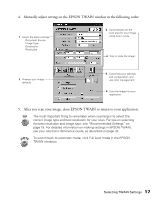
5. When the scan completes, the Scan to Web dialog box opens. I Select USA under Site Name, and enter the same User ID (e-mail address) and Connection Password you used when you registered at the EPSON PhotoCenter. (You only need to do this once. For subsequent scans, these are automatically selected.) I Click Upload. The photos upload to the EPSON PhotoCenter. select USA User ID (e-mail address) and password for the EPSON PhotoCenter click Select File, then browse to add more files click Upload to transfer files to the EPSON PhotoCenter If you have other digital images on your hard drive that you want to upload, click Select File, browse to the location of the files, and add them to the File Specification list before you click Upload. 12 Scanning from Start to Finish
-
 1
1 -
2
-
3
-
4
-
5
-
6
-
7
-
8
-
9
-
10
-
 11
11 -
 12
12 -
 13
13 -
 14
14 -
 15
15 -
 16
16 -
 17
17 -
 18
18 -
 19
19 -
 20
20 -
 21
21 -
22
-
23
-
24
-
25
-
26
-
27
-
28
-
29
-
30
-
31
-
32
-
33
-
34
-
35
-
36
-
37
-
38
-
39
-
40
-
41
-
42
-
43
-
44
-
45
-
46
-
47
-
48
 |
 |