Epson 1250 Scanner Basics - Page 24
Scanning with the EPSON Perfection 1650 PHOTO, then slide it up gently.
 |
UPC - 010343836976
View all Epson 1250 manuals
Add to My Manuals
Save this manual to your list of manuals |
Page 24 highlights
Scanning with the EPSON Perfection 1650 PHOTO If you have an EPSON Perfection 1650 PHOTO scanner, the transparency unit is built into the scanner lid. Follow these steps to use the transparency unit: 1. Unplug the AC adapter. 2. Remove the reflective document mat. To do this, grasp the top of the mat and then slide it up gently. 3. Make sure the TPU cable is plugged into the scanner's transparency unit connector. 4. Plug in the AC adapter. 20 Scanning from Start to Finish
-
 1
1 -
2
-
3
-
4
-
5
-
6
-
7
-
8
-
9
-
10
-
11
-
12
-
13
-
14
-
15
-
16
-
17
-
18
-
 19
19 -
 20
20 -
 21
21 -
 22
22 -
 23
23 -
 24
24 -
 25
25 -
 26
26 -
 27
27 -
 28
28 -
 29
29 -
30
-
31
-
32
-
33
-
34
-
35
-
36
-
37
-
38
-
39
-
40
-
41
-
42
-
43
-
44
-
45
-
46
-
47
-
48
 |
 |
20
Scanning from Start to Finish
Scanning with the EPSON Perfection 1650 PHOTO
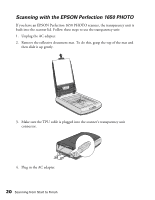
If you have an EPSON Perfection 1650 PHOTO scanner, the transparency unit is
built into the scanner lid. Follow these steps to use the transparency unit:
1.
Unplug the AC adapter.
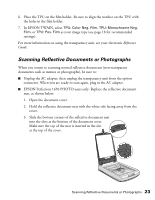
2.
Remove the reflective document mat. To do this, grasp the top of the mat and
then slide it up gently.
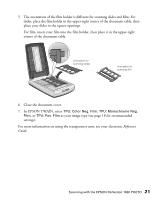
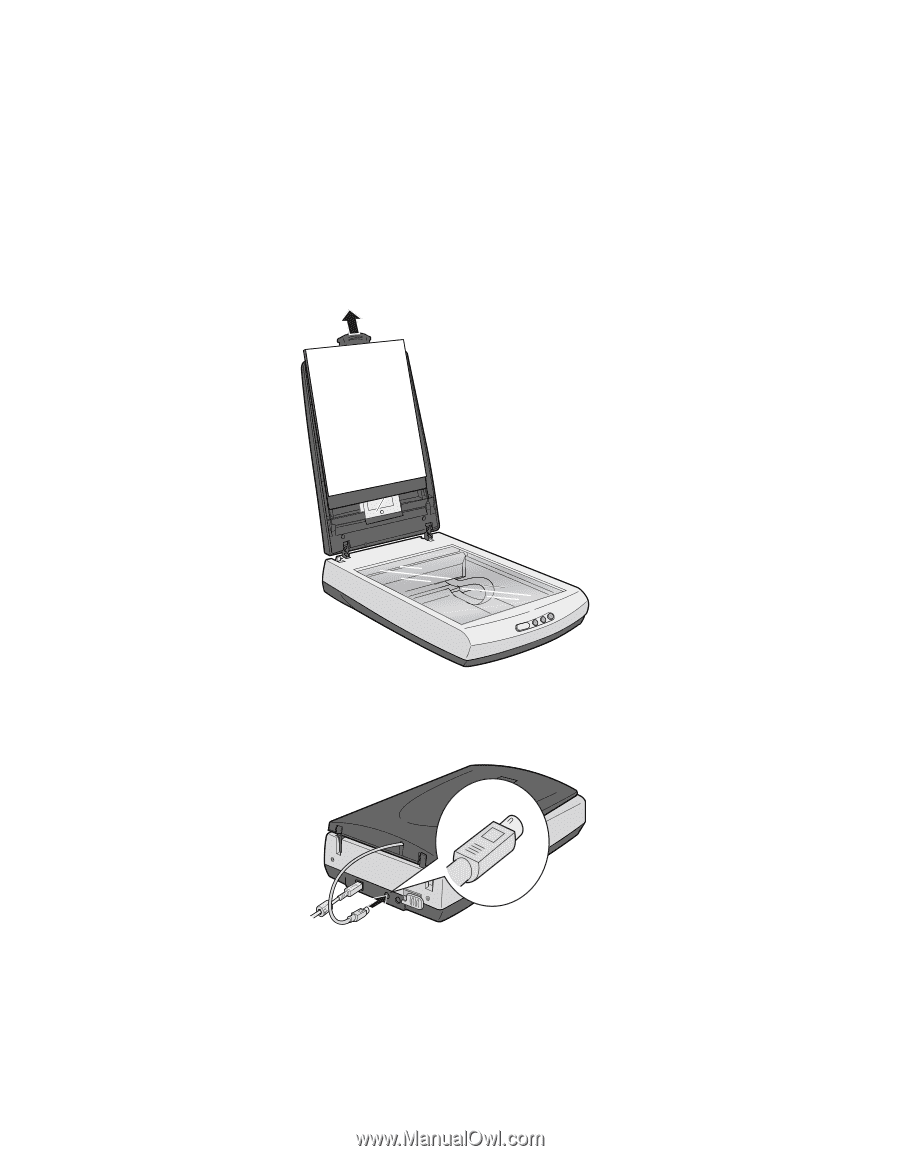
3.
Make sure the TPU cable is plugged into the scanner
’
s transparency unit
connector.
4.
Plug in the AC adapter.