Epson 836XL User Setup Information - Page 54
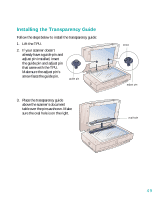
Installing the Transparency Unit, Close the TPU.
 |
UPC - 010343820098
View all Epson 836XL manuals
Add to My Manuals
Save this manual to your list of manuals |
Page 54 highlights
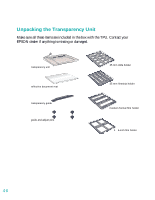
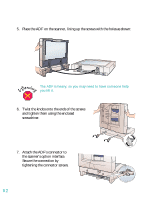
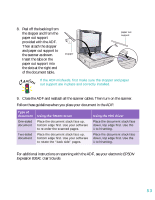
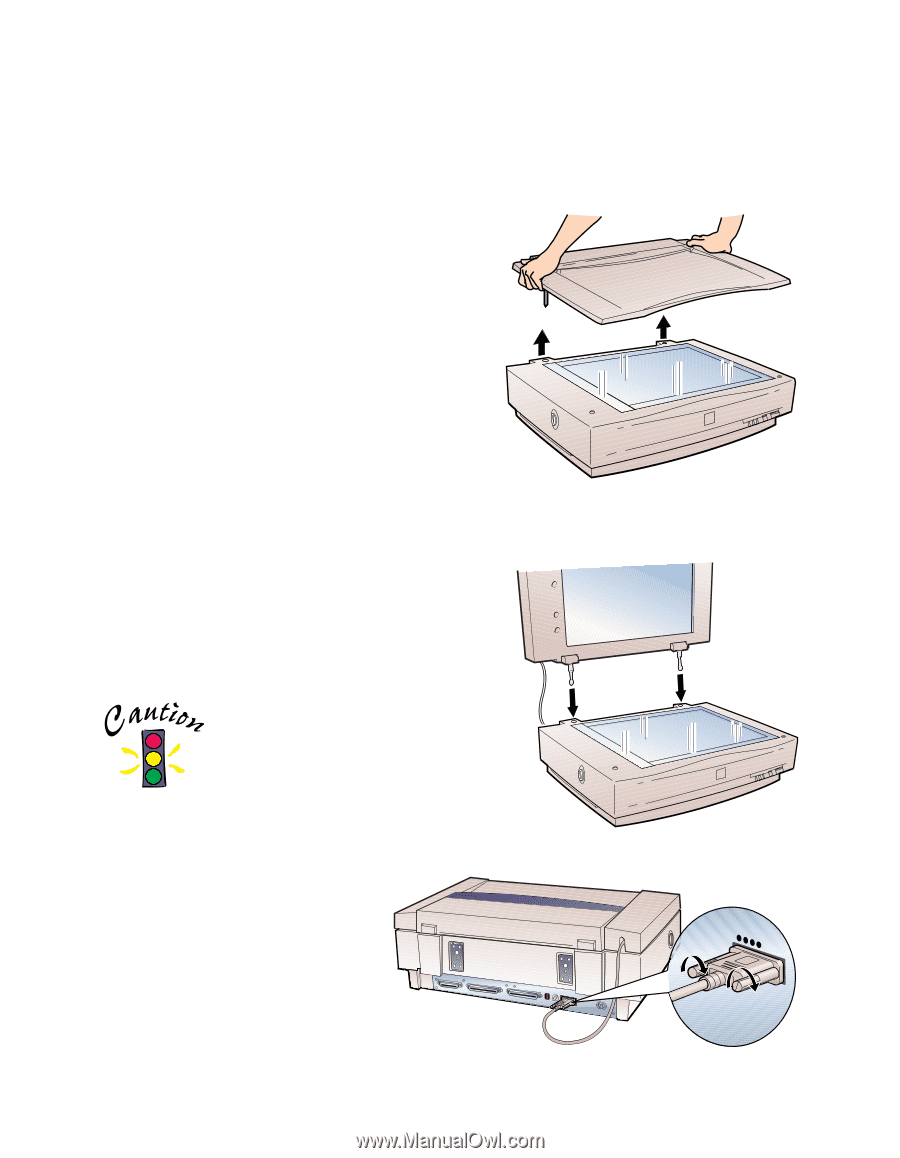
Installing the Transparency Unit 1. Make sure the scanner is turned off. Then unplug the power cable from the scanner. 2. Remove the document cover by grasping it beside the hinges and lifting it straight up. 3. Align the TPU hinge pins with the holes in the scanner, then lower the TPU until the pins rest securely in the holes. 4. Close the TPU. To avoid damaging the TPU, do not place heavy objects on it. 5. Attach the TPU connector to the option connector at the back of the scanner. Secure the connector using the attached screws. 6. Plug the scanner back in and turn it on. 48
-
 1
1 -
2
-
3
-
4
-
5
-
6
-
7
-
8
-
9
-
10
-
11
-
12
-
13
-
14
-
15
-
16
-
17
-
18
-
19
-
20
-
21
-
22
-
23
-
24
-
25
-
26
-
27
-
28
-
29
-
30
-
31
-
32
-
33
-
34
-
35
-
36
-
37
-
38
-
39
-
40
-
41
-
42
-
43
-
44
-
45
-
46
-
47
-
48
-
 49
49 -
 50
50 -
 51
51 -
 52
52 -
 53
53 -
 54
54 -
 55
55 -
 56
56 -
 57
57 -
 58
58 -
 59
59 -
60
-
61
-
62
-
63
-
64
-
65
-
66
-
67
-
68
-
69
-
70
-
71
-
72
-
73
 |
 |
48
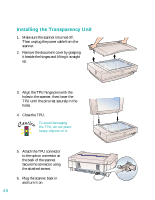
Installing the Transparency Unit
1.
Make sure the scanner is turned off.
Then unplug the power cable from the
scanner.
2.
Remove the document cover by grasping
it beside the hinges and lifting it straight
up.
3.
Align the TPU hinge pins with the
holes in the scanner, then lower the
TPU until the pins rest securely in the
holes.
4.
Close the TPU.
To avoid damaging
the TPU, do not place
heavy objects on it.
5.
Attach the TPU connector
to the option connector at
the back of the scanner.
Secure the connector using
the attached screws.
6.
Plug the scanner back in
and turn it on.