Epson ActionNote 4SLC/33 User Manual - Page 63
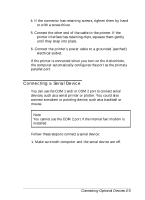
Connecting a Serial Device, Connecting Optional Devices 4-5
 |
View all Epson ActionNote 4SLC/33 manuals
Add to My Manuals
Save this manual to your list of manuals |
Page 63 highlights
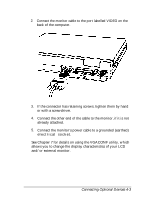
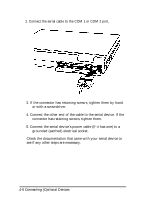
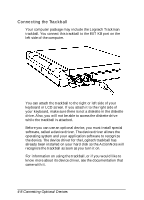
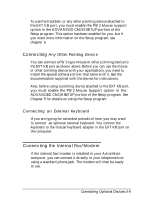
4. If the connector has retaining screws, tighten them by hand or with a screwdriver. 5. Connect the other end of the cable to the printer. If the printer interface has retaining clips, squeeze them gently until they snap into place. 6. Connect the printer's power cable to a grounded (earthed) electrical socket. If the printer is connected when you turn on the ActionNote, the computer automatically configures the port as the primary parallel port. Connecting a Serial Device You can use the COM 1 and/or COM 2 port to connect serial devices, such as a serial printer or plotter. You could also connect a modem or pointing device, such as a trackball or mouse. Note You cannot use the COM 2 port if the internal fax/modern is installed. Follow these steps to connect a serial device: 1. Make sure both computer and the serial device are off. Connecting Optional Devices 4-5
-
 1
1 -
2
-
3
-
4
-
5
-
6
-
7
-
8
-
9
-
10
-
11
-
12
-
13
-
14
-
15
-
16
-
17
-
18
-
19
-
20
-
21
-
22
-
23
-
24
-
25
-
26
-
27
-
28
-
29
-
30
-
31
-
32
-
33
-
34
-
35
-
36
-
37
-
38
-
39
-
40
-
41
-
42
-
43
-
44
-
45
-
46
-
47
-
48
-
49
-
50
-
51
-
52
-
53
-
54
-
55
-
56
-
57
-
 58
58 -
 59
59 -
 60
60 -
 61
61 -
 62
62 -
 63
63 -
 64
64 -
 65
65 -
 66
66 -
 67
67 -
 68
68 -
69
-
70
-
71
-
72
-
73
-
74
-
75
-
76
-
77
-
78
-
79
-
80
-
81
-
82
-
83
-
84
-
85
-
86
-
87
-
88
-
89
-
90
-
91
-
92
-
93
-
94
-
95
-
96
-
97
-
98
-
99
-
100
-
101
-
102
-
103
-
104
-
105
-
106
-
107
-
108
-
109
-
110
-
111
-
112
-
113
-
114
-
115
-
116
-
117
-
118
-
119
-
120
-
121
-
122
-
123
-
124
-
125
-
126
-
127
-
128
-
129
-
130
-
131
-
132
-
133
-
134
-
135
-
136
-
137
-
138
-
139
-
140
-
141
-
142
-
143
-
144
-
145
-
146
-
147
-
148
-
149
-
150
-
151
-
152
-
153
-
154
-
155
-
156
-
157
-
158
-
159
-
160
-
161
-
162
-
163
-
164
-
165
-
166
-
167
-
168
-
169
-
170
-
171
-
172
-
173
-
174
 |
 |
