Epson SureColor P800 Screen Print Edition Basics - Page 13
Loading Roll Paper (Optional), Attaching the Roll Paper Unit
 |
View all Epson SureColor P800 Screen Print Edition manuals
Add to My Manuals
Save this manual to your list of manuals |
Page 13 highlights
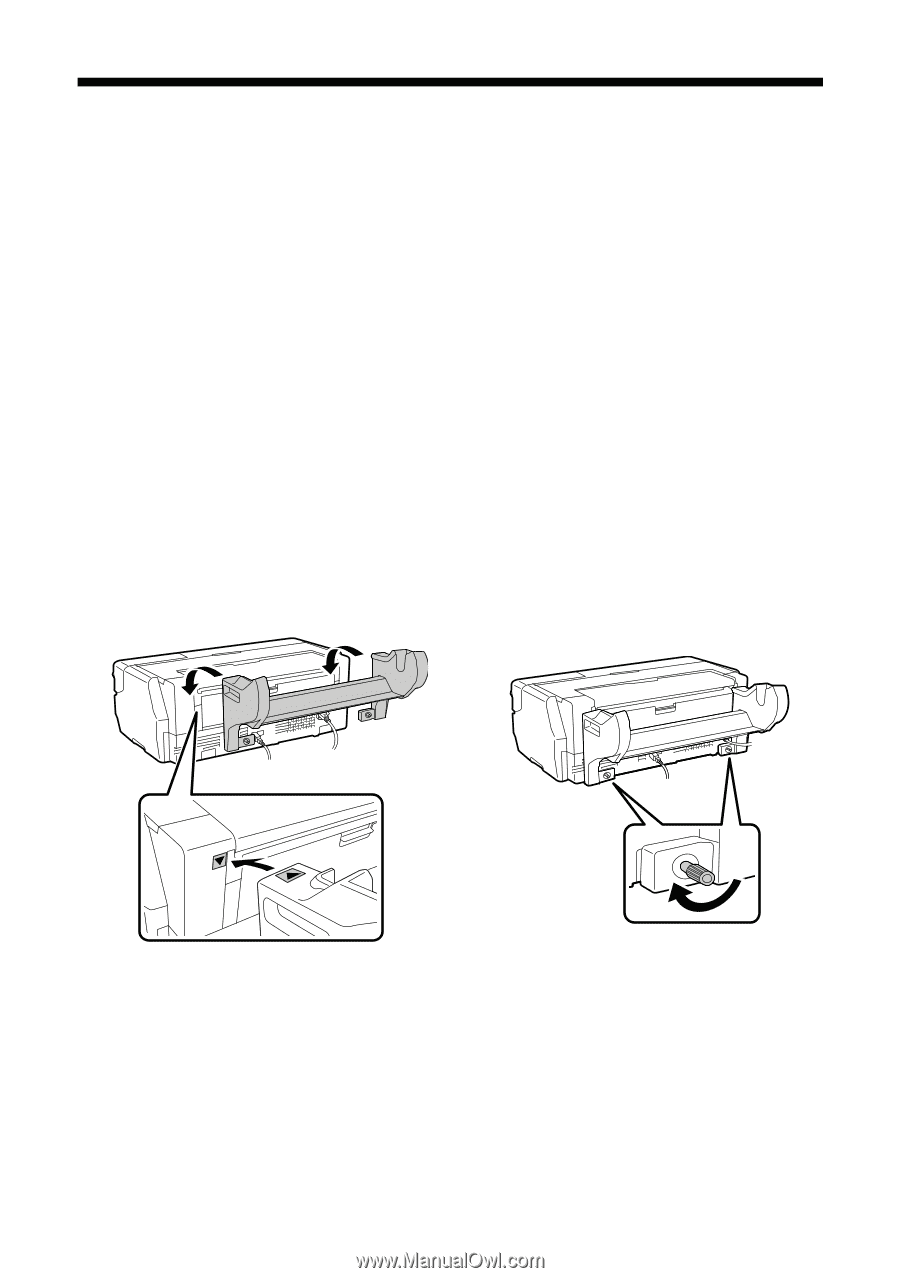
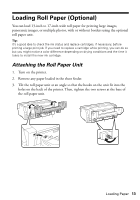
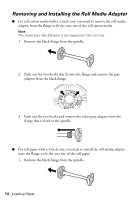
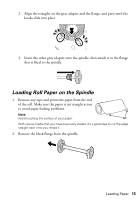
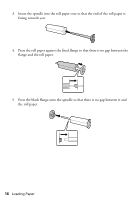
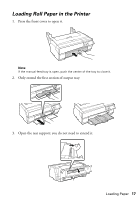
Loading Roll Paper (Optional) You can load 13-inch to 17-inch wide roll paper for printing large images, panoramic images, or multiple photos, with or without borders using the optional roll paper unit. Tip: It's a good idea to check the ink status and replace cartridges, if necessary, before printing a large print job. If you need to replace a cartridge while printing, you can do so but you might notice a color difference depending on drying conditions and the time it takes to install the new ink cartridge. Attaching the Roll Paper Unit 1. Turn on the printer. 2. Remove any paper loaded in the sheet feeder. 3. Tilt the roll paper unit at an angle so that the hooks on the unit fit into the holes on the back of the printer. Then, tighten the two screws at the base of the roll paper unit. Loading Paper 13
-
 1
1 -
2
-
3
-
4
-
5
-
6
-
7
-
 8
8 -
 9
9 -
 10
10 -
 11
11 -
 12
12 -
 13
13 -
 14
14 -
 15
15 -
 16
16 -
 17
17 -
 18
18 -
19
-
20
-
21
-
22
-
23
-
24
-
25
-
26
-
27
-
28
-
29
-
30
-
31
-
32
-
33
-
34
-
35
-
36
-
37
-
38
-
39
-
40
-
41
-
42
-
43
-
44
-
45
-
46
-
47
-
48
-
49
-
50
-
51
-
52
-
53
-
54
-
55
 |
 |