Epson WorkForce WF-2660 User Manual - Page 72
Various Ways of Sending Faxes, Sending Faxes at a Specified Time Send Fax Later
 |
View all Epson WorkForce WF-2660 manuals
Add to My Manuals
Save this manual to your list of manuals |
Page 72 highlights
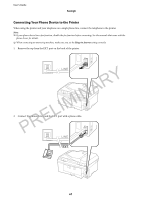
User's Guide Faxing 2. Pick up the handset of the connected telephone, and then dial the recipient's fax number using the phone. 3. Press Start Fax on the printer's control panel, and then press Send. 4. Press Menu, select Fax Send Settings, and then make settings such as the resolution and the sending method as necessary. 5. When you hear a fax tone, press the x button, and then hang up the handset. Note: When a number is dialed using the connected telephone, it takes longer to send a fax because the printer performs scanning and sending simultaneously. While sending the fax, you cannot use the other features. Related Information & "Placing Originals" on page 30 PRELIMINARY & "Fax Mode" on page 16 Various Ways of Sending Faxes Sending Faxes at a Specified Time (Send Fax Later) You can set to send a fax at a specified time. Only monochrome faxes can be sent when the time to send is specified. 1. Place the originals. 2. Enter Fax from the home screen. 3. Specify the recipient. 4. Press Menu, and then select Send Fax Later. 5. Press On, enter the time to send the fax, and then press OK. 6. Press Menu, select Fax Send Settings, and then make settings such as the resolution and the density as necessary. 7. Press the x button. Note: Until the fax is sent at the specified time, you cannot send other faxes. To cancel the fax, press the y button on the fax mode top screen, and then press Yes. Related Information & "Sending Faxes Using the Control Panel" on page 70 & "Placing Originals" on page 30 & "Fax Mode" on page 16 72
-
 1
1 -
2
-
3
-
4
-
5
-
6
-
7
-
8
-
9
-
10
-
11
-
12
-
13
-
14
-
15
-
16
-
17
-
18
-
19
-
20
-
21
-
22
-
23
-
24
-
25
-
26
-
27
-
28
-
29
-
30
-
31
-
32
-
33
-
34
-
35
-
36
-
37
-
38
-
39
-
40
-
41
-
42
-
43
-
44
-
45
-
46
-
47
-
48
-
49
-
50
-
51
-
52
-
53
-
54
-
55
-
56
-
57
-
58
-
59
-
60
-
61
-
62
-
63
-
64
-
65
-
66
-
 67
67 -
 68
68 -
 69
69 -
 70
70 -
 71
71 -
 72
72 -
 73
73 -
 74
74 -
 75
75 -
 76
76 -
 77
77 -
78
-
79
-
80
-
81
-
82
-
83
-
84
-
85
-
86
-
87
-
88
-
89
-
90
-
91
-
92
-
93
-
94
-
95
-
96
-
97
-
98
-
99
-
100
-
101
-
102
-
103
-
104
-
105
-
106
-
107
-
108
-
109
-
110
-
111
-
112
-
113
-
114
-
115
-
116
-
117
-
118
-
119
-
120
-
121
-
122
-
123
-
124
-
125
-
126
-
127
-
128
-
129
-
130
-
131
-
132
-
133
-
134
-
135
-
136
-
137
-
138
-
139
-
140
 |
 |
