Epson tmu375 User Manual - Page 23
Plug the power supply's power cord into an electrical outlet., connector as shown below. - tm u375 printers
 |
View all Epson tmu375 manuals
Add to My Manuals
Save this manual to your list of manuals |
Page 23 highlights
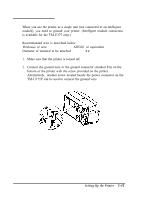
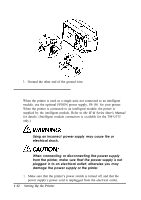
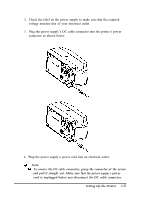
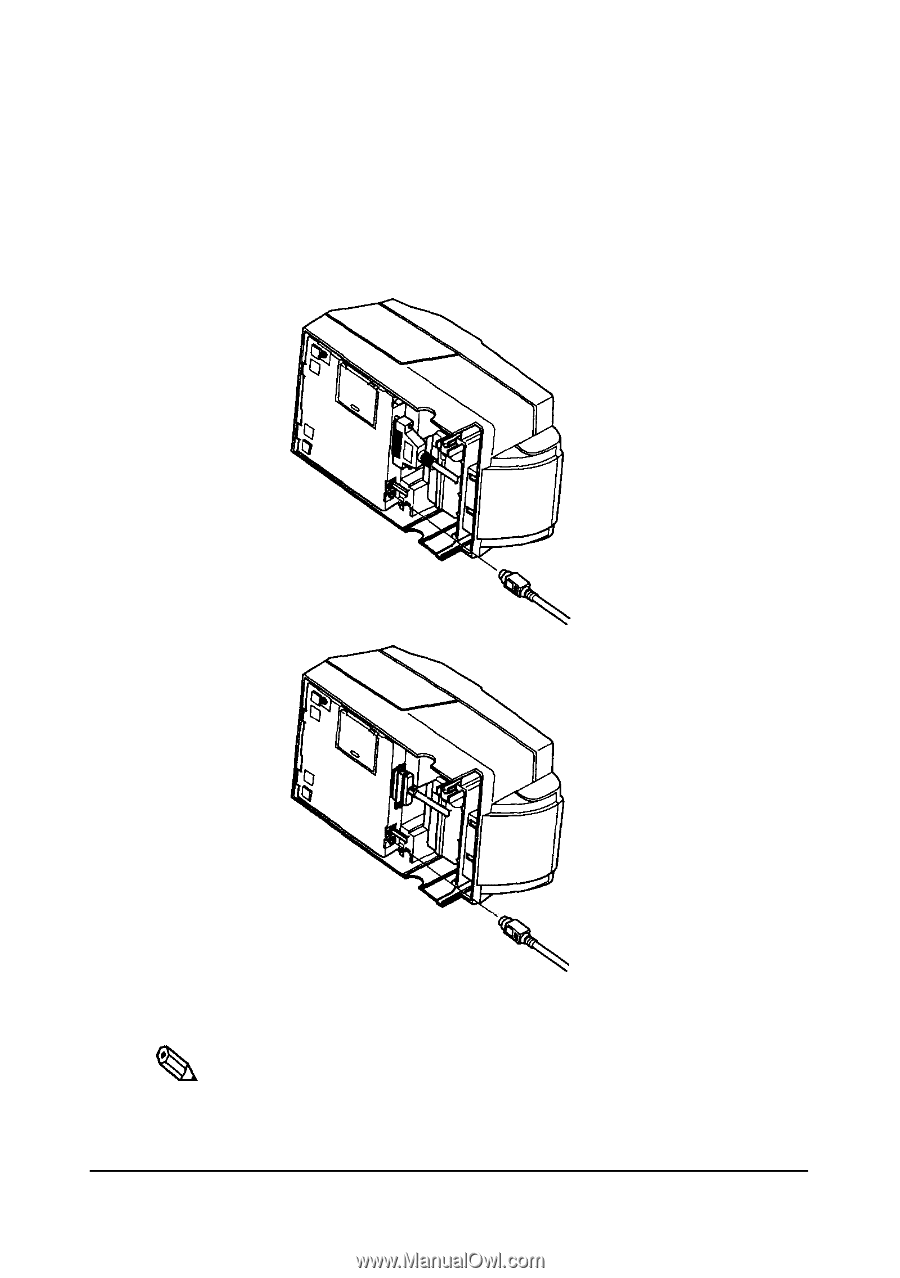
2. Check the label on the power supply to make sure that the required voltage matches that of your electrical outlet. 3. Plug the power supply's DC cable connector into the printer's power connector as shown below. TM-U375 TM-U375P 4. Plug the power supply's power cord into an electrical outlet. , Note: Qh To remove the DC cable connector, grasp the connector at the arrow and pull it straight out. Make sure that the power supply 's power cord is unplugged before you disconnect the DC cable connector. Setting Up the Printer 1-13
-
 1
1 -
2
-
3
-
4
-
5
-
6
-
7
-
8
-
9
-
10
-
11
-
12
-
13
-
14
-
15
-
16
-
17
-
 18
18 -
 19
19 -
 20
20 -
 21
21 -
 22
22 -
 23
23 -
 24
24 -
 25
25 -
 26
26 -
 27
27 -
 28
28 -
29
-
30
-
31
-
32
-
33
-
34
-
35
-
36
-
37
-
38
-
39
-
40
-
41
-
42
-
43
-
44
-
45
-
46
-
47
-
48
-
49
-
50
-
51
-
52
-
53
-
54
-
55
-
56
-
57
-
58
-
59
-
60
-
61
-
62
-
63
-
64
-
65
-
66
-
67
-
68
-
69
-
70
-
71
-
72
 |
 |
2.
3.
Check the label on the power supply to make sure that the required
voltage matches that of your electrical outlet.
Plug the power supply’s DC cable connector into the printer’s power
connector as shown below.
TM-U375
TM-U375P
4.
Plug the power supply’s power cord into an electrical outlet.
,
Qh
Note:
To
remove
the DC
cable
connector, grasp
the
connector at the arrow
and pull it
straight
out. Make sure
that
the
power
supply
's
power
cord is unplugged before you disconnect the DC cable connector.
Setting Up the Printer
1-13