Fluke 225C Service Manual - Page 30
PREVIOUS, Contrast CL 0100, CALIBRATE - equals
 |
View all Fluke 225C manuals
Add to My Manuals
Save this manual to your list of manuals |
Page 30 highlights
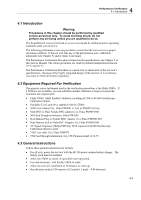
Fluke 19xB-19xC-2x5C Service Manual The test tool shows the calibration menu in the bottom of the display. • Do not press now! If you did, turn the test tool off and on, and start at 4. • Pressing will toggle the menu on-off. 5. Press PREVIOUS three times. The test tool shows Contrast (CL 0100): 6. Press CALIBRATE .The test tool shows a dark display; the test pattern as shown in Figure 4-2 may be not visible or hardly visible. Observe the display closely, and verify that the display shows no abnormalities, as for example very light pixels or lines. Figure 4-2. Display Test Pattern 7. Press . The test pattern is removed; the test tool shows Contrast (CL 0100): 8. Press again to do the next step Contrast (CL 0110): 9. Press CALIBRATE The test tool shows the display test pattern shown in Figure 4-2, at default contrast. Observe the display closely, and verify that the display shows no abnormalities. Also verify that the contrast of the upper left and upper right square of the test pattern is equal. 10. Press . The test pattern is removed; the test tool shows Contrast (CL 0110): 11. Press again to do the next step Contrast (CL 0120): 12. Press CALIBRATE The test tool shows a light display; the test pattern as shown in Figure 4-2 may not be visible or hardly visible. Observe the display closely, and verify that the display shows no abnormalities. 13. Turn the test tool OFF and ON to exit the calibration menu and to return to the normal operating mode. If the maximum, minimum, or default display contrast is not OK, then you can set these items without performing a complete calibration adjustment; refer to Section 5 for detailed information. 4-6
-
 1
1 -
2
-
3
-
4
-
5
-
6
-
7
-
8
-
9
-
10
-
11
-
12
-
13
-
14
-
15
-
16
-
17
-
18
-
19
-
20
-
21
-
22
-
23
-
24
-
 25
25 -
 26
26 -
 27
27 -
 28
28 -
 29
29 -
 30
30 -
 31
31 -
 32
32 -
 33
33 -
 34
34 -
 35
35 -
36
-
37
-
38
-
39
-
40
-
41
-
42
-
43
-
44
-
45
-
46
-
47
-
48
-
49
-
50
-
51
-
52
-
53
-
54
-
55
-
56
-
57
-
58
-
59
-
60
-
61
-
62
-
63
-
64
-
65
-
66
-
67
-
68
-
69
-
70
-
71
-
72
-
73
-
74
-
75
-
76
-
77
-
78
-
79
-
80
-
81
-
82
-
83
-
84
-
85
-
86
 |
 |
