Garmin Forerunner 245 Music Owners Manual - Page 28
Navigating to the Starting Point of Your Last, Saved Activity, Navigating to a Saved Location,
 |
View all Garmin Forerunner 245 Music manuals
Add to My Manuals
Save this manual to your list of manuals |
Page 28 highlights
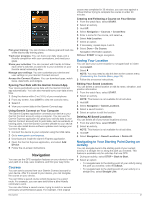
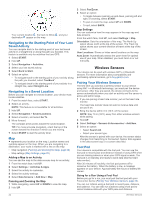
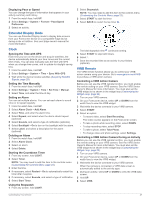
Your current location , the track to follow , and your destination appear on the map. Navigating to the Starting Point of Your Last Saved Activity You can navigate back to the starting point of your last saved activity in a straight line or along the path you traveled. This feature is available only for activities that use GPS. 1 Select START. 2 Hold UP. 3 Select Navigation > Activities. 4 Select your last saved activity. 5 Select Back to Start. 6 Select an option: • To navigate back to the starting point of your activity along the path you traveled, select TracBack®. • To navigate back to the starting point of your activity in a straight line, select Straight Line. Navigating to a Saved Location Before you can navigate to a saved location, your device must locate satellites. 1 From the watch face, select START. 2 Select an activity. NOTE: This feature is not available for all activities. 3 Hold UP. 4 Select Navigation > Saved Locations. 5 Select a location, and select Go To. 6 Move forward. The compass arrow points toward the saved location. TIP: For more accurate navigation, orient the top of the screen toward the direction in which you are moving. 7 Select START to start the activity timer. Map represents your location on the map. Location names and symbols appear on the map. When you are navigating to a destination, your route is marked with a line on the map. • Map navigation (Panning and Zooming the Map, page 22) • Map settings (Map Settings, page 22) Adding a Map to an Activity You can add the map to the data screens loop for an activity. 1 From the watch face, hold UP. 2 Select Settings > Activities & Apps. 3 Select the activity to customize. 4 Select the activity settings. 5 Select Data Screens > Add New > Map. Panning and Zooming the Map 1 While navigating, select UP or DOWN to view the map. 2 Hold UP. 3 Select Pan/Zoom. 4 Select an option: • To toggle between panning up and down, panning left and right, or zooming, select START. • To pan or zoom the map, select UP and DOWN. • To quit, select BACK. Map Settings You can customize how the map appears in the map app and data screens. From the watch face, hold UP, and select Settings > Map. Orientation: Sets the orientation of the map. The North Up option shows north at the top of the screen. The Track Up option shows your current direction of travel at the top of the screen. User Locations: Shows or hides saved locations on the map. Auto Zoom: Automatically selects the zoom level for optimal use of your map. When disabled, you must zoom in or out manually. Wireless Sensors Your device can be used with wireless ANT+ or Bluetooth sensors. For more information about compatibility and purchasing optional sensors, go to buy.garmin.com. Pairing Your Wireless Sensors The first time you connect a wireless sensor to your device using ANT+ or Bluetooth technology, you must pair the device and sensor. After they are paired, the device connects to the sensor automatically when you start an activity and the sensor is active and within range. 1 If you are pairing a heart rate monitor, put on the heart rate monitor. The heart rate monitor does not send or receive data until you put it on. 2 Bring the device within 3 m (10 ft.) of the sensor. NOTE: Stay 10 m (33 ft.) away from other wireless sensors while pairing. 3 Hold UP. 4 Select Settings > Sensors & Accessories > Add New. 5 Select an option: • Select Search All. • Select your sensor type. After the sensor is paired with your device, the sensor status changes from Searching to Connected. Sensor data appears in the data screen loop or a custom data field. Foot Pod Your device is compatible with the foot pod. You can use the foot pod to record pace and distance instead of using GPS when you are training indoors or when your GPS signal is weak. The foot pod is on standby and ready to send data (like the heart rate monitor). After 30 minutes of inactivity, the foot pod powers off to conserve the battery. When the battery is low, a message appears on your device. Approximately five hours of battery life remain. Going for a Run Using a Foot Pod Before you go for a run, you must pair the foot pod with your Forerunner device (Pairing Your Wireless Sensors, page 22). You can run indoors using a foot pod to record pace, distance, and cadence. You can also run outdoors using a foot pod to record cadence data with your GPS pace and distance. 22 Wireless Sensors
-
 1
1 -
2
-
3
-
4
-
5
-
6
-
7
-
8
-
9
-
10
-
11
-
12
-
13
-
14
-
15
-
16
-
17
-
18
-
19
-
20
-
21
-
22
-
 23
23 -
 24
24 -
 25
25 -
 26
26 -
 27
27 -
 28
28 -
 29
29 -
 30
30 -
 31
31 -
 32
32 -
 33
33 -
34
-
35
-
36
-
37
-
38
-
39
-
40
-
41
-
42
-
43
-
44
 |
 |