Garmin G1000H Bell 407GX Cockpit Reference Guide - Page 56
Graphical Flight Plan Creation, Export a Flight Plan to an SD Card, Joystick, LD WPT, EXPORT
 |
View all Garmin G1000H manuals
Add to My Manuals
Save this manual to your list of manuals |
Page 56 highlights
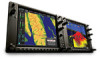
Flight Instruments EICAS Nav/Com/ XPDR/Audio AFCS GPS Nav Flight Planning GRAPHICAL FLIGHT PLAN CREATION 1) Press the FPL Key on the MFD to display the Active Flight Plan Page. 2) Press the Joystick to activate the map pointer. Use the Joystick to move the pointer to the desired point on the map to be inserted as a waypoint in the flight plan. 3) The default insertion point is at the end of the flight plan. If the selected waypoint is to be placed anywhere other than the end of the flight plan, press the FMS Knob to activate the cursor. Waypoints are inserted ABOVE the cursor. Turn the large FMS Knob to select the desired insertion point. 4) Press the LD WPT Softkey. The selected waypoint is inserted at the selected point. The default user waypoint naming is USR000, USR001, USR002, and so on. 5) To change the user waypoint name, follow the procedure for modifying a user waypoint. EXPORT A FLIGHT PLAN TO AN SD CARD NOTE: See the Annunciations & Alerts section for flight plan export message descriptions. 1) Insert the SD card into the top card slot on the MFD. 2) Press the FPL Key to display the Active Flight Plan Page on the MFD. 3) Turn the small FMS Knob to select the Flight Plan Catalog Page. 4) Press the FMS Knob to activate the cursor. 5) Turn the large FMS Knob to highlight the flight plan to be exported. 6) Press the EXPORT Softkey. 7) Press the ENT Key to confirm the export. Flight Planning Procedures Hazard Avoidance Additional Features Abnormal Operation Annun/ Alerts Appendix Index 40 Garmin G1000H™ Cockpit Reference Guide for the Bell 407GX 190-01254-00 Rev. A
-
 1
1 -
2
-
3
-
4
-
5
-
6
-
7
-
8
-
9
-
10
-
11
-
12
-
13
-
14
-
15
-
16
-
17
-
18
-
19
-
20
-
21
-
22
-
23
-
24
-
25
-
26
-
27
-
28
-
29
-
30
-
31
-
32
-
33
-
34
-
35
-
36
-
37
-
38
-
39
-
40
-
41
-
42
-
43
-
44
-
45
-
46
-
47
-
48
-
49
-
50
-
 51
51 -
 52
52 -
 53
53 -
 54
54 -
 55
55 -
 56
56 -
 57
57 -
 58
58 -
 59
59 -
 60
60 -
 61
61 -
62
-
63
-
64
-
65
-
66
-
67
-
68
-
69
-
70
-
71
-
72
-
73
-
74
-
75
-
76
-
77
-
78
-
79
-
80
-
81
-
82
-
83
-
84
-
85
-
86
-
87
-
88
-
89
-
90
-
91
-
92
-
93
-
94
-
95
-
96
-
97
-
98
-
99
-
100
-
101
-
102
-
103
-
104
-
105
-
106
-
107
-
108
-
109
-
110
-
111
-
112
-
113
-
114
-
115
-
116
-
117
-
118
-
119
-
120
-
121
-
122
-
123
-
124
-
125
-
126
-
127
-
128
-
129
-
130
-
131
-
132
-
133
-
134
-
135
-
136
 |
 |
