Garmin GPSMAP 67 Owners Manual - Page 18
Finding a Saved Waypoint, Editing a Waypoint, Changing the Photo for a Waypoint
 |
View all Garmin GPSMAP 67 manuals
Add to My Manuals
Save this manual to your list of manuals |
Page 18 highlights
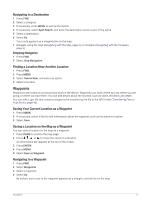
Finding a Saved Waypoint 1 Press MENU twice to open the main menu. 2 Select Waypoint Manager. 3 If necessary, press MENU to narrow the search. 4 If necessary, select an option: • Select Spell Search to search using the name of the waypoint. • Select Search Near to search near a recently found location, another waypoint, your current location, or a point on the map. • Select Sort to view the list of waypoints based on nearest distance or alphabetical order. 5 Select a waypoint from the list. Editing a Waypoint 1 Press MENU twice to open the main menu. 2 Select Waypoint Manager. 3 Select a saved waypoint. 4 Select an item to edit, such as the name or location. 5 Enter the new information, and select Done. Deleting a Waypoint 1 Press MENU twice to open the main menu. 2 Select Waypoint Manager. 3 Select a waypoint. 4 Press MENU. 5 Select Delete. Changing the Photo for a Waypoint 1 Press MENU twice to open the main menu. 2 Select Waypoint Manager. 3 Select a waypoint. 4 Press MENU. 5 Select Change Photo. 6 Select a photo. 7 Select Use. Increasing the Accuracy of a Waypoint Location You can refine the accuracy of a waypoint location by averaging the location data. When averaging, the device takes several GPS readings at the same location and uses the average value to provide more accuracy. 1 Press MENU twice to open the main menu. 2 Select Waypoint Manager. 3 Select a waypoint. 4 Press MENU. 5 Select Average Location. 6 Move to the waypoint location. 7 Select Start. 8 Follow the on-screen instructions. 9 When the confidence status bar reaches 100%, select Save. For best results, collect four to eight samples for the waypoint, waiting at least 90 minutes between samples. 12 Navigation
-
 1
1 -
2
-
3
-
4
-
5
-
6
-
7
-
8
-
9
-
10
-
11
-
12
-
 13
13 -
 14
14 -
 15
15 -
 16
16 -
 17
17 -
 18
18 -
 19
19 -
 20
20 -
 21
21 -
 22
22 -
 23
23 -
24
-
25
-
26
-
27
-
28
-
29
-
30
-
31
-
32
-
33
-
34
-
35
-
36
-
37
-
38
-
39
-
40
-
41
-
42
-
43
-
44
-
45
-
46
-
47
-
48
-
49
-
50
-
51
-
52
-
53
-
54
-
55
-
56
-
57
-
58
-
59
-
60
 |
 |
