HP 8100C HP Digital Sender 8100C - (English) Administrator Guide, C7707-90006 - Page 42
HPDigital Sender 8100C Administrator's Password, Check Address Books, Clear data bas
 |
View all HP 8100C manuals
Add to My Manuals
Save this manual to your list of manuals |
Page 42 highlights
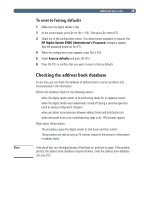
40 1 Make sure the digital sender is idle. 2 At the control panel, press SETUP (ALT+F4). 3 Select any configuration menu. If an administrator password is required, the HP Digital Sender 8100C Administrator's Password dialog box appears. Type the password and press OK (F1). 4 When the configuration menu appears, press TOOLS (F2). 5 Select Check Address Books and press OK (F1). 6 Confirm that you want to perform the check. The digital sender shuts down and then checks the address book database as it restarts. CAUTION You may want to clear the address book data base if: You are changing the digital sender's user base(e.g. moving the digital sender to a different department) The address book has become corrupt and checking the address books (see page 39) has not corrected the problem Clearing the address book data base will erase all user profiles, e-mail addresses, e-mail lists, fax numbers, and fax lists. 1 At the control panel, press SETUP (ALT+F4). 2 Select any configuration menu. If an administrator password is required, the HP Digital Sender 8100C Administrator's Password dialog box appears. Type the password and press OK (F1). 3 When the configuration menu appears, press TOOLS (F2). 4 Select Clear data bas . 5 The confirmation dialog box appears. Press OK to clear the data base. Press CANCEL to exit. 6 The data base is cleared and the digital sender re-starts.
-
 1
1 -
2
-
3
-
4
-
5
-
6
-
7
-
8
-
9
-
10
-
11
-
12
-
13
-
14
-
15
-
16
-
17
-
18
-
19
-
20
-
21
-
22
-
23
-
24
-
25
-
26
-
27
-
28
-
29
-
30
-
31
-
32
-
33
-
34
-
35
-
36
-
 37
37 -
 38
38 -
 39
39 -
 40
40 -
 41
41 -
 42
42 -
 43
43 -
 44
44 -
 45
45 -
 46
46 -
 47
47 -
48
-
49
-
50
-
51
-
52
-
53
-
54
-
55
-
56
-
57
-
58
-
59
-
60
-
61
-
62
-
63
-
64
-
65
-
66
-
67
-
68
-
69
-
70
-
71
-
72
-
73
-
74
-
75
-
76
-
77
-
78
-
79
-
80
-
81
-
82
-
83
-
84
-
85
-
86
-
87
-
88
-
89
-
90
 |
 |
