HP 9050dn HP LaserJet 9050 - Software Technical Reference (External) - Page 202
Document preview image, Use Different Paper
 |
UPC - 829160316352
View all HP 9050dn manuals
Add to My Manuals
Save this manual to your list of manuals |
Page 202 highlights
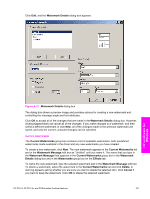
The Size is: setting specifies the media size to use for the entire print job. Changes made to the Size is: setting here override any previous Size is: settings made in other Use Different Paper/Covers options. When you select Back Cover, you must also select the Add a Blank or Preprinted Cover check box to enable the setting. When you select this check box, the Source is: and Type is: drop-down menus become available and a check mark appears next to the Back Cover option. NOTE The Back Cover options are not available when the Booklet Printing Layout setting is enabled on the Finishing tab. The back cover setting is unavailable, because this page would otherwise be printed in the middle of a booklet. The Source is: setting specifies the source tray to use for adding a back cover to the document. The list of source trays depends on the printer accessories. Any optional media trays that are installed through the Device Settings tab also appear here. The Type is: drop-down menu shows all of the media types that the printer supports. NOTE You must use the same size of media for the entire print job. All Use Different Paper/ Covers options use the last Size is: setting that you select in any one of the Use Different Paper/Covers options. When you change the type and source of the media and covers, the settings you select remain configured until you close the software program. Document preview image The document preview image is a line-drawn image of a page that represents graphics and text. The document preview image is always oriented so that the contents of the page are right-side up. The document preview image appears in the upper-right corner of the Paper/Quality, Effects,, Finishing, and Output tabs. Switching between tabs does not change the location or appearance of the document preview image. When you move the mouse over the document preview image, the mouse cursor changes from an arrow to a gloved hand. You can toggle between portrait and landscape page orientation by clicking on the image. HP unidrivers for Windows 186 4 HP PCL 6, HP PCL 5e, and HP PS emulation unidrivers for Windows
-
 1
1 -
2
-
3
-
4
-
5
-
6
-
7
-
8
-
9
-
10
-
11
-
12
-
13
-
14
-
15
-
16
-
17
-
18
-
19
-
20
-
21
-
22
-
23
-
24
-
25
-
26
-
27
-
28
-
29
-
30
-
31
-
32
-
33
-
34
-
35
-
36
-
37
-
38
-
39
-
40
-
41
-
42
-
43
-
44
-
45
-
46
-
47
-
48
-
49
-
50
-
51
-
52
-
53
-
54
-
55
-
56
-
57
-
58
-
59
-
60
-
61
-
62
-
63
-
64
-
65
-
66
-
67
-
68
-
69
-
70
-
71
-
72
-
73
-
74
-
75
-
76
-
77
-
78
-
79
-
80
-
81
-
82
-
83
-
84
-
85
-
86
-
87
-
88
-
89
-
90
-
91
-
92
-
93
-
94
-
95
-
96
-
97
-
98
-
99
-
100
-
101
-
102
-
103
-
104
-
105
-
106
-
107
-
108
-
109
-
110
-
111
-
112
-
113
-
114
-
115
-
116
-
117
-
118
-
119
-
120
-
121
-
122
-
123
-
124
-
125
-
126
-
127
-
128
-
129
-
130
-
131
-
132
-
133
-
134
-
135
-
136
-
137
-
138
-
139
-
140
-
141
-
142
-
143
-
144
-
145
-
146
-
147
-
148
-
149
-
150
-
151
-
152
-
153
-
154
-
155
-
156
-
157
-
158
-
159
-
160
-
161
-
162
-
163
-
164
-
165
-
166
-
167
-
168
-
169
-
170
-
171
-
172
-
173
-
174
-
175
-
176
-
177
-
178
-
179
-
180
-
181
-
182
-
183
-
184
-
185
-
186
-
187
-
188
-
189
-
190
-
191
-
192
-
193
-
194
-
195
-
196
-
 197
197 -
 198
198 -
 199
199 -
 200
200 -
 201
201 -
 202
202 -
 203
203 -
 204
204 -
 205
205 -
 206
206 -
 207
207 -
208
-
209
-
210
-
211
-
212
-
213
-
214
-
215
-
216
-
217
-
218
-
219
-
220
-
221
-
222
-
223
-
224
-
225
-
226
-
227
-
228
-
229
-
230
-
231
-
232
-
233
-
234
-
235
-
236
-
237
-
238
-
239
-
240
-
241
-
242
-
243
-
244
-
245
-
246
-
247
-
248
-
249
-
250
-
251
-
252
-
253
-
254
-
255
-
256
-
257
-
258
-
259
-
260
-
261
-
262
-
263
-
264
-
265
-
266
-
267
-
268
-
269
-
270
-
271
-
272
-
273
-
274
-
275
-
276
-
277
-
278
-
279
-
280
-
281
-
282
-
283
-
284
-
285
-
286
-
287
-
288
-
289
-
290
-
291
-
292
-
293
-
294
-
295
-
296
-
297
-
298
-
299
-
300
-
301
-
302
-
303
-
304
-
305
-
306
-
307
-
308
-
309
-
310
-
311
-
312
-
313
-
314
-
315
-
316
-
317
-
318
-
319
-
320
-
321
-
322
 |
 |
