HP Color LaserJet Pro M255-M256 User Guide - Page 108
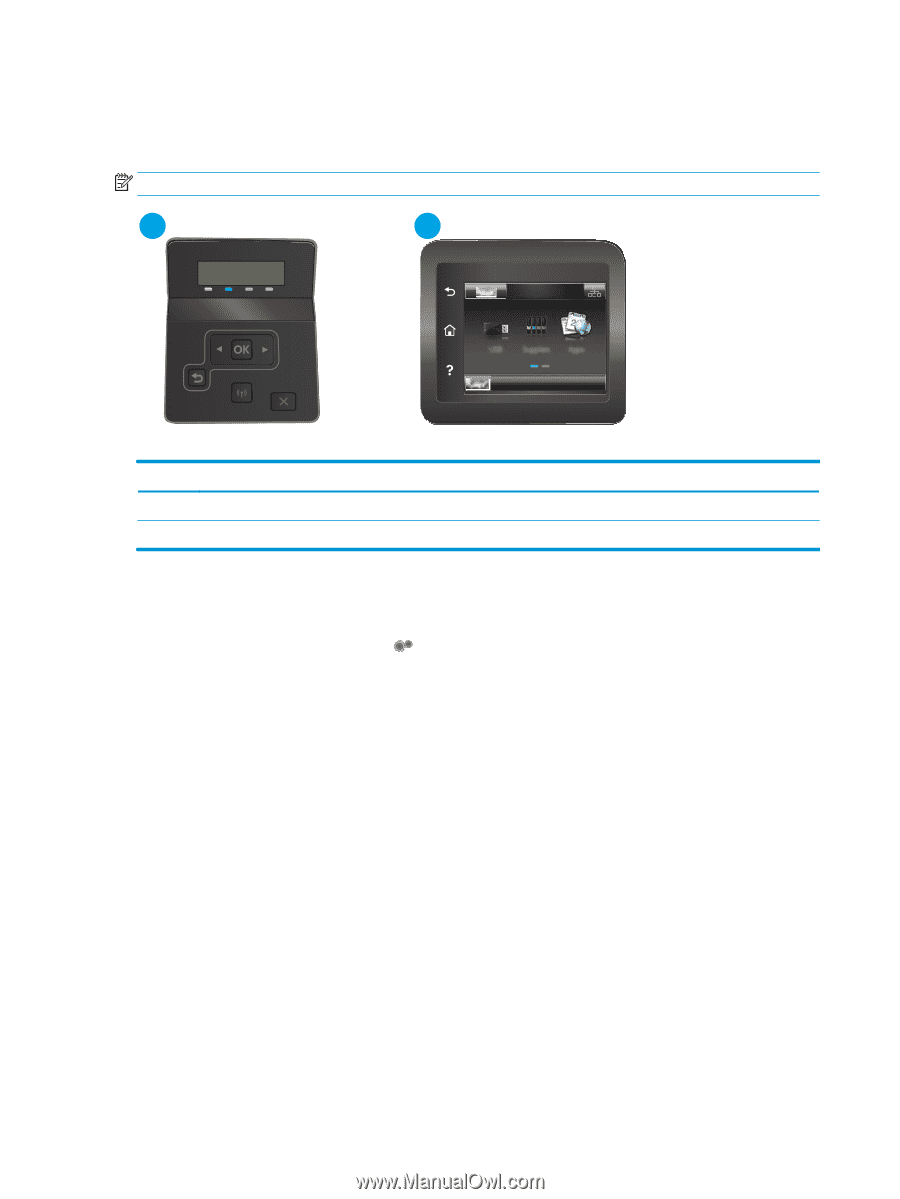
Step three: Set the individual tray alignment, Setup, System Setup, Print Quality, Adjust Alignment
 |
View all HP Color LaserJet Pro M255-M256 manuals
Add to My Manuals
Save this manual to your list of manuals |
Page 108 highlights
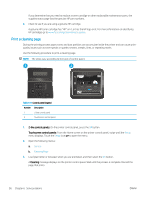
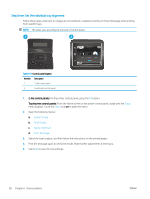
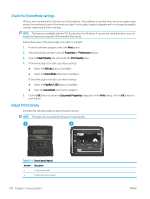
Step three: Set the individual tray alignment Follow these steps when text or images are not centered or aligned correctly on the printed page when printing from specific trays. NOTE: The steps vary according to the type of control panel. 1 2 Table 6-9 Control panel legend Number Description 1 2-line control panel 2 Touchscreen control panel 1. 2-line control panels: On the printer control panel, press the OK button. Touchscreen control panels: From the Home screen on the printer control panel, swipe until the Setup menu displays. Touch the Setup icon to open the menu. 2. Open the following menus: a. System Setup b. Print Quality c. Adjust Alignment d. Print Test Page 3. Select the tray to adjust, and then follow the instructions on the printed pages. 4. Print the test page again to verify the results. Make further adjustments if necessary. 5. Select OK to save the new settings. 98 Chapter 6 Solve problems ENWW
-
 1
1 -
2
-
3
-
4
-
5
-
6
-
7
-
8
-
9
-
10
-
11
-
12
-
13
-
14
-
15
-
16
-
17
-
18
-
19
-
20
-
21
-
22
-
23
-
24
-
25
-
26
-
27
-
28
-
29
-
30
-
31
-
32
-
33
-
34
-
35
-
36
-
37
-
38
-
39
-
40
-
41
-
42
-
43
-
44
-
45
-
46
-
47
-
48
-
49
-
50
-
51
-
52
-
53
-
54
-
55
-
56
-
57
-
58
-
59
-
60
-
61
-
62
-
63
-
64
-
65
-
66
-
67
-
68
-
69
-
70
-
71
-
72
-
73
-
74
-
75
-
76
-
77
-
78
-
79
-
80
-
81
-
82
-
83
-
84
-
85
-
86
-
87
-
88
-
89
-
90
-
91
-
92
-
93
-
94
-
95
-
96
-
97
-
98
-
99
-
100
-
101
-
102
-
 103
103 -
 104
104 -
 105
105 -
 106
106 -
 107
107 -
 108
108 -
 109
109 -
 110
110 -
 111
111 -
 112
112 -
 113
113 -
114
-
115
-
116
-
117
-
118
-
119
-
120
-
121
-
122
-
123
-
124
-
125
-
126
-
127
-
128
-
129
-
130
-
131
-
132
 |
 |