HP Color LaserJet Pro M255-M256 User Guide - Page 113
Setup, Reports, Print Quality
 |
View all HP Color LaserJet Pro M255-M256 manuals
Add to My Manuals
Save this manual to your list of manuals |
Page 113 highlights
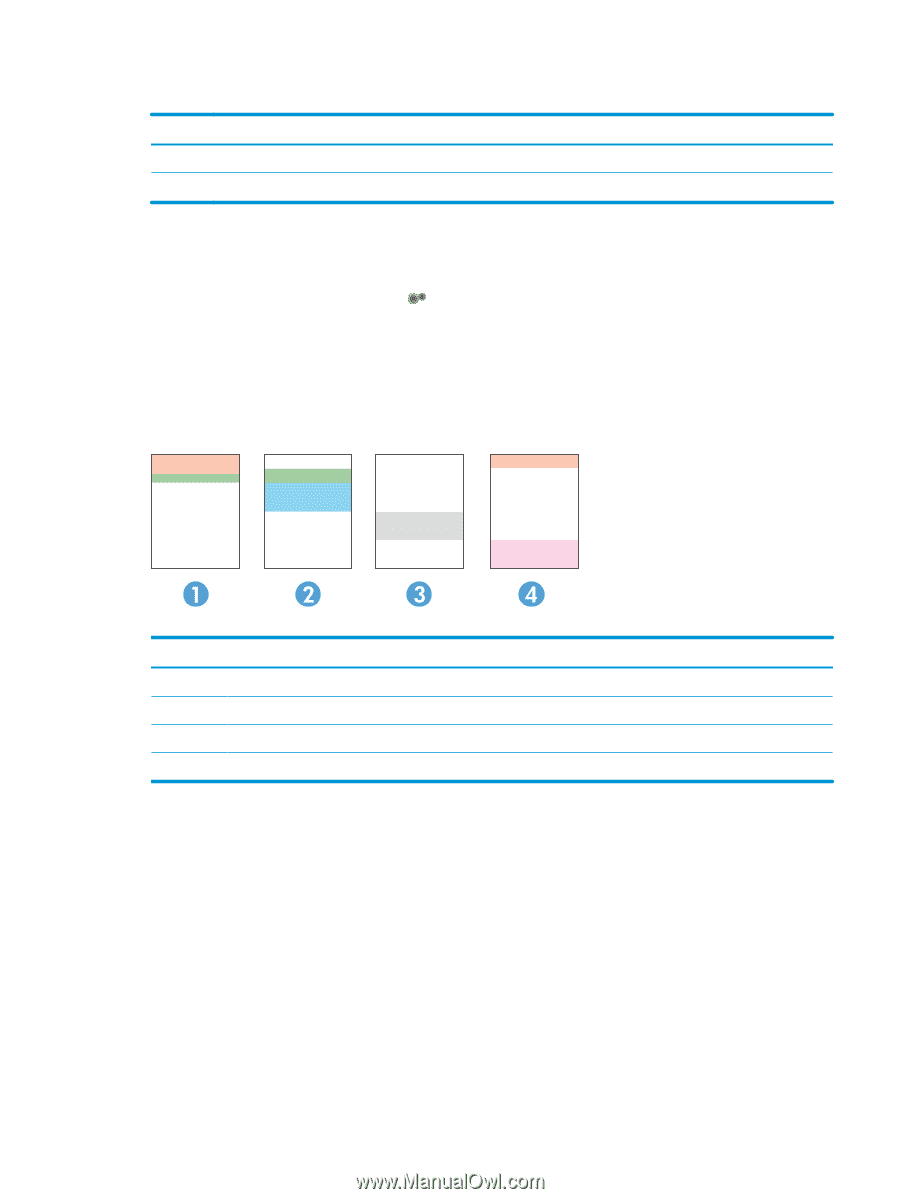
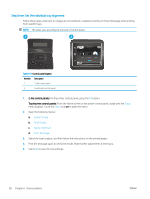
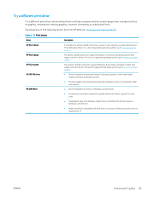
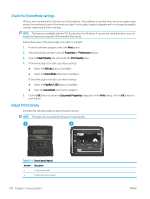
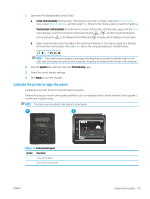
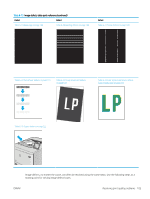
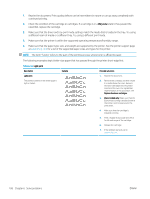
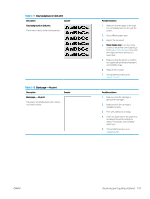
Table 6-13 Control panel legend Number Description 1 2-line control panel 2 Touchscreen control panel 1. 2-line control panels: On the printer control panel, press the OK button. Touchscreen control panels: From the Home screen on the printer control panel, swipe until the Setup menu displays. Touch the Setup icon to open the menu. 2. Select the Reports menu. 3. Select the Print Quality Page item. This page contains five bands of color, which are divided into four groups as indicated in the following illustration. By examining each group, you can isolate the problem to a particular toner cartridge. Figure 6-1 Print quality page Table 6-14 Print quality page legend Section Toner cartridge 1 Yellow 2 Cyan 3 Black 4 Magenta ● If dots or streaks appear in only one of the groups, replace the toner cartridge that correlates with that group. ● If dots appear in more than one group, print a cleaning page. If this does not solve the problem, determine if the dots are always the same color; for example, if magenta dots appear in all five color bands. If the dots are all the same color, replace that toner cartridge. ● If streaks appear in multiple color bands, contact HP. A component other than the toner cartridge is probably causing the problem. ENWW Improve print quality 103
-
 1
1 -
2
-
3
-
4
-
5
-
6
-
7
-
8
-
9
-
10
-
11
-
12
-
13
-
14
-
15
-
16
-
17
-
18
-
19
-
20
-
21
-
22
-
23
-
24
-
25
-
26
-
27
-
28
-
29
-
30
-
31
-
32
-
33
-
34
-
35
-
36
-
37
-
38
-
39
-
40
-
41
-
42
-
43
-
44
-
45
-
46
-
47
-
48
-
49
-
50
-
51
-
52
-
53
-
54
-
55
-
56
-
57
-
58
-
59
-
60
-
61
-
62
-
63
-
64
-
65
-
66
-
67
-
68
-
69
-
70
-
71
-
72
-
73
-
74
-
75
-
76
-
77
-
78
-
79
-
80
-
81
-
82
-
83
-
84
-
85
-
86
-
87
-
88
-
89
-
90
-
91
-
92
-
93
-
94
-
95
-
96
-
97
-
98
-
99
-
100
-
101
-
102
-
103
-
104
-
105
-
106
-
107
-
 108
108 -
 109
109 -
 110
110 -
 111
111 -
 112
112 -
 113
113 -
 114
114 -
 115
115 -
 116
116 -
 117
117 -
 118
118 -
119
-
120
-
121
-
122
-
123
-
124
-
125
-
126
-
127
-
128
-
129
-
130
-
131
-
132
 |
 |