HP D2D110 HP StorageWorks D2D Backup System User Guide (EH880-90950, October 2 - Page 118
Removing the disk cover, Identifying the hard disk, not correct
 |
View all HP D2D110 manuals
Add to My Manuals
Save this manual to your list of manuals |
Page 118 highlights
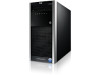
Figure 43 Removing the disk cover 8. The diagram on the lid of the HP D2D Backup System shows how the disks are cabled. a. Check that the disk identified as failed in the Web Management interface is plugged into the corresponding SATA port. For example, if Disk 1 is shown as failed, trace the cable to the SATA port. It should be in SATA Port 1. (If it is not, you may need to remove several disks to locate the failed one, identified by the unique serial number.) b. Remove the disk from the disk bay and check the serial number. It must match the serial number in the Web Management interface. c. If the serial number is correct, it is safe to remove and replace the disk. If the serial number is not correct, you must locate the correct disk by checking all the others. CAUTION: If you replace the wrong disk, you could lose all your data. Power Supply System Board HDD 4 HDD 3 HDD 2 HDD 1 SATA3 SATA4 SATA2 SATA1 Figure 44 Identifying the hard disk 9. Observing normal anti-static precautions, remove the failed disk. Disconnect the power and data cables from the back of the installed drive (1). A drive latch (2) with release tabs secures the hard drives in the drive bay. Lift the release tab on the drive latch. Slide the hard disk drive from the drive bay (3). 118 Hard disk replacement
-
 1
1 -
2
-
3
-
4
-
5
-
6
-
7
-
8
-
9
-
10
-
11
-
12
-
13
-
14
-
15
-
16
-
17
-
18
-
19
-
20
-
21
-
22
-
23
-
24
-
25
-
26
-
27
-
28
-
29
-
30
-
31
-
32
-
33
-
34
-
35
-
36
-
37
-
38
-
39
-
40
-
41
-
42
-
43
-
44
-
45
-
46
-
47
-
48
-
49
-
50
-
51
-
52
-
53
-
54
-
55
-
56
-
57
-
58
-
59
-
60
-
61
-
62
-
63
-
64
-
65
-
66
-
67
-
68
-
69
-
70
-
71
-
72
-
73
-
74
-
75
-
76
-
77
-
78
-
79
-
80
-
81
-
82
-
83
-
84
-
85
-
86
-
87
-
88
-
89
-
90
-
91
-
92
-
93
-
94
-
95
-
96
-
97
-
98
-
99
-
100
-
101
-
102
-
103
-
104
-
105
-
106
-
107
-
108
-
109
-
110
-
111
-
112
-
 113
113 -
 114
114 -
 115
115 -
 116
116 -
 117
117 -
 118
118 -
 119
119 -
 120
120 -
 121
121 -
 122
122 -
 123
123 -
124
-
125
-
126
 |
 |
