HP D2D110 HP StorageWorks D2D Backup System User Guide (EH880-90950, October 2 - Page 33
Installing an internal tape drive, Replacing the PCI slot cover, Removing
 |
View all HP D2D110 manuals
Add to My Manuals
Save this manual to your list of manuals |
Page 33 highlights
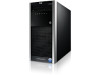
Figure 16 Replacing the PCI slot cover Installing an internal tape drive Read this section if your are installing an internal tape drive. If you are connecting an external tape drive, go to "Replacing the access panel and bezel" on page 35. WARNING! To avoid personal injury or damage to the server or tape drive, ensure that the server is disconnected from the mains power supply while you install the drive. CAUTION: Static electricity can damage electronic components. Always wear an antistatic wriststrap if one is available. If not, after you have disconnected power from the server and removed the cover, touch a bare metal part of the chassis. Similarly, touch a bare metal part of the drive before installing it. 1. Access the removable media cage (1) and remove the filler panel (2). Figure 17 Removing the filler panel 2. Mounting screws and shims are provided in the Mounting Hardware pack, which is supplied with the tape drive. Locate the pack of short, cylindrical-headed screws and shims. D2D Backup System 33
-
 1
1 -
2
-
3
-
4
-
5
-
6
-
7
-
8
-
9
-
10
-
11
-
12
-
13
-
14
-
15
-
16
-
17
-
18
-
19
-
20
-
21
-
22
-
23
-
24
-
25
-
26
-
27
-
 28
28 -
 29
29 -
 30
30 -
 31
31 -
 32
32 -
 33
33 -
 34
34 -
 35
35 -
 36
36 -
 37
37 -
 38
38 -
39
-
40
-
41
-
42
-
43
-
44
-
45
-
46
-
47
-
48
-
49
-
50
-
51
-
52
-
53
-
54
-
55
-
56
-
57
-
58
-
59
-
60
-
61
-
62
-
63
-
64
-
65
-
66
-
67
-
68
-
69
-
70
-
71
-
72
-
73
-
74
-
75
-
76
-
77
-
78
-
79
-
80
-
81
-
82
-
83
-
84
-
85
-
86
-
87
-
88
-
89
-
90
-
91
-
92
-
93
-
94
-
95
-
96
-
97
-
98
-
99
-
100
-
101
-
102
-
103
-
104
-
105
-
106
-
107
-
108
-
109
-
110
-
111
-
112
-
113
-
114
-
115
-
116
-
117
-
118
-
119
-
120
-
121
-
122
-
123
-
124
-
125
-
126
 |
 |
