HP D2D110 HP StorageWorks D2D Backup System User Guide (EH880-90950, October 2 - Page 36
Connecting an external tape drive, Replacing the bezel
 |
View all HP D2D110 manuals
Add to My Manuals
Save this manual to your list of manuals |
Page 36 highlights
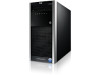
Figure 22 Replacing the bezel 3. Use two hands to place the access panel flat against the chassis (1), the back of the access panel extending about 2.5 cm (1.0 in) behind the back of the server. Make sure the hooks on the access panel align with the holes on the edges of the chassis. Slide (2) the access panel toward the front of the chassis to position it into place. Tighten the captive thumbscrew (3) to secure the access panel. Figure 23 Replacing the access panel 4. Reconnect the network cable and the power cord. Connecting an external tape drive Read this section if your are connecting an external tape drive. NOTE: You can only connect an external tape drive, if you have already installed a recommended HBA. 1. Connect the device cable (SCSI or SAS) to the appropriate ports on the HBA and tape drive. The example shows a SCSI tape drive. 2. Plug the power cable (1)ecurely into the socket on the rear panel of the drive and plug the other end of the power cable into the power outlet. The power on/off switch (2)is on the front panel. 36 Attaching a physical tape drive (optional)
-
 1
1 -
2
-
3
-
4
-
5
-
6
-
7
-
8
-
9
-
10
-
11
-
12
-
13
-
14
-
15
-
16
-
17
-
18
-
19
-
20
-
21
-
22
-
23
-
24
-
25
-
26
-
27
-
28
-
29
-
30
-
 31
31 -
 32
32 -
 33
33 -
 34
34 -
 35
35 -
 36
36 -
 37
37 -
 38
38 -
 39
39 -
 40
40 -
 41
41 -
42
-
43
-
44
-
45
-
46
-
47
-
48
-
49
-
50
-
51
-
52
-
53
-
54
-
55
-
56
-
57
-
58
-
59
-
60
-
61
-
62
-
63
-
64
-
65
-
66
-
67
-
68
-
69
-
70
-
71
-
72
-
73
-
74
-
75
-
76
-
77
-
78
-
79
-
80
-
81
-
82
-
83
-
84
-
85
-
86
-
87
-
88
-
89
-
90
-
91
-
92
-
93
-
94
-
95
-
96
-
97
-
98
-
99
-
100
-
101
-
102
-
103
-
104
-
105
-
106
-
107
-
108
-
109
-
110
-
111
-
112
-
113
-
114
-
115
-
116
-
117
-
118
-
119
-
120
-
121
-
122
-
123
-
124
-
125
-
126
 |
 |
