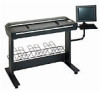
HP Designjet 4200 HP Designjet cc800ps, 815mfp, 5500mfp, and 4200 scanner - Co - Page 10
Running a job: operator settings
 |
View all HP Designjet 4200 manuals
Add to My Manuals
Save this manual to your list of manuals |
Page 10 highlights
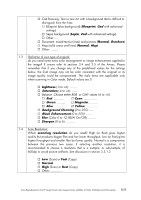
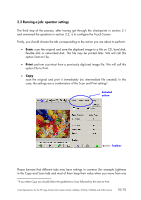
2.3 Running a job: operator settings The third step of the process, after having got through the checkpoints in section 2.1 and answered the questions in section 2.2, is to configure the Touch Screen. Firstly, you should choose the tab corresponding to the action you are about to perform: • Scan: scan the original and save the digitized image to a file on CD, hard disk, flexible disk or networked disk. This file may be printed later. We will call this option Scan to File. • Print: perform a printout from a previously digitized image file. We will call this option File to Print. • Copy: scan the original and print it immediately (no intermediate file created). In this case, the settings are a combination of the Scan and Print settings1. Selected action Toolbar Please beware that different tabs may have settings in common (for example Lightness in the Copy and Scan tab) and most of them keep their value when you move from one 1 If you select Copy you should follow the guidelines to Scan followed by the ones to Print. Color Reproduction for the HP Large Format Color Copiers family: cc800ps, 815mfp, 5500mfp and 4200 scanner 10/10
-
 1
1 -
2
-
3
-
4
-
 5
5 -
 6
6 -
 7
7 -
 8
8 -
 9
9 -
 10
10 -
 11
11 -
 12
12 -
 13
13 -
 14
14 -
 15
15 -
16
-
17
-
18
-
19
-
20
-
21
-
22
-
23
-
24
-
25
-
26
-
27
-
28
-
29
-
30
-
31
-
32
-
33
-
34
-
35
-
36
-
37
-
38
-
39
-
40
-
41
-
42
-
43
-
44
-
45
-
46
-
47
-
48
-
49
-
50
-
51
-
52
-
53
-
54
-
55
-
56
-
57
-
58
-
59
-
60
-
61
 |
 |
