HP Deskjet 6980 User Guide - Pre-Windows 2000 - Page 95
Print multiple s on a single sheet of paper, Print a different first
 |
UPC - 882780129580
View all HP Deskjet 6980 manuals
Add to My Manuals
Save this manual to your list of manuals |
Page 95 highlights
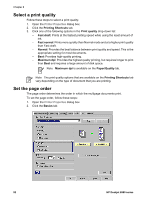
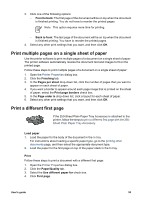
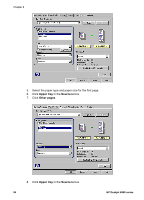
3. Click one of the following options: - Front to back: The first page of the document will be on top when the document is finished printing. You do not have to reorder the printed pages. Note This option requires more time for printing. - Back to front: The last page of the document will be on top when the document is finished printing. You have to reorder the printed pages. 4. Select any other print settings that you want, and then click OK. Print multiple pages on a single sheet of paper Use the printer software to print multiple pages of a document on a single sheet of paper. The printer software automatically resizes the document text and images to fit on the printed page. Follow these steps to print multiple pages of a document on a single sheet of paper: 1. Open the Printer Properties dialog box. 2. Click the Finishing tab. 3. In the Pages per sheet drop-down list, click the number of pages that you want to appear on each sheet of paper. 4. If you want a border to appear around each page image that is printed on the sheet of paper, select the Print page borders check box. 5. In the Page order is drop-down list, click a layout for each sheet of paper. 6. Select any other print settings that you want, and then click OK. Print a different first page If the 250-Sheet Plain Paper Tray Accessory is attached to the printer, follow the steps to print a different first page with the 250Sheet Plain Paper Tray Accessory. Load paper 1. Load the paper for the body of the document in the In tray. For instructions about loading a specific paper type, go to the printing other documents page, and then select the appropriate document type. 2. Load the paper for the first page on top of the paper stack in the In tray. Print Follow these steps to print a document with a different first page: 1. Open the Printer Properties dialog box. 2. Click the Paper/Quality tab. 3. Select the Use different paper for check box. 4. Click First page. User's guide 93
-
 1
1 -
2
-
3
-
4
-
5
-
6
-
7
-
8
-
9
-
10
-
11
-
12
-
13
-
14
-
15
-
16
-
17
-
18
-
19
-
20
-
21
-
22
-
23
-
24
-
25
-
26
-
27
-
28
-
29
-
30
-
31
-
32
-
33
-
34
-
35
-
36
-
37
-
38
-
39
-
40
-
41
-
42
-
43
-
44
-
45
-
46
-
47
-
48
-
49
-
50
-
51
-
52
-
53
-
54
-
55
-
56
-
57
-
58
-
59
-
60
-
61
-
62
-
63
-
64
-
65
-
66
-
67
-
68
-
69
-
70
-
71
-
72
-
73
-
74
-
75
-
76
-
77
-
78
-
79
-
80
-
81
-
82
-
83
-
84
-
85
-
86
-
87
-
88
-
89
-
 90
90 -
 91
91 -
 92
92 -
 93
93 -
 94
94 -
 95
95 -
 96
96 -
 97
97 -
 98
98 -
 99
99 -
 100
100 -
101
-
102
-
103
-
104
-
105
-
106
-
107
-
108
-
109
-
110
-
111
-
112
-
113
-
114
-
115
-
116
-
117
-
118
-
119
-
120
-
121
-
122
-
123
-
124
-
125
-
126
-
127
-
128
-
129
-
130
-
131
-
132
-
133
-
134
-
135
-
136
-
137
-
138
-
139
-
140
-
141
-
142
-
143
-
144
-
145
-
146
-
147
-
148
-
149
-
150
-
151
-
152
-
153
-
154
-
155
-
156
-
157
-
158
-
159
-
160
-
161
-
162
-
163
-
164
-
165
-
166
-
167
-
168
-
169
-
170
-
171
-
172
-
173
-
174
-
175
-
176
-
177
-
178
-
179
-
180
-
181
-
182
 |
 |