HP G32-200 Compaq Presario CQ32 Notebook PC and HP G32 Notebook PC - Maintenan - Page 86
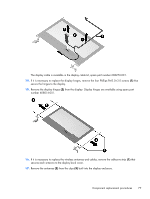
Disengage the webcam cable from the glue securing it to the back of the display
 |
View all HP G32-200 manuals
Add to My Manuals
Save this manual to your list of manuals |
Page 86 highlights
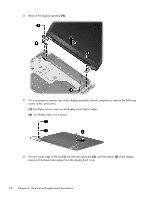
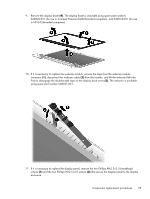
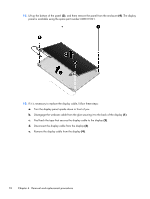
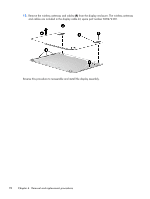
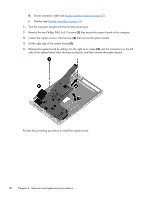
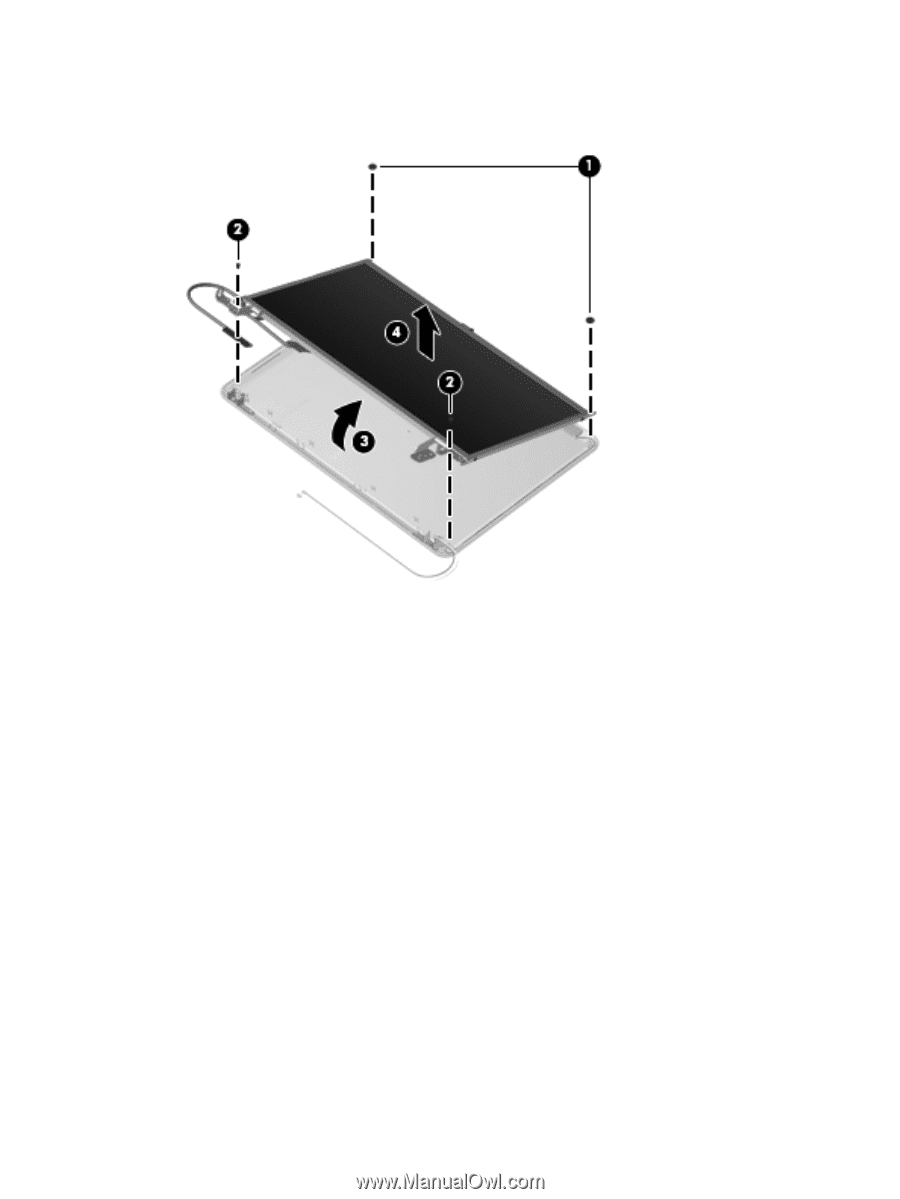
12. Lift up the bottom of the panel (3), and them remove the panel from the enclosure (4). The display panel is available using the spare part number 608019-001. 13. If it is necessary to replace the display cable, follow these steps: a. Turn the display panel upside down in front of you. b. Disengage the webcam cable from the glue securing it to the back of the display (1). c. Peel back the tape that secures the display cable to the display (2). d. Disconnect the display cable from the display (3). e. Remove the display cable from the display (4). 76 Chapter 4 Removal and replacement procedures
-
 1
1 -
2
-
3
-
4
-
5
-
6
-
7
-
8
-
9
-
10
-
11
-
12
-
13
-
14
-
15
-
16
-
17
-
18
-
19
-
20
-
21
-
22
-
23
-
24
-
25
-
26
-
27
-
28
-
29
-
30
-
31
-
32
-
33
-
34
-
35
-
36
-
37
-
38
-
39
-
40
-
41
-
42
-
43
-
44
-
45
-
46
-
47
-
48
-
49
-
50
-
51
-
52
-
53
-
54
-
55
-
56
-
57
-
58
-
59
-
60
-
61
-
62
-
63
-
64
-
65
-
66
-
67
-
68
-
69
-
70
-
71
-
72
-
73
-
74
-
75
-
76
-
77
-
78
-
79
-
80
-
 81
81 -
 82
82 -
 83
83 -
 84
84 -
 85
85 -
 86
86 -
 87
87 -
 88
88 -
 89
89 -
 90
90 -
 91
91 -
92
-
93
-
94
-
95
-
96
-
97
-
98
-
99
-
100
-
101
-
102
-
103
-
104
-
105
-
106
-
107
-
108
-
109
-
110
-
111
-
112
-
113
-
114
-
115
-
116
-
117
-
118
-
119
-
120
-
121
-
122
-
123
-
124
-
125
-
126
-
127
-
128
-
129
-
130
 |
 |
12.
Lift up the bottom of the panel
(3)
, and them remove the panel from the enclosure
(4)
. The display
panel is available using the spare part number 608019-001.
13.
If it is necessary to replace the display cable, follow these steps:
a.
Turn the display panel upside down in front of you.
b.
Disengage the webcam cable from the glue securing it to the back of the display
(1)
.
c.
Peel back the tape that secures the display cable to the display
(2)
.
d.
Disconnect the display cable from the display
(3)
.
e.
Remove the display cable from the display
(4)
.
76
Chapter 4
Removal and replacement procedures