HP Integrity Superdome 2 8/16 HP Smart Update Manager 5.0 User Guide - Page 28
Select components, View firmware mismatch details, Select devices, Failed Dependency, Con Now
 |
View all HP Integrity Superdome 2 8/16 manuals
Add to My Manuals
Save this manual to your list of manuals |
Page 28 highlights
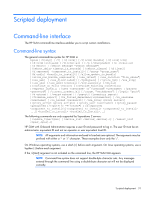
3. Check each component that you want to update on the selected target. If there is a dependency failure, click Failed Dependency to see potential solutions for the failed dependency. NOTE: If you select individual components from the Select Unbundled Components list on the Select Bundles screen, these selections are also applied to the Select Components screen. NOTE: If HP SUM shows no devices you can update, you might need to change the types of updates to use on the Edit Repository screen. For more information, see "Edit Repository (on page 20)." Select components This screen allows you to install individual smart components that are not contained in a bundle. You can choose the devices to update, and choose whether to activate the updates immediately, or wait until the next scheduled target maintenance. 1. In the Review/Install window, click Select Components for a target. The Select Components screen shows applicable components. 2. Select the components that you want to install. 3. Click Configure Now and then select Upload and Active to activate the update. To wait until the next scheduled maintenance to activate the update, select Upload and Do not Activate. 4. Check each component that you want to update on the selected target. If there is a dependency failure, click Failed Dependency to see potential solutions to the failed dependency. NOTE: If HP SUM shows no devices you can update, you might need to change the types of updates to use on the Edit Repository screen. For more information, see "Edit Repository (on page 20)." 5. Click OK. View firmware mismatch details If you have a multi-blade server, you might encounter an instance where the device bays are running different versions of component firmware. Before you can update the server, you need to first correct the mismatch. Use HP SUM to update the bays so that they are using the same firmware version. After you update the bay firmware, close HP SUM. To perform the remaining updates, reopen HP SUM. Select devices On the Select Devices screen, select the devices on the target that you want to update. You can also review any dependency problems that need to be resolved before HP SUM begins the update installation. To select devices: 1. To reach the Select Devices screen, click Select Devices on the Select Bundles or Select Components screen. 2. Select the checkbox for the device that you want to update. The Status field displays messages about the selected device. If you cannot update a device, the Status field displays a brief explanation. 3. View any errors or warnings displayed at the bottom of the screen. Correct errors before continuing. Warnings do not prevent the installation, but continuing an installation without correcting the problem HP SUM User Interface 28
-
 1
1 -
2
-
3
-
4
-
5
-
6
-
7
-
8
-
9
-
10
-
11
-
12
-
13
-
14
-
15
-
16
-
17
-
18
-
19
-
20
-
21
-
22
-
 23
23 -
 24
24 -
 25
25 -
 26
26 -
 27
27 -
 28
28 -
 29
29 -
 30
30 -
 31
31 -
 32
32 -
 33
33 -
34
-
35
-
36
-
37
-
38
-
39
-
40
-
41
-
42
-
43
-
44
-
45
-
46
-
47
-
48
-
49
-
50
-
51
-
52
-
53
-
54
-
55
-
56
-
57
-
58
-
59
-
60
-
61
-
62
-
63
-
64
-
65
-
66
-
67
-
68
-
69
-
70
-
71
-
72
-
73
-
74
-
75
-
76
-
77
-
78
-
79
-
80
-
81
-
82
 |
 |