HP LH4r HP Netserver LH 3 30/FC Installation Guide - Page 63
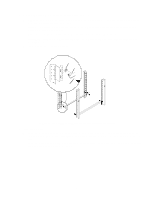
Secure the brackets to the posts with 10-32 x .625 machine screws see
 |
View all HP LH4r manuals
Add to My Manuals
Save this manual to your list of manuals |
Page 63 highlights
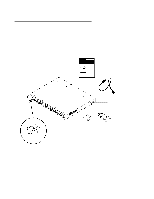
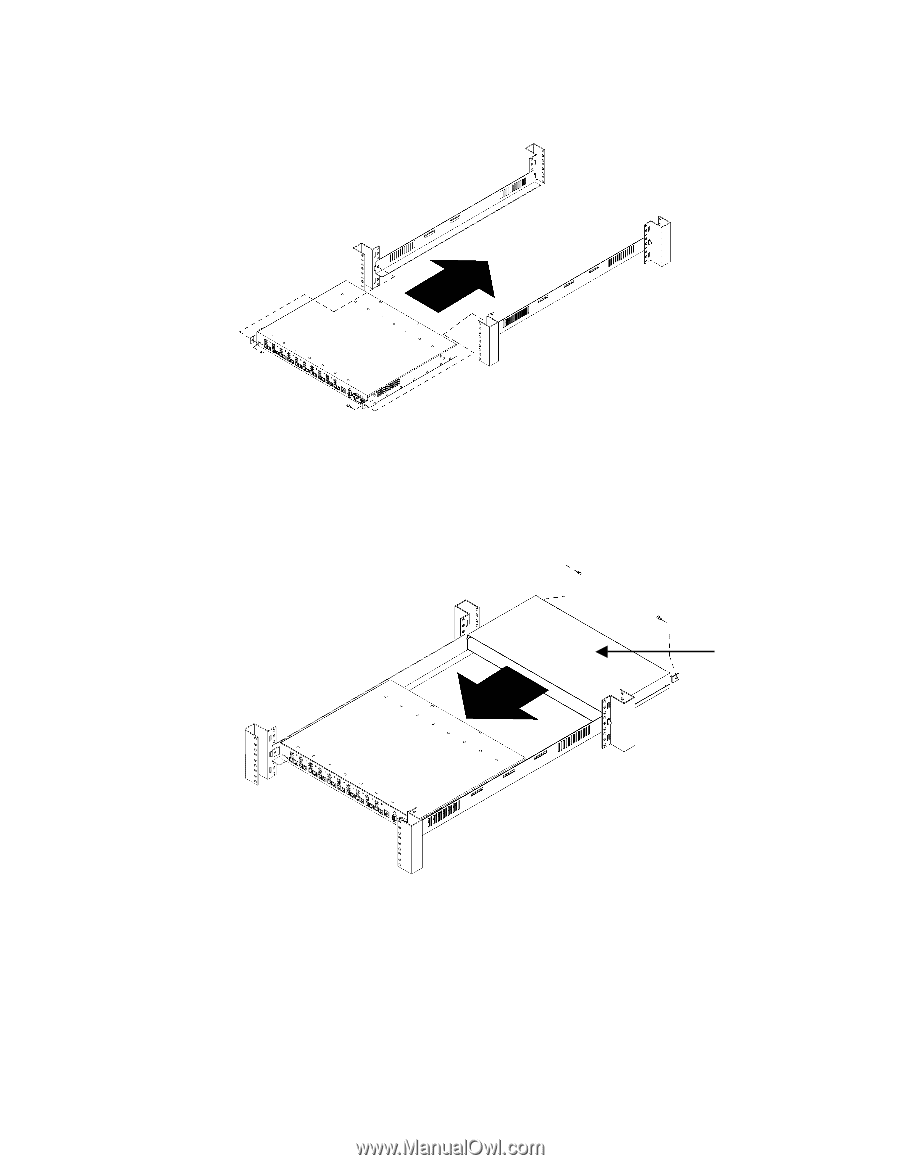
g. Set the HP FC-AL hub on the cabinet. Align the hole in each mounting ear bracket with the holes in the assembled rail, nut, and column, and insert a 10-32 x .625 machine screw. Securely tighten the screws (see figure 7). Figure 7. Installing the HP FC-AL hub into the cabinet h. The plenum shroud is a back cover that slides onto the HP FC-AL hub. Set the plenum shroud on the front side of the cabinet. Align the holes in the brackets with the holes in the assembled rails and outer posts. i. Secure the brackets to the posts with 10-32 x .625 machine screws (see figure 8). Plenum shroud Figure 8. Installing the plenum shroud j. Reinstall filler panels over the plenum shroud. 12
-
 1
1 -
2
-
3
-
4
-
5
-
6
-
7
-
8
-
9
-
10
-
11
-
12
-
13
-
14
-
15
-
16
-
17
-
18
-
19
-
20
-
21
-
22
-
23
-
24
-
25
-
26
-
27
-
28
-
29
-
30
-
31
-
32
-
33
-
34
-
35
-
36
-
37
-
38
-
39
-
40
-
41
-
42
-
43
-
44
-
45
-
46
-
47
-
48
-
49
-
50
-
51
-
52
-
53
-
54
-
55
-
56
-
57
-
 58
58 -
 59
59 -
 60
60 -
 61
61 -
 62
62 -
 63
63 -
 64
64 -
 65
65 -
 66
66 -
 67
67 -
 68
68 -
69
-
70
-
71
-
72
-
73
-
74
-
75
-
76
-
77
-
78
-
79
-
80
-
81
-
82
-
83
-
84
-
85
-
86
-
87
-
88
-
89
-
90
 |
 |
12
g.
Set the HP FC-AL hub on the cabinet. Align the hole in each mounting ear bracket with the holes in the assembled
rail, nut, and column, and insert a 10-32 x .625 machine screw. Securely tighten the screws (see figure 7).
Figure 7.
Installing the HP FC-AL hub into the cabinet
h.
The plenum shroud is a back cover that slides onto the HP FC-AL hub. Set the plenum shroud on the front side of
the cabinet. Align the holes in the brackets with the holes in the assembled rails and outer posts.
i.
Secure the brackets to the posts with 10-32 x .625 machine screws (see figure 8).
Figure 8.
Installing the plenum shroud
j.
Reinstall filler panels over the plenum shroud.
Plenum shroud