HP LH4r HP Netserver LH 3 30/FC Installation Guide - Page 68
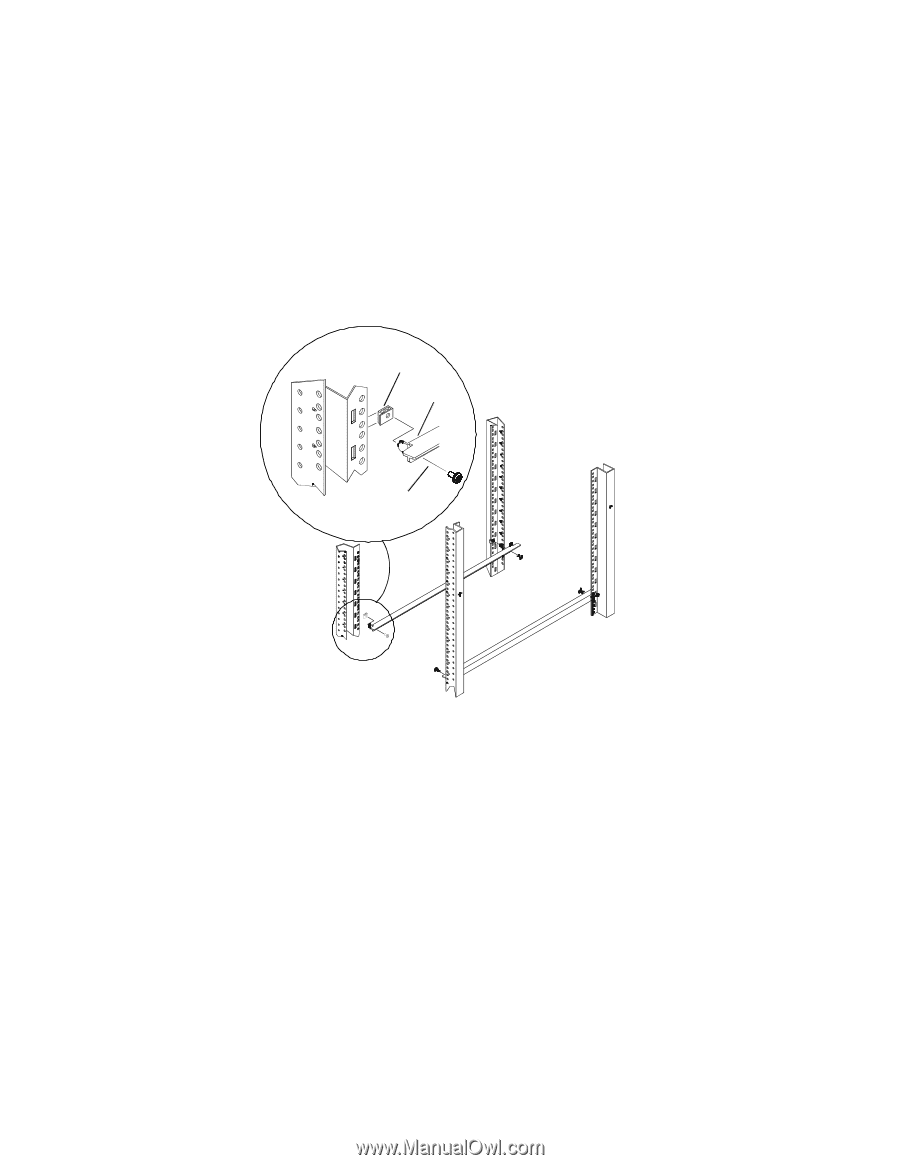
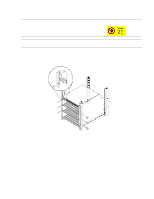
Install the clip nuts.
 |
View all HP LH4r manuals
Add to My Manuals
Save this manual to your list of manuals |
Page 68 highlights
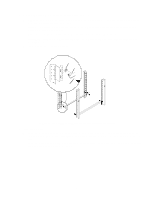
c. Attach the mounting rails to the cabinet as shown (see figure 11). - Determine the location in the cabinet where the disk array is to be mounted. The disk array should be mounted in the lowest position available in the cabinet. - Install two clip nuts (A in figure 11) over the two holes in the front and back cabinet columns at the height where the left rail is to be mounted. - Mount the left rail by inserting the tabs at the front and rear of the cabinet (B in figure 9). - Install the two screws (one on the front column and one on the rear column) to anchor the rail in the cabinet (C in figure 11). - Install the right rail in the same manner. A B C Figure 11. Installing mounting rails for the disk array into the cabinet d. Install the clip nuts. - Count up 14, 20, and 26 holes from the hole used to install the rail and slide clip nuts over these holes for the front retaining screws. Perform these steps for both sides of the front of the cabinet, installing a total of six clip nuts. - Count up five and six holes from the holes used to install the rear of the rails and install the clip nuts for the rear retaining screws on both sides of the cabinet. 17
-
 1
1 -
2
-
3
-
4
-
5
-
6
-
7
-
8
-
9
-
10
-
11
-
12
-
13
-
14
-
15
-
16
-
17
-
18
-
19
-
20
-
21
-
22
-
23
-
24
-
25
-
26
-
27
-
28
-
29
-
30
-
31
-
32
-
33
-
34
-
35
-
36
-
37
-
38
-
39
-
40
-
41
-
42
-
43
-
44
-
45
-
46
-
47
-
48
-
49
-
50
-
51
-
52
-
53
-
54
-
55
-
56
-
57
-
58
-
59
-
60
-
61
-
62
-
 63
63 -
 64
64 -
 65
65 -
 66
66 -
 67
67 -
 68
68 -
 69
69 -
 70
70 -
 71
71 -
 72
72 -
 73
73 -
74
-
75
-
76
-
77
-
78
-
79
-
80
-
81
-
82
-
83
-
84
-
85
-
86
-
87
-
88
-
89
-
90
 |
 |