HP OfficeJet Enterprise Color X555 Officejet Enterprise Color X555 - User Guid - Page 43
Print a stored job, Proof and Hold, Personal Job, Quick Copy, Stored Job, Custom, Use Job Name + 1-99
 |
View all HP OfficeJet Enterprise Color X555 manuals
Add to My Manuals
Save this manual to your list of manuals |
Page 43 highlights
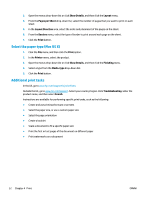
● Proof and Hold: Print and proof one copy of a job, and then print more copies. ● Personal Job: The job does not print until you request it at the product control panel. If you assign a personal identification number (PIN) to the job, you must provide the required PIN at the control panel. ● Quick Copy: Print the requested number of copies of a job and store a copy of the job in the product memory so you can print it again later. ● Stored Job: Store a job on the product and allow other users to print the job at any time. If you assign a personal identification number (PIN) to the job, the person who prints the job must provide the required PIN at the control panel. 5. To use a custom user name or job name, click the Custom button, and then enter the user name or the job name. Select which option to use if another stored job already has that name. ● Use Job Name + (1-99): Append a unique number to the end of the job name. ● Replace Existing File: Overwrite the existing stored job with the new one. 6. If you selected the Stored Job or Personal Job option in step 3, you can protect the job with a PIN. Type a 4-digit number in the Use PIN to Print field. When other people attempt to print this job, the product prompts them to enter this PIN number. 7. Click the Print button to process the job. Print a stored job Use the following procedure to print a job that is stored in the product memory. 1. From the Home screen on the product control panel, scroll to and touch the Retrieve from Device Memory button. 2. Select the name of the folder where the job is stored. 3. Select the name of the job. If the job is private or encrypted, enter the PIN or password. 4. Adjust the number of copies, and then touch the Start button to print the job. Delete a stored job When you send a stored job to the product memory, the product overwrites any previous jobs with the same user and job name. If a job is not already stored under the same user and job name, and the product needs additional space, the product might delete other stored jobs starting with the oldest. You can change the number of jobs that the product can store from the General Settings menu on the product control panel. Use this procedure to delete a job that is stored in the product memory. 1. From the Home screen on the product control panel, scroll to and touch the Retrieve from Device Memory button. 2. Select the name of the folder where the job is stored. 3. Select the name of the job, and then touch the Delete button. 4. If the job is private or encrypted, enter the PIN or the password, and then touch the Delete button. ENWW Store print jobs on the product to print later 35
-
 1
1 -
2
-
3
-
4
-
5
-
6
-
7
-
8
-
9
-
10
-
11
-
12
-
13
-
14
-
15
-
16
-
17
-
18
-
19
-
20
-
21
-
22
-
23
-
24
-
25
-
26
-
27
-
28
-
29
-
30
-
31
-
32
-
33
-
34
-
35
-
36
-
37
-
 38
38 -
 39
39 -
 40
40 -
 41
41 -
 42
42 -
 43
43 -
 44
44 -
 45
45 -
 46
46 -
 47
47 -
 48
48 -
49
-
50
-
51
-
52
-
53
-
54
-
55
-
56
-
57
-
58
-
59
-
60
-
61
-
62
-
63
-
64
-
65
-
66
-
67
-
68
-
69
-
70
-
71
-
72
-
73
-
74
-
75
-
76
-
77
-
78
-
79
-
80
-
81
-
82
-
83
-
84
-
85
-
86
-
87
-
88
-
89
-
90
-
91
-
92
-
93
-
94
-
95
-
96
-
97
-
98
-
99
-
100
-
101
-
102
 |
 |
