HP Pavilion 900 HP Pavilion Desktop PCs - (English, French, Spanish) Upgrading - Page 22
Removing the Preinstalled Hard, Drive
 |
View all HP Pavilion 900 manuals
Add to My Manuals
Save this manual to your list of manuals |
Page 22 highlights
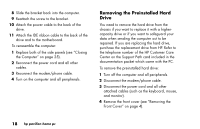
8 Slide the bracket back into the computer. 9 Reattach the screw to the bracket. 10 Attach the power cable to the back of the drive. 11 Attach the IDE ribbon cable to the back of the drive and to the motherboard. To reassemble the computer: 1 Replace both of the side panels (see "Closing the Computer" on page 25). 2 Reconnect the power cord and all other cables. 3 Reconnect the modem/phone cable. 4 Turn on the computer and all peripherals. Removing the Preinstalled Hard Drive You need to remove the hard drive from the chassis if you want to replace it with a highercapacity drive or if you want to safeguard your data when sending the computer out to be repaired. If you are replacing the hard drive, purchase the replacement drive from HP. Refer to the telephone number of the HP Customer Care Center on the Support Path card included in the documentation packet which came with the PC. To remove the preinstalled hard drive: 1 Turn off the computer and all peripherals. 2 Disconnect the modem/phone cable. 3 Disconnect the power cord and all other attached cables (such as the keyboard, mouse, and monitor). 4 Remove the front cover (see "Removing the Front Cover" on page 4). 18 hp pavilion home pc
-
 1
1 -
2
-
3
-
4
-
5
-
6
-
7
-
8
-
9
-
10
-
11
-
12
-
13
-
14
-
15
-
16
-
 17
17 -
 18
18 -
 19
19 -
 20
20 -
 21
21 -
 22
22 -
 23
23 -
 24
24 -
 25
25 -
 26
26 -
 27
27 -
28
-
29
-
30
-
31
-
32
-
33
-
34
-
35
-
36
-
37
-
38
-
39
-
40
-
41
-
42
-
43
-
44
-
45
-
46
-
47
-
48
-
49
-
50
-
51
-
52
-
53
-
54
-
55
-
56
-
57
-
58
-
59
-
60
-
61
-
62
-
63
-
64
-
65
-
66
-
67
-
68
-
69
-
70
-
71
-
72
-
73
-
74
-
75
-
76
-
77
-
78
-
79
-
80
-
81
-
82
-
83
-
84
-
85
-
86
-
87
-
88
-
89
-
90
-
91
-
92
-
93
-
94
-
95
-
96
-
97
-
98
-
99
-
100
-
101
-
102
-
103
-
104
-
105
-
106
-
107
-
108
-
109
-
110
-
111
-
112
-
113
-
114
-
115
-
116
-
117
-
118
-
119
-
120
-
121
-
122
-
123
-
124
-
125
-
126
-
127
-
128
-
129
-
130
-
131
-
132
-
133
-
134
-
135
-
136
-
137
-
138
-
139
-
140
-
141
-
142
-
143
-
144
-
145
-
146
-
147
-
148
-
149
-
150
 |
 |