HP Pavilion xh545 HP Pavilion Notebook N5400 and XH500 Series PC's - Reference - Page 75
Installing RAM Modules
 |
View all HP Pavilion xh545 manuals
Add to My Manuals
Save this manual to your list of manuals |
Page 75 highlights
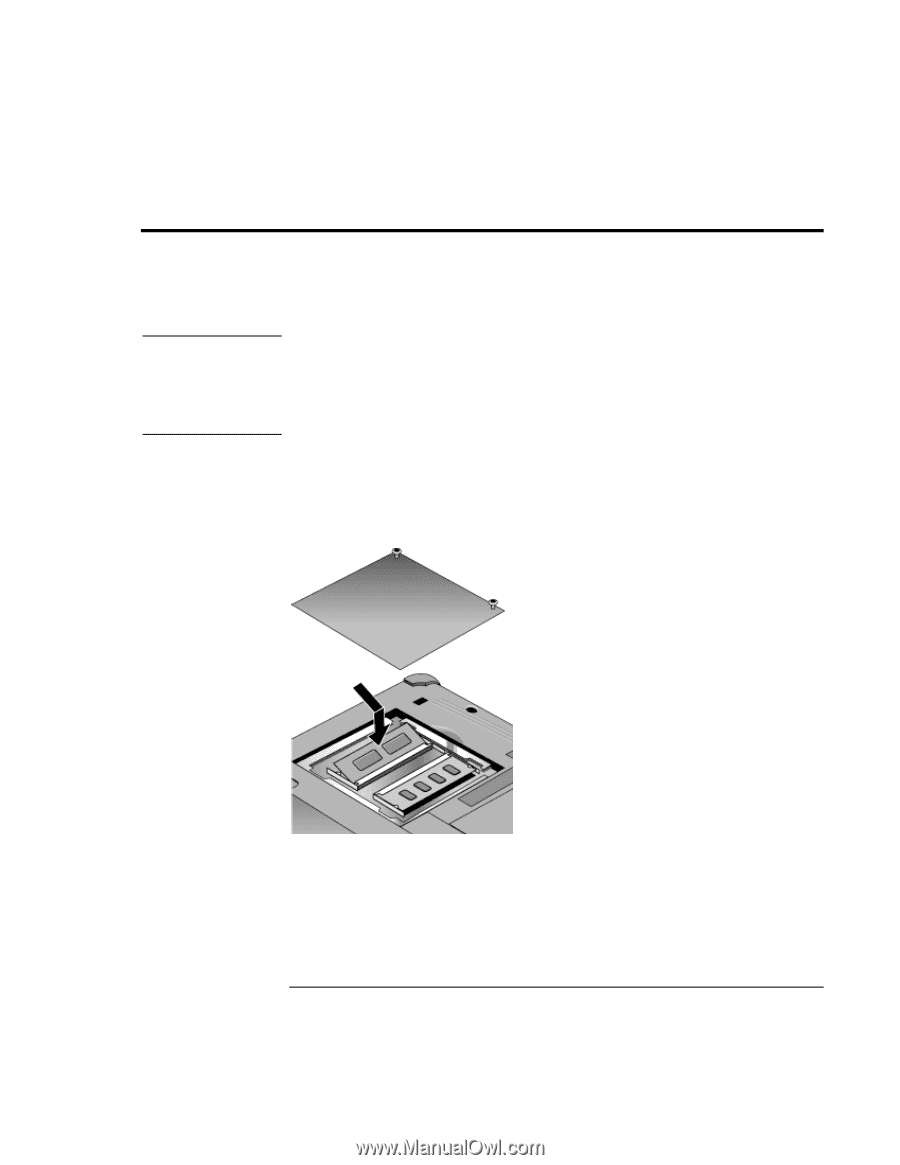
Configuring and Expanding Your Computer Installing RAM Modules Installing RAM Modules CAUTION The notebook provides an optional memory expansion slot for installing up to two RAM expansion modules. Use HP PC-133 or higher SDRAM modules only. Static electricity can permanently damage computer chips. Handle the RAM module only by its three non-connector edges. Otherwise, you may damage the module due to electrostatic discharge. Always discharge the static electricity from your body by touching the metal shielding around the connectors on the rear of the computer before touching or installing the memory module. You'll need a small Phillips screwdriver to complete this procedure. 1. Click Start, Turn Off Computer, Turn Off. 2. Important: unplug the AC adapter, if present, and remove the battery. 3. Remove the RAM expansion cover located on the bottom of the computer. 4. Insert the RAM expansion module into the connector at about a 30° angle until it's fully inserted. Then press down at both sides of the module until it latches. 5. Replace the RAM expansion module door. 6. Insert the battery. Reference Guide 75
-
 1
1 -
2
-
3
-
4
-
5
-
6
-
7
-
8
-
9
-
10
-
11
-
12
-
13
-
14
-
15
-
16
-
17
-
18
-
19
-
20
-
21
-
22
-
23
-
24
-
25
-
26
-
27
-
28
-
29
-
30
-
31
-
32
-
33
-
34
-
35
-
36
-
37
-
38
-
39
-
40
-
41
-
42
-
43
-
44
-
45
-
46
-
47
-
48
-
49
-
50
-
51
-
52
-
53
-
54
-
55
-
56
-
57
-
58
-
59
-
60
-
61
-
62
-
63
-
64
-
65
-
66
-
67
-
68
-
69
-
 70
70 -
 71
71 -
 72
72 -
 73
73 -
 74
74 -
 75
75 -
 76
76 -
 77
77 -
 78
78 -
 79
79 -
 80
80 -
81
-
82
-
83
-
84
-
85
-
86
-
87
-
88
-
89
-
90
-
91
-
92
-
93
-
94
-
95
-
96
-
97
-
98
-
99
-
100
-
101
-
102
-
103
-
104
-
105
-
106
-
107
-
108
-
109
-
110
-
111
-
112
-
113
-
114
-
115
-
116
-
117
-
118
-
119
-
120
-
121
-
122
-
123
-
124
-
125
-
126
-
127
-
128
-
129
-
130
-
131
-
132
-
133
-
134
-
135
-
136
-
137
-
138
-
139
-
140
-
141
 |
 |