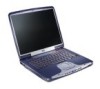
HP Pavilion zt1100 HP Pavilion Notebook PC ZE1000 Series - Reference Guide - Page 73
Replacing the Hard Disk Drive
 |
View all HP Pavilion zt1100 manuals
Add to My Manuals
Save this manual to your list of manuals |
Page 73 highlights
Add-On Devices Replacing the Hard Disk Drive Replacing the Hard Disk Drive To replace the hard disk drive You'll need a small (#0) Phillips screwdriver for this procedure. 1. Unplug the AC adapter, if present, and remove the notebook's battery. 2. Remove both hard drive retaining screws from the bottom of the notebook. Important 3. Pull the hard drive out of the notebook. 4. Carefully slide the new drive into the hard drive compartment. Press firmly to make sure its connector seats properly. 5. Reinstall the hard drive retaining screws. If you are installing a new hard disk drive, create a Utility partition on the drive before loading any software-see "To recover the factory installation of your hard disk" on page 100. Reference Guide 73
-
 1
1 -
2
-
3
-
4
-
5
-
6
-
7
-
8
-
9
-
10
-
11
-
12
-
13
-
14
-
15
-
16
-
17
-
18
-
19
-
20
-
21
-
22
-
23
-
24
-
25
-
26
-
27
-
28
-
29
-
30
-
31
-
32
-
33
-
34
-
35
-
36
-
37
-
38
-
39
-
40
-
41
-
42
-
43
-
44
-
45
-
46
-
47
-
48
-
49
-
50
-
51
-
52
-
53
-
54
-
55
-
56
-
57
-
58
-
59
-
60
-
61
-
62
-
63
-
64
-
65
-
66
-
67
-
 68
68 -
 69
69 -
 70
70 -
 71
71 -
 72
72 -
 73
73 -
 74
74 -
 75
75 -
 76
76 -
 77
77 -
 78
78 -
79
-
80
-
81
-
82
-
83
-
84
-
85
-
86
-
87
-
88
-
89
-
90
-
91
-
92
-
93
-
94
-
95
-
96
-
97
-
98
-
99
-
100
-
101
-
102
-
103
-
104
-
105
-
106
-
107
-
108
-
109
-
110
-
111
-
112
-
113
-
114
-
115
-
116
-
117
-
118
-
119
-
120
-
121
-
122
-
123
-
124
-
125
-
126
-
127
-
128
-
129
 |
 |

Add-On Devices
Replacing the Hard Disk Drive
Reference Guide
73
Replacing the Hard Disk Drive
To replace the hard disk drive
You’ll need a small (#0) Phillips screwdriver for this procedure.
1.
Unplug the AC adapter, if present, and remove the notebook’s battery.
2.
Remove both hard drive retaining screws from the bottom of the notebook.
3.
Pull the hard drive out of the notebook.
4.
Carefully slide the new drive into the hard drive compartment. Press firmly to make
sure its connector seats properly.
5. Reinstall the hard drive retaining screws.
Important
If you are installing a new hard disk drive, create a Utility partition on the drive before
loading any software—see “To recover the factory installation of your hard disk” on
page 100.