HP Pavilion zt1200 HP Pavilion Notebook PC zt1200 and xz300 Series - Reference - Page 92
Turn off the notebook: click Start, Turn Off Computer, Turn Off.
 |
View all HP Pavilion zt1200 manuals
Add to My Manuals
Save this manual to your list of manuals |
Page 92 highlights
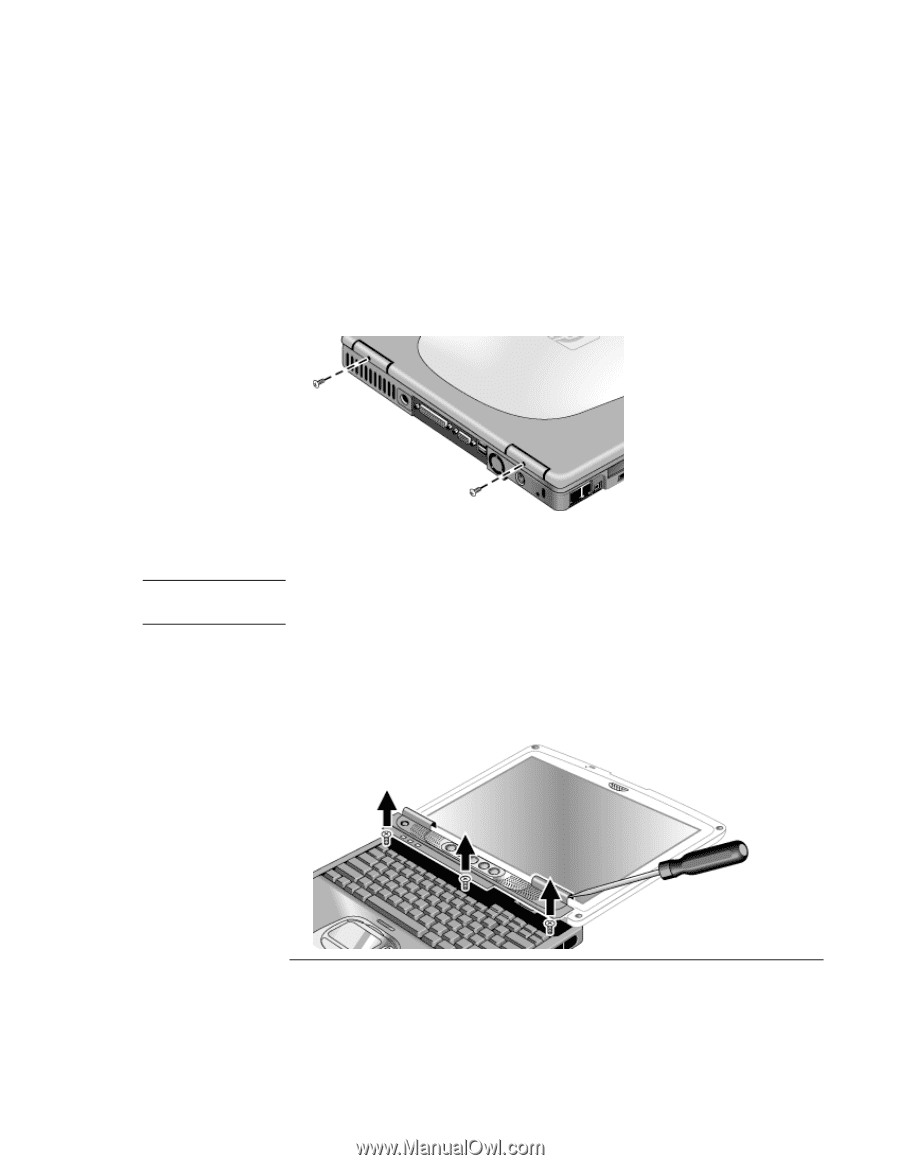
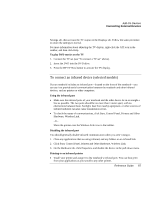
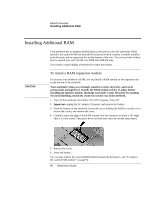
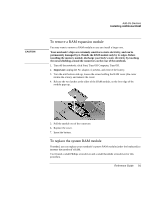
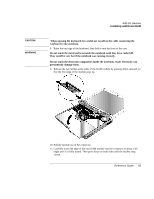
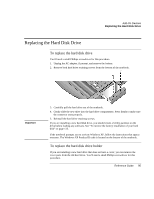
Add-On Devices Installing Additional RAM 1. Turn off the notebook: click Start, Turn Off Computer, Turn Off. 2. Important: unplug the AC adapter, if present, and remove the battery. 3. Open the display so that it lays flat. 4. Remove the screws from the back of the display hinge covers. CAUTION 5. Remove the plastic panel above the keyboard (containing the power button and OneTouch buttons). Use a small, flat-blade screwdriver to carefully pry up the right end of the panel above the Page Up key, then lift the end until the panel unsnaps. When removing the panel, be careful not to pull on the cable connecting the panel to the notebook. 6. Carefully lift the panel to unsnap the latches above the middle One-Touch button and the F1 key, then lift the panel an inch or so off of the notebook. 7. Loosen the three screws holding the top of the keyboard. (The keyboard retains the screws.) 92 Reference Guide
-
 1
1 -
2
-
3
-
4
-
5
-
6
-
7
-
8
-
9
-
10
-
11
-
12
-
13
-
14
-
15
-
16
-
17
-
18
-
19
-
20
-
21
-
22
-
23
-
24
-
25
-
26
-
27
-
28
-
29
-
30
-
31
-
32
-
33
-
34
-
35
-
36
-
37
-
38
-
39
-
40
-
41
-
42
-
43
-
44
-
45
-
46
-
47
-
48
-
49
-
50
-
51
-
52
-
53
-
54
-
55
-
56
-
57
-
58
-
59
-
60
-
61
-
62
-
63
-
64
-
65
-
66
-
67
-
68
-
69
-
70
-
71
-
72
-
73
-
74
-
75
-
76
-
77
-
78
-
79
-
80
-
81
-
82
-
83
-
84
-
85
-
86
-
 87
87 -
 88
88 -
 89
89 -
 90
90 -
 91
91 -
 92
92 -
 93
93 -
 94
94 -
 95
95 -
 96
96 -
 97
97 -
98
-
99
-
100
-
101
-
102
-
103
-
104
-
105
-
106
-
107
-
108
-
109
-
110
-
111
-
112
-
113
-
114
-
115
-
116
-
117
-
118
-
119
-
120
-
121
-
122
-
123
-
124
-
125
-
126
-
127
-
128
-
129
-
130
-
131
-
132
-
133
-
134
-
135
-
136
-
137
-
138
-
139
-
140
-
141
-
142
-
143
-
144
-
145
-
146
-
147
-
148
-
149
-
150
-
151
-
152
-
153
-
154
-
155
-
156
-
157
-
158
-
159
-
160
 |
 |