HP ProLiant DL380p Configuring Arrays on HP Smart Array Controllers Reference - Page 17
Typical manual configuration procedures
 |
View all HP ProLiant DL380p manuals
Add to My Manuals
Save this manual to your list of manuals |
Page 17 highlights
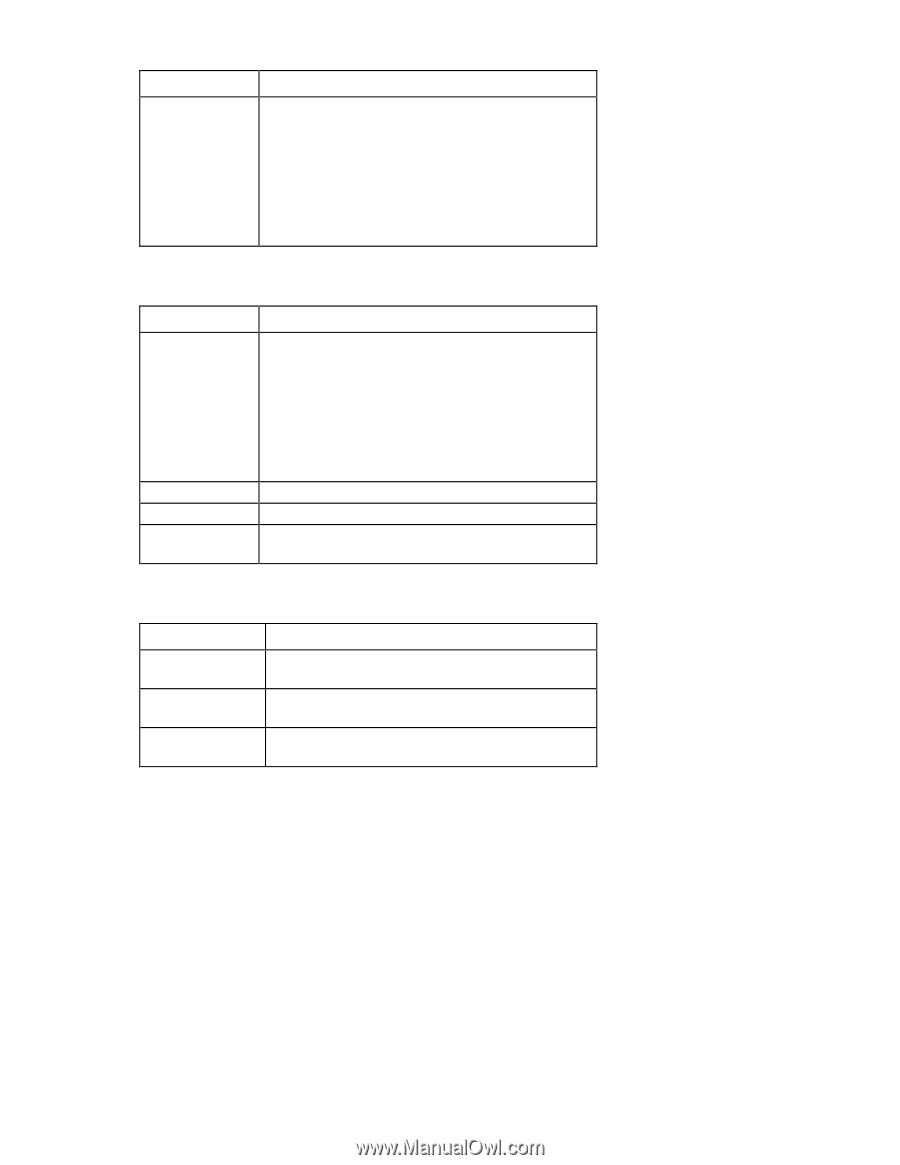
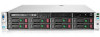
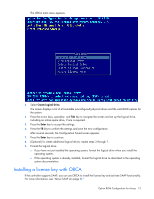
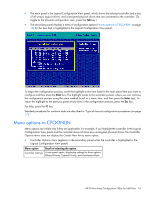
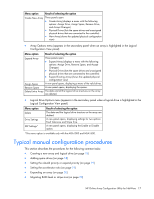
Menu option Result of selecting the option Create New Array Three panels open: • Create Array (displays a menu with the following options: Assign Drive, Assign Spare, Remove Drive, and Accept Changes) • Physical Drives (lists the spare drives and unassigned physical drives that are connected to the controller) • New Array (shows the updated physical configuration view) • Array Options menu (appears in the secondary panel when an array is highlighted in the Logical Configuration View panel) Menu option Result of selecting the option Expand Array Three panels open: • Expand Array (displays a menu with the following options: Assign Drive, Remove Spare, and Accept Changes) • Physical Drives (lists the spare drives and unassigned physical drives that are connected to the controller) • Expand Existing Array (shows the updated physical configuration view) Assign Spare A new panel opens, displaying a menu of the valid drives. Remove Spare A new panel opens, displaying the spares. Delete Entire Array The data and all the logical drive structures on the array are deleted. • Logical Drive Options menu (appears in the secondary panel when a logical drive is highlighted in the Logical Configuration View panel) Menu option Delete Drive Settings SSP Settings* Result of selecting the option The data and the logical drive structure on the array are deleted. A new panel opens, displaying settings for two options: Fault Tolerance and Stripe Size. A new panel opens, displaying the Enable or Disable option. *This menu option is available only with the MSA1000 and MSA1500. Typical manual configuration procedures This section describes the procedures for the following common tasks: • Creating a new array and logical drive (on page 18) • Adding spare drives (on page 18) • Setting the rebuild priority or expand priority (on page 19) • Setting the accelerator ratio (on page 19) • Expanding an array (on page 20) • Migrating RAID level or stripe size (on page 20) HP Online Array Configuration Utility for NetWare 17
-
 1
1 -
2
-
3
-
4
-
5
-
6
-
7
-
8
-
9
-
10
-
11
-
 12
12 -
 13
13 -
 14
14 -
 15
15 -
 16
16 -
 17
17 -
 18
18 -
 19
19 -
 20
20 -
 21
21 -
 22
22 -
23
-
24
-
25
-
26
-
27
-
28
-
29
-
30
-
31
-
32
-
33
-
34
-
35
-
36
-
37
-
38
-
39
-
40
-
41
-
42
-
43
-
44
-
45
-
46
-
47
-
48
-
49
-
50
-
51
-
52
-
53
-
54
-
55
-
56
-
57
-
58
-
59
-
60
-
61
-
62
-
63
-
64
-
65
-
66
-
67
-
68
-
69
-
70
-
71
-
72
-
73
-
74
-
75
-
76
-
77
-
78
-
79
-
80
-
81
-
82
-
83
-
84
-
85
-
86
-
87
-
88
-
89
-
90
-
91
-
92
-
93
-
94
-
95
-
96
-
97
-
98
-
99
-
100
-
101
-
102
-
103
-
104
-
105
-
106
-
107
-
108
-
109
-
110
-
111
-
112
-
113
-
114
-
115
-
116
-
117
-
118
-
119
-
120
-
121
-
122
-
123
-
124
-
125
-
126
-
127
-
128
 |
 |