HP ProLiant DL380p Configuring Arrays on HP Smart Array Controllers Reference - Page 23
Launching ACU during POST (Gen8 or later), Launching ACU from the SmartStart CD (G7 or earlier) - generation 8 gen8
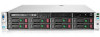 |
View all HP ProLiant DL380p manuals
Add to My Manuals
Save this manual to your list of manuals |
Page 23 highlights
3. At the main screen, select Perform Maintenance. 4. At the Maintenance screen, select Array Configuration Utility (ACU). The system launches the ACU GUI. Launching ACU during POST (Gen8 or later) 1. Boot the server. During POST, the system recognizes devices. 2. When the system recognizes a Smart Array controller, press F5. The system launches the ACU GUI. Launching ACU from the SmartStart CD (G7 or earlier) 1. Close all applications. 2. Insert the SmartStart CD into the CD-ROM drive. 3. Restart the server. The server boots from the CD, and then loads the SmartStart executable and drivers. 4. When prompted, select the language and agree to the license restrictions. 5. Click Maintain Server. 6. Click Array Configuration Utility. ACU opens, scans the local server, and detects controllers. This process can last up to 2 minutes. When controller detection is complete, the controllers are available on the Controller/Device menu. Launching ACU from an ISO image (all generations) To launch ACU, you can also boot from an ISO image. To prepare the image, use one of the following methods: • Mounting the image on a local drive (on page 23) • Mounting the image through iLO (on page 24) • Burning the image to a CD or DVD (on page 24) • Flashing the image to a USB memory key or SD card (on page 24) • Installing the image on a PXE server (on page 25) Booting from the ISO image on a drive, on a key, or through iLO provides the same GUI interface. The user can select to run Offline ACU GUI, ACU CLI, or ACU Scripting. Mounting the image on a local drive 1. Download the HP ProLiant Offline Array Configuration Utility ISO image from the HP website (http://h20000.www2.hp.com/bizsupport/TechSupport/SoftwareDescription.jsp?lang=en&cc=US &swItem=MTX-aad98a00c0d6469d8abf78e2f3&mode=4&idx=1). 2. Using ISO mounting software, mount the Offline ACU ISO image to a drive. 3. Set the server to boot the image. 4. Reboot the server. HP Array Configuration Utility 23
-
 1
1 -
2
-
3
-
4
-
5
-
6
-
7
-
8
-
9
-
10
-
11
-
12
-
13
-
14
-
15
-
16
-
17
-
 18
18 -
 19
19 -
 20
20 -
 21
21 -
 22
22 -
 23
23 -
 24
24 -
 25
25 -
 26
26 -
 27
27 -
 28
28 -
29
-
30
-
31
-
32
-
33
-
34
-
35
-
36
-
37
-
38
-
39
-
40
-
41
-
42
-
43
-
44
-
45
-
46
-
47
-
48
-
49
-
50
-
51
-
52
-
53
-
54
-
55
-
56
-
57
-
58
-
59
-
60
-
61
-
62
-
63
-
64
-
65
-
66
-
67
-
68
-
69
-
70
-
71
-
72
-
73
-
74
-
75
-
76
-
77
-
78
-
79
-
80
-
81
-
82
-
83
-
84
-
85
-
86
-
87
-
88
-
89
-
90
-
91
-
92
-
93
-
94
-
95
-
96
-
97
-
98
-
99
-
100
-
101
-
102
-
103
-
104
-
105
-
106
-
107
-
108
-
109
-
110
-
111
-
112
-
113
-
114
-
115
-
116
-
117
-
118
-
119
-
120
-
121
-
122
-
123
-
124
-
125
-
126
-
127
-
128
 |
 |
