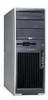
HP Xw4200 HP Workstations xw Series - Setup and Troubleshooting Guide
HP Xw4200 - Workstation - 1 GB RAM Manual
 |
UPC - 829160426853
View all HP Xw4200 manuals
Add to My Manuals
Save this manual to your list of manuals |
HP Xw4200 manual content summary:
- HP Xw4200 | HP Workstations xw Series - Setup and Troubleshooting Guide - Page 1
Setup and Troubleshooting HP xw4200, xw6200, xw8200, and xw9300 Workstations Part number: 361756-002 First edition: 02/2005 - HP Xw4200 | HP Workstations xw Series - Setup and Troubleshooting Guide - Page 2
information contained herein is subject to change without notice. Microsoft and Windows are U.S. registered trademarks of Microsoft Corporation. Linux is a accompanying such products and services. Nothing herein should be construed as constituting an additional warranty. HP shall not be liable for - HP Xw4200 | HP Workstations xw Series - Setup and Troubleshooting Guide - Page 3
- HP Xw4200 | HP Workstations xw Series - Setup and Troubleshooting Guide - Page 4
- HP Xw4200 | HP Workstations xw Series - Setup and Troubleshooting Guide - Page 5
System 27 Upgrading Device Drivers 28 After First-Boot 28 Hyper-Threading Technology 28 Turning off the Workstation 29 Upgrading the BIOS 29 Subscribing to Software Support 30 HP ProtectTools Embedded Security 30 4 Troubleshooting Self Troubleshooting 31 HP Troubleshooting Resources and - HP Xw4200 | HP Workstations xw Series - Setup and Troubleshooting Guide - Page 6
6 Contents - HP Xw4200 | HP Workstations xw Series - Setup and Troubleshooting Guide - Page 7
go/ subscriberschoice. The Product Bulletin contains QuickSpecs for HP workstations. QuickSpecs provide an overall specification review of your product. It includes information about its features including the operating system, power supply, memory, processor, and many other components of the system - HP Xw4200 | HP Workstations xw Series - Setup and Troubleshooting Guide - Page 8
the latest drivers for your system by visiting http://welcome.hp.com/country/us/en/ support.html. Determining the meaning of beep and LED codes. See "Diagnostic Lights and Audible (Beep) Codes" on page 30 for detailed information about beep and LED codes applicable to the workstation. Locating - HP Xw4200 | HP Workstations xw Series - Setup and Troubleshooting Guide - Page 9
Locating HP Resources 2. Type: X:\index.htm (where X is the drive letter designator for the CD-ROM drive) 3. Click OK. Linux-based Workstations If the workstation can download the image from www.hp.com/go/workstationsupport. 1. Click on your workstation model link then click the download drivers - HP Xw4200 | HP Workstations xw Series - Setup and Troubleshooting Guide - Page 10
10 Locating HP Resources - HP Xw4200 | HP Workstations xw Series - Setup and Troubleshooting Guide - Page 11
from the monitor and workstation to a power outlet. Figure 2-1 Cable Connections NOTE: Connect other components, such as a printer, according to the instructions included with the device.For more information on your workstation, refer to the Documentation and Diagnostics CD or visit www.hp.com/go - HP Xw4200 | HP Workstations xw Series - Setup and Troubleshooting Guide - Page 12
. Refer to the following notes and illustrations to properly position your system for maximum airflow • Place the computer in an area that is relatively cool with adequate ventilation. • Operate the computer on a sturdy, level surface. Leave a 10.2-cm (4-inch) clearance on all vented sides of the - HP Xw4200 | HP Workstations xw Series - Setup and Troubleshooting Guide - Page 13
13 14 Figure 2-3 xw4200 Front Panel Components Table 2-2 xw4200 Front Panel Components Item Description Item Description 1 Optical Drive* 8 Power On Light 2 Optical Drive Activity Lights 9 Power Button 3 5.25 Inch Drive Bays 10 Hard Drive Activity Light 4 Diskette Drive (optional) 11 - HP Xw4200 | HP Workstations xw Series - Setup and Troubleshooting Guide - Page 14
Item Description 1 Optical Drive* 7 Power Button 2 Optical Drive Activity Lights 8 Hard Drive Activity Light 3 5.25 Inch Drive Bays 9 USB Ports (2) 4 Diskette Drive (optional) 10 Headphone Connector 5 Optical Drive Eject Button 11 Microphone Connector 6 Power On Light 12 IEEE - HP Xw4200 | HP Workstations xw Series - Setup and Troubleshooting Guide - Page 15
Light 11 IEEE-1394a Connector 6 Power Button NOTE: * An optical drive is a CD-ROM, CD-R/RW, DVD-ROM, DVD+R/RW, or CD-RW/DVD combo drive. NOTE: **The lowest 5.25 inch bay on the xw9300 only supports an optional 3.5 floppy diskette drive or a hard drive. Hardware Setup Front Panel Components 15 - HP Xw4200 | HP Workstations xw Series - Setup and Troubleshooting Guide - Page 16
Table 2-5 xw4200 Rear Panel Components Item Description Item Description 1 Power Cord Connector 8 Universal Chassis Clamp Opening 2 Keyboard Connector (purple) 9 Mouse Connector (green) 3 Serial Connector (teal) 10 Parallel Connector (burgundy) 4 USB Ports (6) 11 Audio Line-In - HP Xw4200 | HP Workstations xw Series - Setup and Troubleshooting Guide - Page 17
Connector (burgundy 3 USB Ports (6) 11 RJ-45 Network Connector 4 Microphone Connector (pink) 12 Audio Line-In Connector (light blue) 5 Audio Line-Out Connector (lime) 13 Graphics Adapter (blue) 6 Power Cord Connector 14 Cable Lock Slot 7 Universal Chassis Clamp Opening 15 Mouse Connector - HP Xw4200 | HP Workstations xw Series - Setup and Troubleshooting Guide - Page 18
Components Table 2-7 xw8200 Rear Panel Components Item Description Item Description 1 Power Cord Connector 9 Access Panel Key 2 Keyboard Connector 10 Padlock Loop Audio Line-Out Connector (lime) 15 Audio Line-In Connector (light blue) 8 Universal Chassis Clamp Opening 16 Graphics Adapter - HP Xw4200 | HP Workstations xw Series - Setup and Troubleshooting Guide - Page 19
Panel Components Table 2-8 xw9300 Rear Panel Components Item Description Item Description 1 Power Cord Connector 9 Access Panel Key 2 Serial Connector (teal) 10 Connector (pink) 14 Audio Line-In Connector (light blue) 7 Audio Line-Out Connector (lime) 15 Graphics Adapter (blue) 8 - HP Xw4200 | HP Workstations xw Series - Setup and Troubleshooting Guide - Page 20
Delete, End, and Page Down. 3 Status Lights Indicate the status of the workstation and keyboard settings (Num Lock, Caps Lock, and Scroll Lock). 4 Numeric in other software applications. 7 Windows® Logo Keys* Used to open the Start menu in Microsoft Windows. Used in combination with other keys - HP Xw4200 | HP Workstations xw Series - Setup and Troubleshooting Guide - Page 21
Windows Logo Key + e Launches My Computer Windows Logo Key + f Launches Find Document Windows Logo Key + Ctrl + f Launches Find Computer Windows Logo Key + F1 Launches Windows Help Windows Logo Key + l Locks the computer connected to your workstation through a KVM (keyboard, video, mouse) - HP Xw4200 | HP Workstations xw Series - Setup and Troubleshooting Guide - Page 22
Serial Number and COA Label Location Figure 2-11 Each workstation has two unique serial number labels 1 and a certificate of authentication (COA) label 2 (for Windows-preinstalled systems only). In general, the serial number labels can be found on the top panel or on the side of the unit and at - HP Xw4200 | HP Workstations xw Series - Setup and Troubleshooting Guide - Page 23
. Installing and Customizing Windows XP Workstations If your unit is a Windows-preinstalled workstation, follow the instructions in this section to requested. If the wrong OS is accidently unbundled during the initial boot, technical support will have to be contacted to get a "key" to unlock it and - HP Xw4200 | HP Workstations xw Series - Setup and Troubleshooting Guide - Page 24
Linux-based workstations. For those workstations supporting Energy Star and have it enabled, the power management features will be set as follows: • Monitor-goes into Standby mode after 20 minutes of inactivity. • System-goes into Standby mode after 20 minutes of inactivity. • Hard Drive-goes into - HP Xw4200 | HP Workstations xw Series - Setup and Troubleshooting Guide - Page 25
Guide web link located on the Documentation and Diagnostics CD (www.hp.com/support/workstation_manuals). Accessibility HP is committed to designing products, services, and programs with improved usability and accessibility for all customers. HP products with Microsoft Windows XP preinstalled - HP Xw4200 | HP Workstations xw Series - Setup and Troubleshooting Guide - Page 26
HP Driver CD to get any new enhancements. Downloading the Latest HP Driver CD To download the latest HP Driver CD: 1. Download the ISO image to a local hard drive from the HP support website for the appropriate workstation platform (such as www.hp.com/support/xw4200). a. Click the download drivers - HP Xw4200 | HP Workstations xw Series - Setup and Troubleshooting Guide - Page 27
. 2. Follow the instructions for Starting up the Linux Operating System in the previous section. NOTE: For additional information concerning the setup of Linux-preinstalled or Linux-enabled workstations, refer to the HP User Manual for Linux, located at www.hp.com/support/linux_user_manual. For - HP Xw4200 | HP Workstations xw Series - Setup and Troubleshooting Guide - Page 28
have the latest system BIOS loaded by visiting http://welcome.hp.com/country/us/en/ support.html. See Upgrading the BIOS later in this chapter for more details. • Verify you have the latest drivers for your system by visiting http://welcome.hp.com/country/us/en/ support.html. • Review the Preface of - HP Xw4200 | HP Workstations xw Series - Setup and Troubleshooting Guide - Page 29
the power button to work in On/Off mode, run Computer Setup (F10). Refer to the Service and Technical Reference Guide web link located on the Documentation and Diagnostics CD (www.hp.com/support/workstation_manuals) for more information about using Computer Setup. Upgrading the BIOS After - HP Xw4200 | HP Workstations xw Series - Setup and Troubleshooting Guide - Page 30
com/support/files/workstations/us/purchase.html HP ProtectTools Embedded Security The HP ProtectTools Embedded Security solution includes the following key components: • ProtectTools Embedded Security - a hardware module, known as the Trusted Platform Module (TPM), that is integrated in the computer - HP Xw4200 | HP Workstations xw Series - Setup and Troubleshooting Guide - Page 31
CD. HP Troubleshooting Resources and Tools HP Help and Support Center The HP Help and Support Center is a customized HP user interface that enhances the Windows XP Help and Support Center Help feature. This customized utility allows you to access specific information about your HP workstation such - HP Xw4200 | HP Workstations xw Series - Setup and Troubleshooting Guide - Page 32
and best performance. HP Performance Tuning Framework will guide your system setup allowing a "custom" configuration that best matches the workstation to user requirements. This customization ensures availability of the latest graphics cards and drivers and removes some memory restraints. The - HP Xw4200 | HP Workstations xw Series - Setup and Troubleshooting Guide - Page 33
controls of the monitor if the monitor is dim. • If your workstation has multiple video power button to start the workstation. • Reconfigure your workstation after installing a non-plug and play expansion board or other option. See Hardware Installation Problems for instructions. HP Troubleshooting - HP Xw4200 | HP Workstations xw Series - Setup and Troubleshooting Guide - Page 34
in the Service and Technical Reference Guide for your workstation. The Service and Technical Reference Guide is available as a Web link located on the Documentation and Diagnostics CD (www.hp.com/support/workstation_manuals). Basic Troubleshooting This section concentrates on problems that you - HP Xw4200 | HP Workstations xw Series - Setup and Troubleshooting Guide - Page 35
and time using need to be replaced. Computer Setup (F10). If the problem persists, replace the RTC battery. See NOTE: Connecting the workstation to the Service and Technical Reference a live AC outlet prolongs the life of the Guide for instructions on installing a RTC battery. new battery - HP Xw4200 | HP Workstations xw Series - Setup and Troubleshooting Guide - Page 36
front of the workstation are not blinking. System unable to power on. Press and hold the power button for less than 4 seconds. If the hard drive LED turns green, then: 1. Remove the expansion cards one at a time and try holding the power button again for less than 4 seconds. 2. Replace the system - HP Xw4200 | HP Workstations xw Series - Setup and Troubleshooting Guide - Page 37
to isolate faulty module. 3. Replace third-party memory with HP memory. 4. Replace the system board. Power LED blinks Red six times, Video card is not seated properly For systems with a graphics card: once every second, followed by a two second pause, and the workstation beeps six times. or is - HP Xw4200 | HP Workstations xw Series - Setup and Troubleshooting Guide - Page 38
-Test (POST). Table 4-13 Diagnostic Lights and Audible Codes Activity Beeps Possible Cause Recommended Action Green Power LED On. None Workstation on. None Green Power LED blinks every None two seconds.** Workstation in Suspend to RAM None mode (select models only) or normal Suspend mode - HP Xw4200 | HP Workstations xw Series - Setup and Troubleshooting Guide - Page 39
a time to isolate faulty module. 3. Replace third-party memory with HP memory. 4. Replace the system board. Pre-video graphics error. For systems with a graphics card: 1. Reseat the graphics card. Power on the system. 2. Replace the graphics card. 3. Replace the system board. System board failure - HP Xw4200 | HP Workstations xw Series - Setup and Troubleshooting Guide - Page 40
and Diagnostics CD www.hp.com/support/ workstation_manuals 2. Replace the system board. System powers on but does not boot. System unable to power on. Press and hold the power button for less than 4 seconds. If the hard drive LED turns green, then: 1. Remove the expansion cards one at a time and - HP Xw4200 | HP Workstations xw Series - Setup and Troubleshooting Guide - Page 41
. • Be prepared to spend the time necessary troubleshooting the problem with the service technician. NOTE: When calling in for service or support, you may be asked for the Product Number (example: P8814A) of your workstation. If your workstation has a Product Number, it is generally located next - HP Xw4200 | HP Workstations xw Series - Setup and Troubleshooting Guide - Page 42
34 Troubleshooting - HP Xw4200 | HP Workstations xw Series - Setup and Troubleshooting Guide - Page 43
a padlock. • access panel lock-on some workstations, the access panel comes with a keylock to prevent guide or refer to the Service and Technical Reference Guide web link located on the Documentation and Diagnostics CD (www.hp.com/support/workstation_manuals). Chassis Conversion Features The xw4200 - HP Xw4200 | HP Workstations xw Series - Setup and Troubleshooting Guide - Page 44
of these options include: • graphics cards • memory • diskette drives • optical drives • hard drives • processors • audio cards Visit www.hp.com/workstations/pws/options for more information on available workstation options. HP also tests certain options that are available from supported third-party - HP Xw4200 | HP Workstations xw Series - Setup and Troubleshooting Guide - Page 45
16, 17, 18, 19 serial number location 22 software restoring Linux 26 Windows 24 T technical support 41 troubleshooting audible codes 38 basic 34 e-support 32 general problems 34 helpful hints 33 HP Help and Support Center 31 HP Insight Diagnostics 31 self 31 turning off the workstation 29 Index 45 - HP Xw4200 | HP Workstations xw Series - Setup and Troubleshooting Guide - Page 46
U universal chassis clamp description 43 opening location 16, 17, 18, 19 USB ports front panel location 13, 14, 15 rear panel location 16, 17, 18, 19 W Windows operating system additional information 23 language selection 23 preinstalled 23 restoring 24 46 Index
-
 1
1 -
 2
2 -
 3
3 -
 4
4 -
 5
5 -
 6
6 -
 7
7 -
8
-
9
-
10
-
11
-
12
-
13
-
14
-
15
-
16
-
17
-
18
-
19
-
20
-
21
-
22
-
23
-
24
-
25
-
26
-
27
-
28
-
29
-
30
-
31
-
32
-
33
-
34
-
35
-
36
-
37
-
38
-
39
-
40
-
41
-
42
-
43
-
44
-
45
-
46
 |
 |

Setup and Troubleshooting
HP xw4200, xw6200, xw8200, and xw9300
Workstations
Part number:
361756-002
First edition: 02/2005