HP rp8420 Installation Guide, Fifth Edition - HP 9000 rp8420 Server - Page 37
Side Cushion Removal from Server, Step 12.
 |
View all HP rp8420 manuals
Add to My Manuals
Save this manual to your list of manuals |
Page 37 highlights
Installation Wheel Kit Installation Step 12. Remove the two side cushions from the server and unfold the cardboard tray so that it lays flat on the pallet. Figure 2-11Side Cushion Removal from Server Side Cushion Ramp Step 13. Carefully roll the server off the pallet and down the ramp. Step 14. Obtain the caster covers from the wheel kit. Note that the caster covers are designed to fit on either side of the server NOTE It may be necessary to loosen or remove the mounted side covers to install the supplied caster covers. If removal is required, see Figure 2-16 on page 42 for details. Chapter 2 37
-
 1
1 -
2
-
3
-
4
-
5
-
6
-
7
-
8
-
9
-
10
-
11
-
12
-
13
-
14
-
15
-
16
-
17
-
18
-
19
-
20
-
21
-
22
-
23
-
24
-
25
-
26
-
27
-
28
-
29
-
30
-
31
-
 32
32 -
 33
33 -
 34
34 -
 35
35 -
 36
36 -
 37
37 -
 38
38 -
 39
39 -
 40
40 -
 41
41 -
 42
42 -
43
-
44
-
45
-
46
-
47
-
48
-
49
-
50
-
51
-
52
-
53
-
54
-
55
-
56
-
57
-
58
-
59
-
60
-
61
-
62
-
63
-
64
-
65
-
66
-
67
-
68
-
69
-
70
-
71
-
72
-
73
-
74
-
75
-
76
-
77
-
78
-
79
-
80
 |
 |

Chapter 2
Installation
Wheel Kit Installation
37
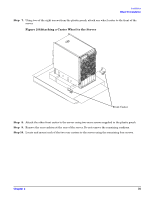
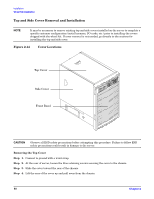
Step 12.
Remove the two side cushions from the server and unfold the cardboard tray so that it lays flat on
the pallet.
Figure 2-11Side Cushion Removal from Server
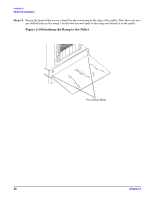
Step 13.
Carefully roll the server off the pallet and down the ramp.
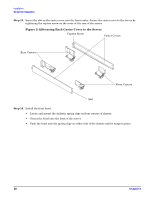
Step 14.
Obtain the caster covers from the wheel kit. Note that the caster covers are designed to fit on either
side of the server
NOTE
It may be necessary to loosen or remove the mounted side covers to install the
supplied caster covers. If removal is required, see Figure 2-16 on page 42 for details.
Side Cushion
Ramp