HP wp110 HP Wireless Print Server wp110 - (English) Configuration Guide - Page 9
configuring the print server for Windows - print server driver
 |
View all HP wp110 manuals
Add to My Manuals
Save this manual to your list of manuals |
Page 9 highlights
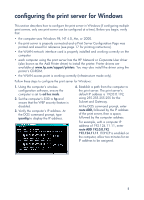
configuring the print server for Windows This section describes how to configure the print server in Windows (if configuring multiple print servers, only one print server can be configured at a time). Before you begin, verify that: • the computer uses Windows 98, NT 4.0, Me, or 2000. • the print server is properly connected and a Print Server Configuration Page was printed and saved for reference (see page 17 for printing instructions). • the WLAN network interface card is properly installed and working correctly on the computer. • each computer using the print server has the HP Network or Corporate User driver (also known as the Add Printer driver) to install the printer. Printer drivers are available at www.hp.com/support/printers. You may also install the driver using the printer's CD-ROM. • the WLAN access point is working correctly (infrastructure mode only). Follow these steps to configure the print server for Windows: 1. Using the computer's wireless configuration software, ensure the computer is set to ad hoc mode. 2. Set the computer's SSID to hp and ensure that the WEP security feature is disabled. 3. Verify the computer's IP address. At the DOS command prompt, type ipconfig to display the IP address. 4. Establish a path from the computer to the print server. The print server's default IP address is 192.0.0.192, using 255.255.255.255 for the Subnet and Gateway. At the DOS command prompt, enter route ADD, followed by the IP address of the print server, then a space, followed by the computer address. For example, with a computer IP address of 192.124.11.11, enter route ADD 192.0.0.192 192.124.11.11. If DHCP is enabled on the computer, allow two minutes for an IP address to be assigned. 5
-
 1
1 -
2
-
3
-
 4
4 -
 5
5 -
 6
6 -
 7
7 -
 8
8 -
 9
9 -
 10
10 -
 11
11 -
 12
12 -
 13
13 -
 14
14 -
15
-
16
-
17
-
18
-
19
-
20
-
21
-
22
-
23
-
24
-
25
-
26
-
27
-
28
-
29
-
30
-
31
-
32
-
33
-
34
-
35
 |
 |
