HP xp7030 User Guide - Page 15
Connecting power
 |
View all HP xp7030 manuals
Add to My Manuals
Save this manual to your list of manuals |
Page 15 highlights
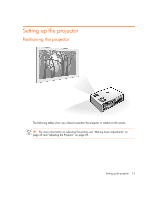
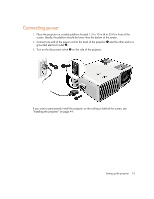
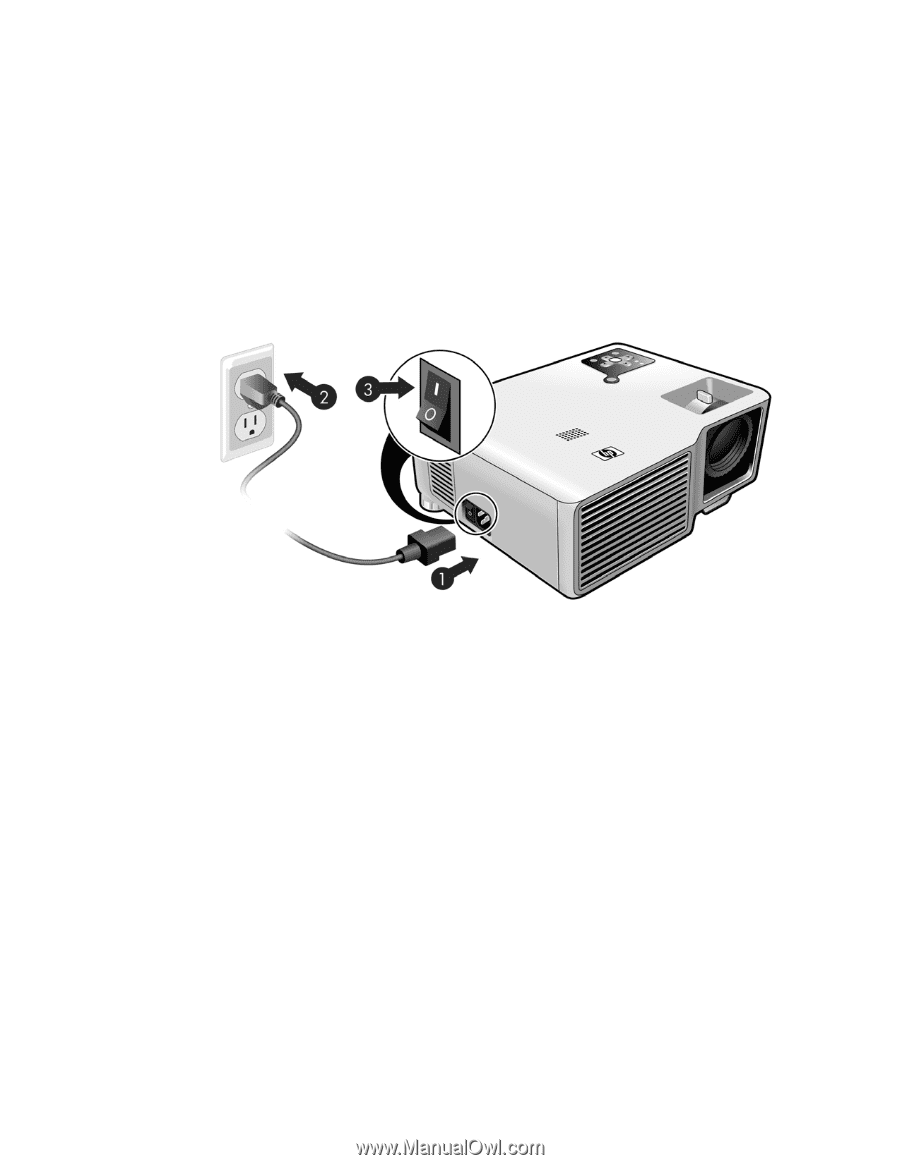
Connecting power 1. Place the projector on a stable platform located 1.2 to 10 m (4 to 33 ft) in front of the screen. Ideally, the platform should be lower than the bottom of the screen. 2. Connect one end of the power cord to the back of the projector 1 and the other end to a grounded electrical outlet 2. 3. Turn on the disconnect switch 3 on the side of the projector. If you want to permanently install the projector on the ceiling or behind the screen, see "Installing the projector" on page 44. Setting up the projector 15
-
 1
1 -
2
-
3
-
4
-
5
-
6
-
7
-
8
-
9
-
 10
10 -
 11
11 -
 12
12 -
 13
13 -
 14
14 -
 15
15 -
 16
16 -
 17
17 -
 18
18 -
 19
19 -
 20
20 -
21
-
22
-
23
-
24
-
25
-
26
-
27
-
28
-
29
-
30
-
31
-
32
-
33
-
34
-
35
-
36
-
37
-
38
-
39
-
40
-
41
-
42
-
43
-
44
-
45
-
46
-
47
-
48
-
49
-
50
-
51
-
52
-
53
-
54
-
55
-
56
-
57
-
58
-
59
-
60
-
61
-
62
-
63
-
64
-
65
-
66
-
67
-
68
-
69
-
70
-
71
-
72
 |
 |
Setting up the projector
15
Connecting power
1.
Place the projector on a stable platform located 1.2 to 10 m (4 to 33 ft) in front of the
screen. Ideally, the platform should be lower than the bottom of the screen.
2.
Connect one end of the power cord to the back of the projector
1
and the other end to a
grounded electrical outlet
2
.
3.
Turn on the disconnect switch
3
on the side of the projector.
If you want to permanently install the projector on the ceiling or behind the screen, see
“Installing the projector” on page 44.